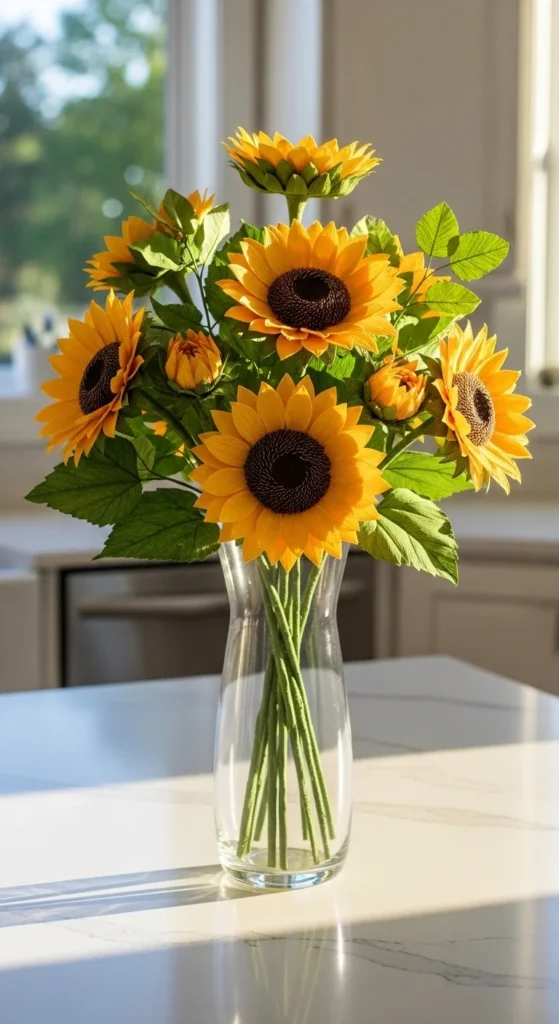
Paper sunflowers are the happiest kind of DIY. They’re bold, bright, and they instantly make a room feel warmer—without watering, wilting, or cleanup. The secret to a sunflower that looks “wow” is simple: layered petals + a textured center + a little curling. You can make small bouquet flowers, big wall blooms, or party backdrops, all with the same basic build.
This tutorial keeps things easy and realistic. You’ll learn a clean way to stack petals, create a seed center with texture, and finish with a sturdy stem and leaves that look natural.
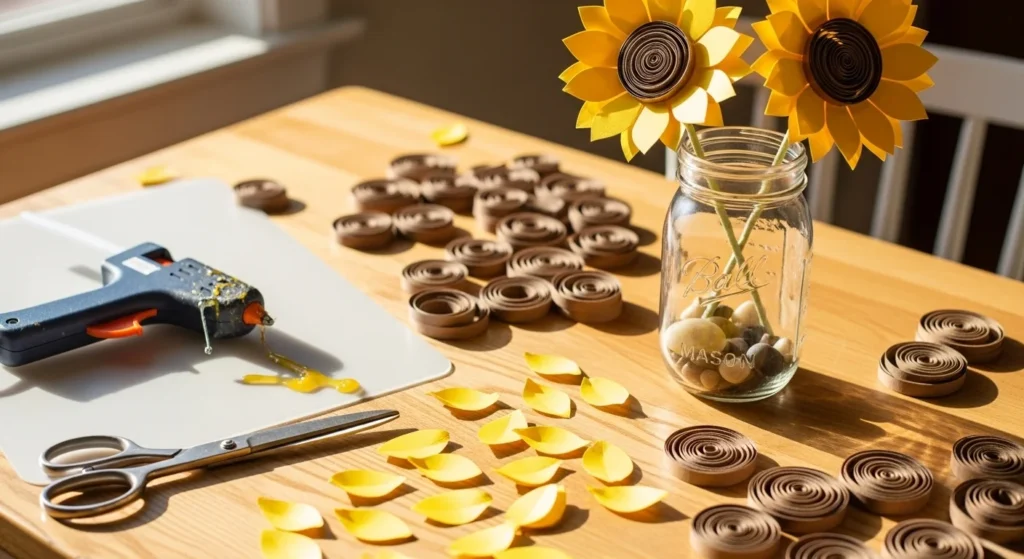
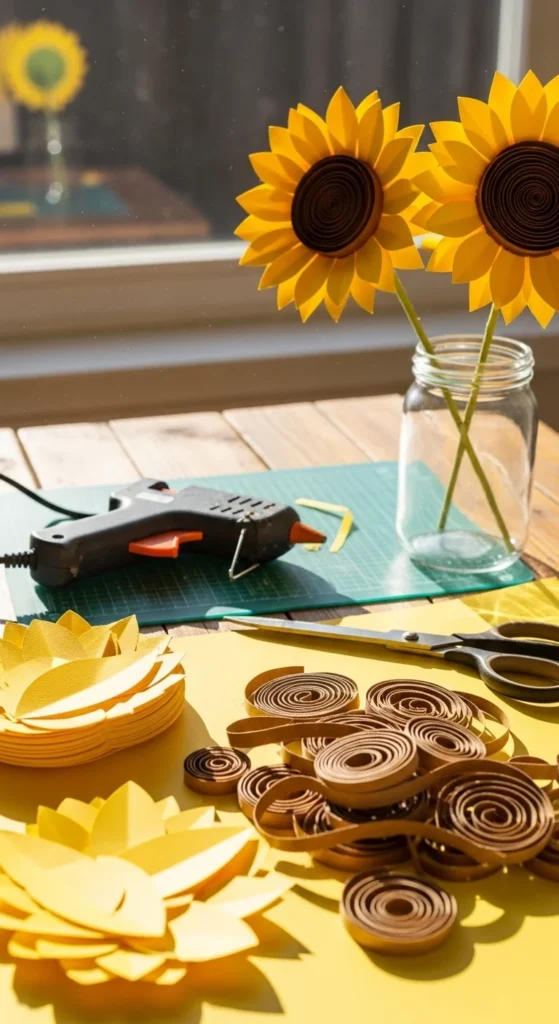
Supplies (Pick What You Have)
You can make these with basic materials. Choose one style and go.
Paper options
- Cardstock (best for crisp petals and bold color)
- Crepe paper (best for soft, lifelike shaping)
- Tissue paper (great for quick, lightweight blooms)
Tools
- Scissors (or a craft cutter if you use templates)
- Hot glue gun or craft glue
- Pencil (for tracing templates)
- Marker, paintbrush handle, or wooden dowel (for curling)
For centers + stems
- Brown and black paper (or dark brown + tan for a softer center)
- Floral wire or bamboo skewers (stems)
- Green floral tape (or green paper strips)
- Green cardstock (leaves)
- Optional: foam circle or thick cardboard circle (for sturdier big flowers)
Budget tip: Bamboo skewers work perfectly as stems and are easy to wrap with green paper.
Step 1: Cut Your Petals in 3 Sizes (So It Looks Full)
Sunflowers look best when petals graduate from small to large. That’s what gives the bloom depth.
Easy petal plan (one medium sunflower)
- 12 small petals
- 18 medium petals
- 24 large petals
Petal shape: long oval with a soft point at the end.
Color trick for “pop”
- Use slightly darker yellow for the outer layer
- Use brighter yellow for the inner layers
This subtle shift makes the flower look more dimensional, even in photos.
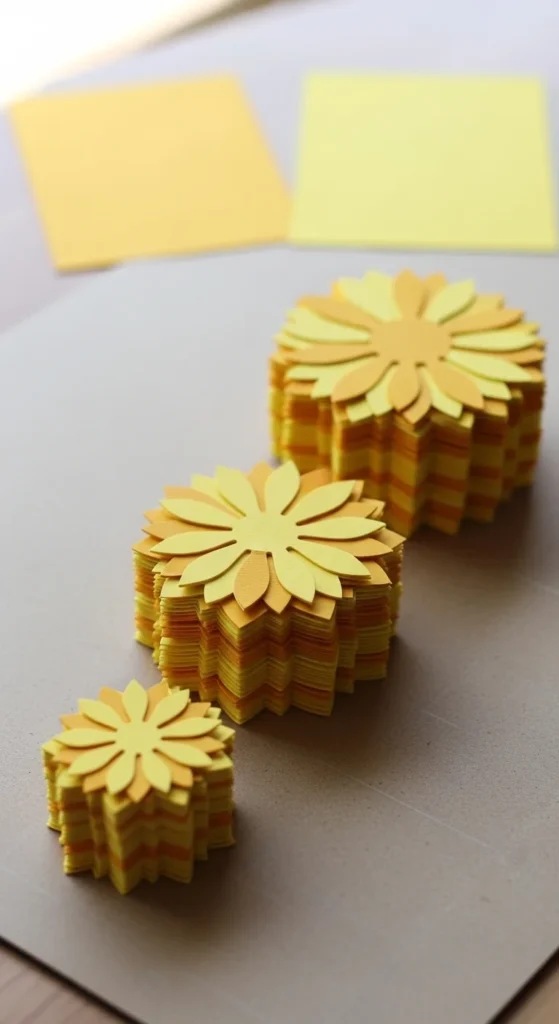
Quick template hack
- Draw one petal on cardboard and cut it out.
- Trace it repeatedly for consistent petals.
- For medium and small, trim the same template slightly smaller.
Step 2: Curl the Petals (This Is Where the Magic Happens)
Flat petals look like paper. Curled petals look like a flower.
How to curl
- Hold a petal in your hand.
- Drag the top edge gently across a marker or paintbrush handle.
- Curl outward for most petals.
- Curl a few inner petals slightly inward for depth.
Extra realism tip
- Pinch the petal base between your fingers to create a slight “cup” shape.
- Don’t overdo it. A small curve reads best.
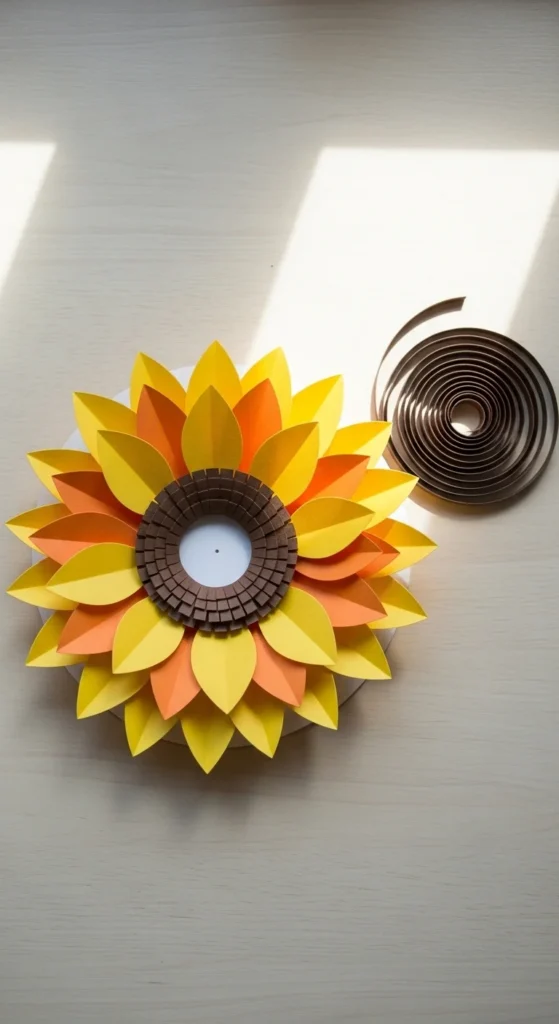
Step 3: Make a Textured Seed Center (Spiral Method)
The center is what makes paper sunflowers look realistic. A textured spiral gives that “seed head” effect.
Simple spiral center
- Cut a long strip of brown paper (about 1–2 inches wide).
- Make small snips along one long edge to create fringe.
- Roll the strip tightly into a spiral, keeping the fringe on the outside.
- Glue as you roll so it stays firm.
- Place it on a black circle base (cardstock or thick paper) and glue down.
Center color tip
- Use dark brown for the inner roll.
- Add a second strip in lighter brown or tan around the outside for a natural gradient.
Clean glue tip
- Use tiny glue dots and press for a second.
- If glue strings show, pause and pull them away while still warm.
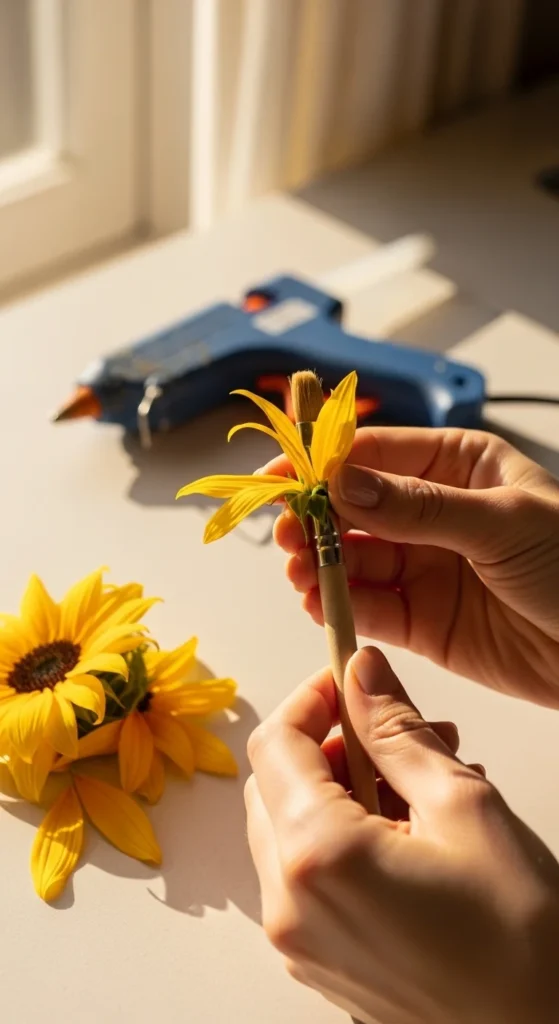
Step 4: Assemble the Sunflower in Layers (Fast + Neat)
Now you’ll build the bloom behind the center. If you have a base circle, this part becomes easy.
Make a base
- Cut a circle from thick cardstock or thin cardboard.
- Size guide:
- Small flower: 2–3 inch base
- Medium flower: 4–6 inch base
- Large flower: 8+ inch base
Layering order
- Start with large petals on the back.
- Add medium petals next.
- Finish with small petals closest to the center.
How to place petals
- Glue petals around the base circle like a clock.
- Slightly overlap each petal over the next.
- Angle petals a bit so they don’t sit perfectly flat.
Then glue your seed center on top, right in the middle.
Balance tip
If your flower looks uneven, rotate it and check from different angles. Add 2–3 extra petals where it looks thin.
Step 5: Add Stem and Leaves (So It Looks Finished)
A sunflower looks more real with leaves and a sturdy stem.
Stem options
- Floral wire (best for heavier blooms)
- Bamboo skewer (best budget choice)
Attach the stem
- Glue the stem to the back of the base circle.
- Reinforce with an extra strip of cardstock glued over the stem like a strap.
Wrap the stem
- Use green floral tape, or wrap with thin green paper strips and glue as you go.
Leaves
- Cut 2–3 leaf shapes from green cardstock.
- Fold each leaf down the center for a natural crease.
- Pinch the base slightly so it curves.
- Glue leaves to the stem and wrap that spot with tape for a clean finish.
Easy Variations (Bouquets, Backdrops, Kid-Friendly)
Mini table sunflowers
- Use fewer petals (8 small, 10 medium, 12 large)
- Use drinking straws as stems for lightweight builds
Backdrop “giant” sunflowers
- Increase petal count and size
- Use a thicker base (foam circle or foam board)
- Add extra layers so petals don’t droop
Pleated petal sunflowers (easy for kids)
- Accordion-fold strips of yellow paper
- Fan them into a circle
- Use a button-like center cutout for a cute look
Quick Troubleshooting (Common Issues)
- Petals droop: Use thicker cardstock or a sturdier base circle.
- Center looks flat: Add a second spiral ring around the first.
- Bloom looks messy: Keep petals in neat size groups and layer evenly.
- Glue looks visible: Glue only at the base of petals, not near the tips.
Takeaway
Paper sunflowers stand out because they’re all about layers and texture. Cut petals in three sizes, curl them for shape, make a spiraled seed center, and stack everything in clean rings. Once you make one, you’ll want to create a full bouquet or a big wall bloom for spring and summer decor.
Save this tutorial for later and try a set of three sunflowers in different sizes—they look amazing together.

DiyVisual is a DIY ideas resource for makers of every level. Our small editorial team researches and curates easy, budget-friendly craft, home decor, and handmade gift projects — explained step by step so anyone can recreate them at home with simple materials.


