
A paper rose is one of those crafts that looks fancy, but it’s really just smart layering. You cut a few petal shapes, curl the edges, and build the bloom from the center outward. The magic comes from tiny details: gentle ruffles, a tight bud, and a clean stem finish. Whether you’re making a bouquet, a wreath, or one single rose for a gift topper, this guide will help you create a paper rose that looks beautiful and realistic.
What You’ll Need (Simple Supplies)
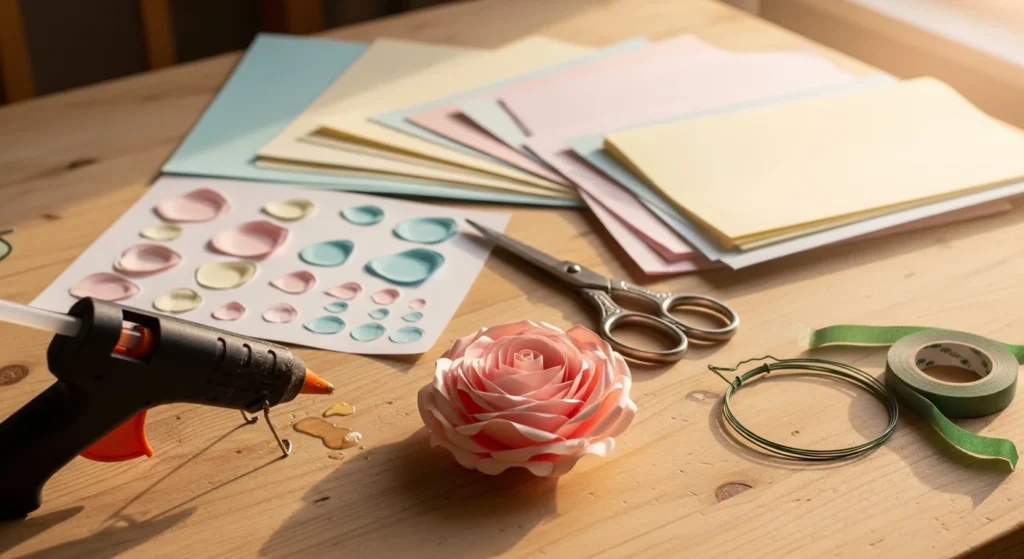
You don’t need a big craft stash. Start with basics, then upgrade if you want.
Materials
- Colored craft paper, book pages, or sturdy tissue paper
- Green cardstock (for sepals and leaves)
- Floral wire (for stems)
- Floral tape (green)
- Hot glue sticks (or tacky glue)
Tools
- Scissors (or a craft cutter if you have one)
- Pencil and ruler (optional, for tracing templates)
- Toothpick or paintbrush handle (for curling edges)
- Wire cutters
Budget tip: If you’re practicing, use old book pages or leftover wrapping paper. Save the nicer paper for your final bouquet.
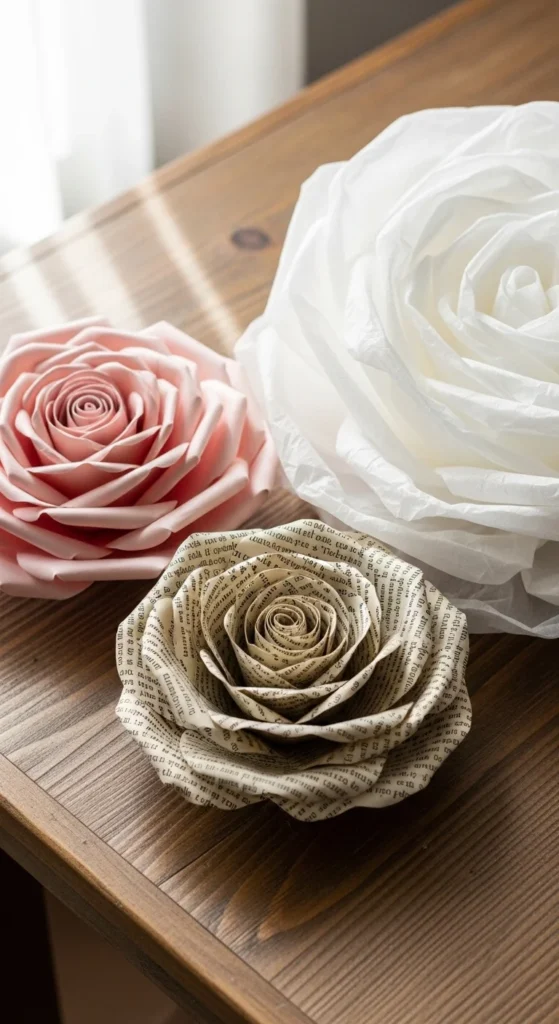
Step 1: Choose Your Rose Style (Realistic vs. Rustic)
Different papers create different vibes, so pick what matches your decor.
- Craft paper: Clean, smooth, great for realistic roses.
- Book pages: Rustic and vintage. Perfect for wreaths and farmhouse decor.
- Tissue paper: Soft and airy. Great for oversized roses.
If you’re new, start with craft paper. It holds shape well and forgives small mistakes.
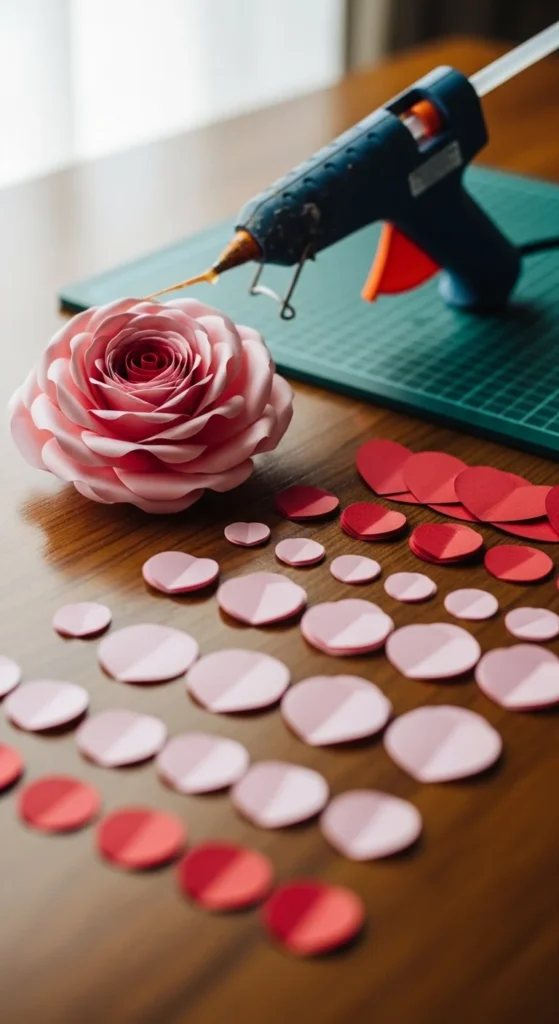
Step 2: Cut Petals in a “Petal Progression”
The easiest way to make a rose look real is to use petal sizes that grow gradually. Think small to large.
Quick petal set (works great for one medium rose)
Cut:
- 1–2 tiny petals (for the tight bud)
- 4 small petals
- 5 medium petals
- 6 large petals
Keep petals rounded at the top. A slight point is okay, but round usually looks more natural.
Fast template hack: Fold a square of paper into quarters, draw one petal shape, cut, and unfold. You’ll get matching petals quickly.
Budget tip: Trace one “master” petal onto cardboard and reuse it as a template.
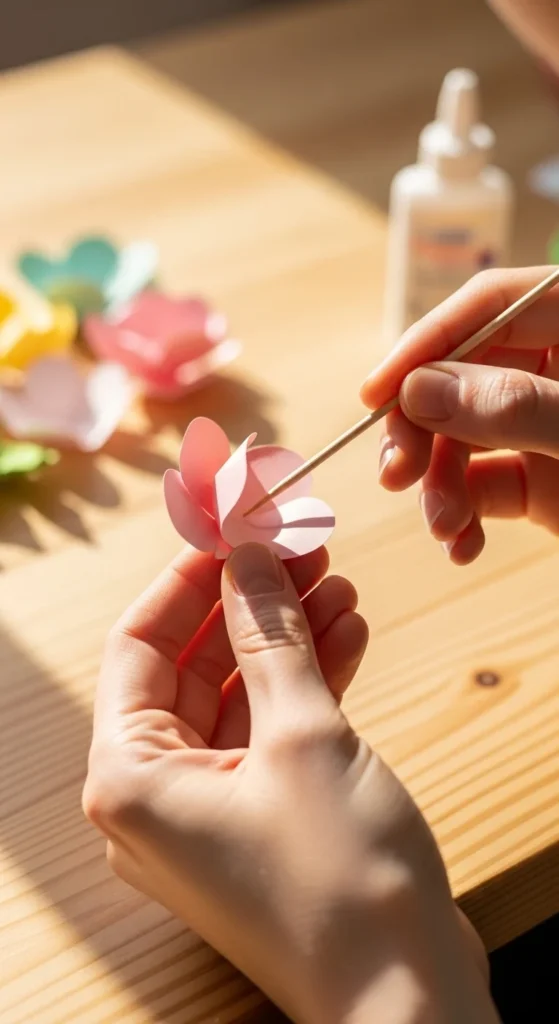
Step 3: Curl the Edges for That “Real Rose” Look
Flat petals look like paper. Curled petals look like a rose.
Here’s the trick:
- Place a petal in your hand.
- Pull the top edge across a toothpick or paintbrush handle.
- Curl outward for a soft ruffle.
- For inner petals, curl slightly inward to mimic a tight bud.
Do a few test curls first. Too much curl can look cartoonish, so aim for gentle movement.
Quick fix: If a petal curls too hard, flatten it slightly with your fingers and try again.
Step 4: Build the Bud (Center of the Rose)
The center makes or breaks the rose. Keep it tight.
Simple bud method
- Take one tiny petal.
- Roll it into a small cone.
- Add a dot of hot glue to hold the seam.
Then:
- Wrap a second tiny petal around it.
- Overlap the edges slightly.
- Glue at the base only (avoid glue near the top edge).
You should have a compact little bud that looks like it’s just starting to open.
Budget tip: Use tacky glue if you don’t have hot glue. Just give it more drying time.
Step 5: Add Petals in Layers (Cone-Style Overlap)
Now you’ll build fullness by layering petals around the bud.
Layering sequence
- Small petals: Add 4 around the bud, one at a time
- Medium petals: Add 5, slightly lower on the bud
- Large petals: Add 6, with wider spacing
How to place each petal
- Add glue only at the bottom.
- Press the petal base to the flower.
- Overlap the next petal about 1/3 over the previous one.
- Rotate as you go so the rose stays round.
If your rose starts to look lopsided, pause and add a petal on the thinner side.
Step 6: Finish with Sepals and a Clean Stem
This is the part that makes your rose look “finished” instead of “crafty.”
Make sepals (the green cup under the bloom)
- Cut a small green star shape (5 points).
- Curl the tips slightly downward.
- Glue it under the rose base to cover petal seams.
Add a stem
- Insert floral wire into the rose base.
- Secure with hot glue.
- Wrap the wire with green floral tape from top to bottom.
Optional leaves
- Cut two leaf shapes from green cardstock.
- Score veins lightly with scissors (gentle pressure).
- Wrap onto the stem with floral tape.
Budget tip: No floral tape? Use thin strips of green paper and glue as you wrap.
Styling Ideas (So It Looks Pinterest-Ready)
Once you’ve made one rose, you’ll want to use it everywhere.
Try:
- Bouquets: Mix 5–7 roses with leaves and baby’s-breath style filler (paper or faux).
- Wreaths: Use book page roses for rustic texture.
- Gift toppers: One rose + twine = instant upgrade.
- Table decor: Scatter a few blooms on a tray with candles.
Quick Troubleshooting (Common Problems)
- Petals look stiff: Curl more gently and vary the curl direction.
- Glue blobs show: Use tiny dots at the base only and press for a second.
- Rose looks flat: Add 1–2 extra large petals and space them wider.
- Stem droops: Use thicker wire or double the wire for heavier blooms.
Takeaway
Paper roses are all about layers and little details. Start with a simple petal progression, curl the edges, keep the bud tight, and finish with sepals and a wrapped stem. After one or two practice roses, your next ones will look surprisingly realistic.
Save this tutorial for later, and make a small batch this weekend—you’ll have decor-ready flowers that never wilt.

DiyVisual is a DIY ideas resource for makers of every level. Our small editorial team researches and curates easy, budget-friendly craft, home decor, and handmade gift projects — explained step by step so anyone can recreate them at home with simple materials.


