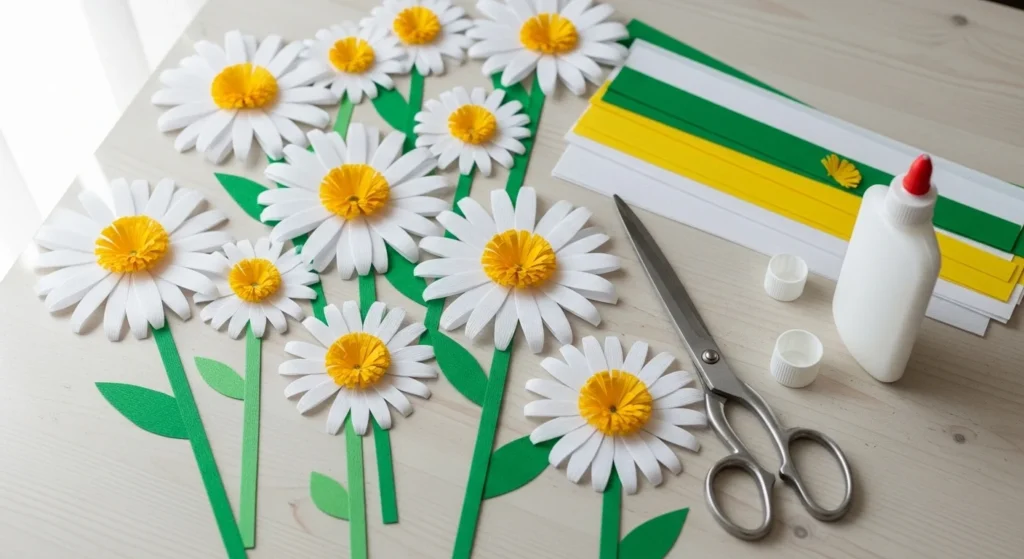
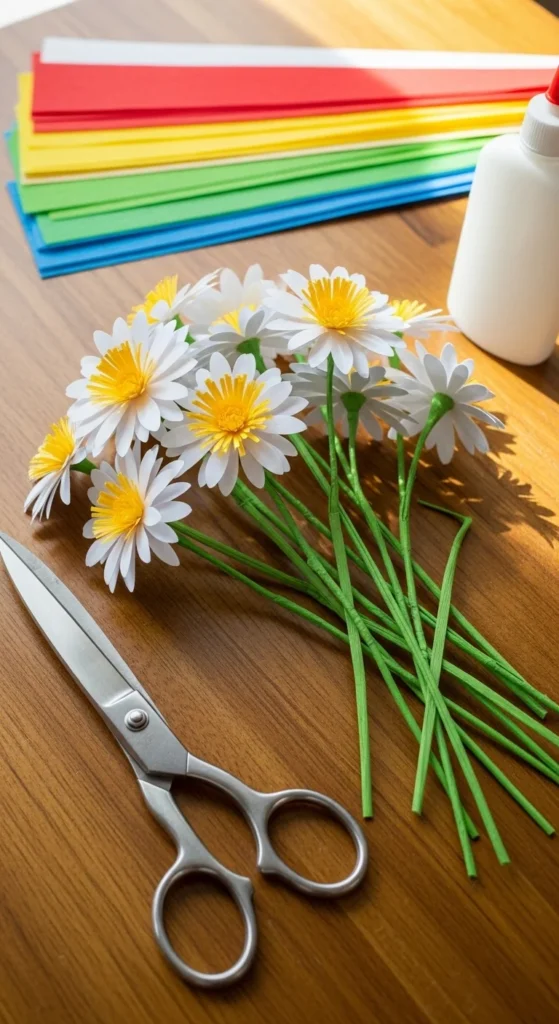
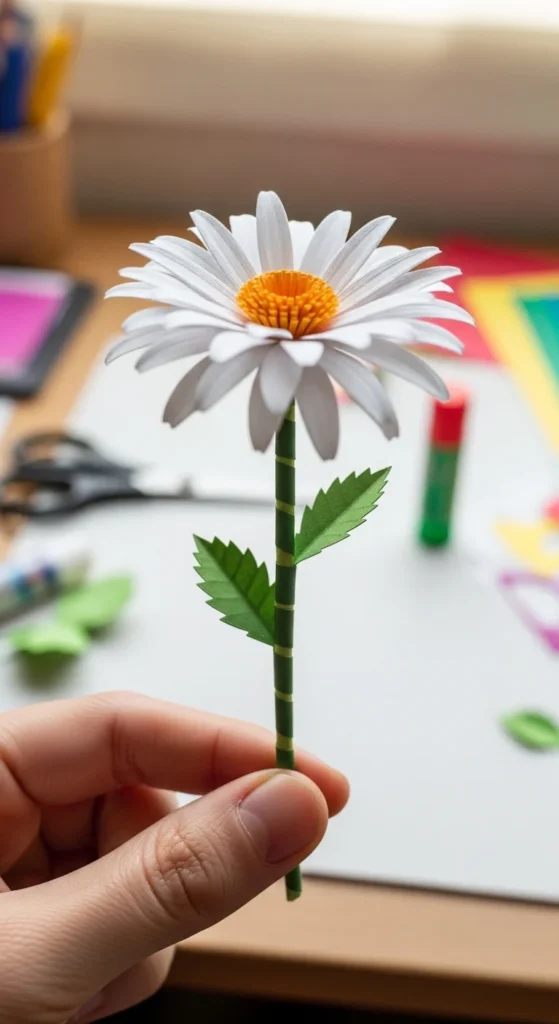
Paper daisies are one of the easiest flowers to make, but when done right, they look surprisingly realistic. With layered white petals, a fluffy yellow center, and simple green stems, these flowers work beautifully in bouquets, wreaths, and spring decor.
The trick is simple: thin layered petals + a fringed center + gentle curling. This guide walks you through a beginner-friendly method that still gives that full, dimensional look you see in Pinterest-worthy arrangements. Once you make one, you can quickly build a whole bouquet.
Supplies You’ll Need
You don’t need fancy tools to get great results.
Paper options
- White crepe paper (best for soft, realistic petals)
- White cardstock (clean and sturdy option)
- Coffee filters (great budget alternative)
Center materials
- Yellow crepe paper or cardstock
- Small strip of darker yellow (optional for depth)
Tools
- Scissors
- Hot glue gun or craft glue
- Pencil or thin marker (for curling)
- Floral wire or bamboo skewers (stems)
- Green floral tape or green paper
- Green crepe or cardstock (leaves)
Budget tip: Coffee filters make beautiful soft daisies for very little cost.

Step 1: Make the Fringed Yellow Center
The fluffy center gives daisies their signature look. Take your time here.
Cut the center strip
- Cut a yellow strip about 1 inch wide and 6–8 inches long.
- Fold it lengthwise once.
Create the fringe
- Make small, even snips along the folded edge.
- Do not cut all the way through.
- Keep the fringe thin for a softer look.
Roll the center
- Add a thin line of glue along the non-fringed edge.
- Roll tightly from one end.
- Press the base firmly as you go.
- Fan the fringe outward with your fingers.
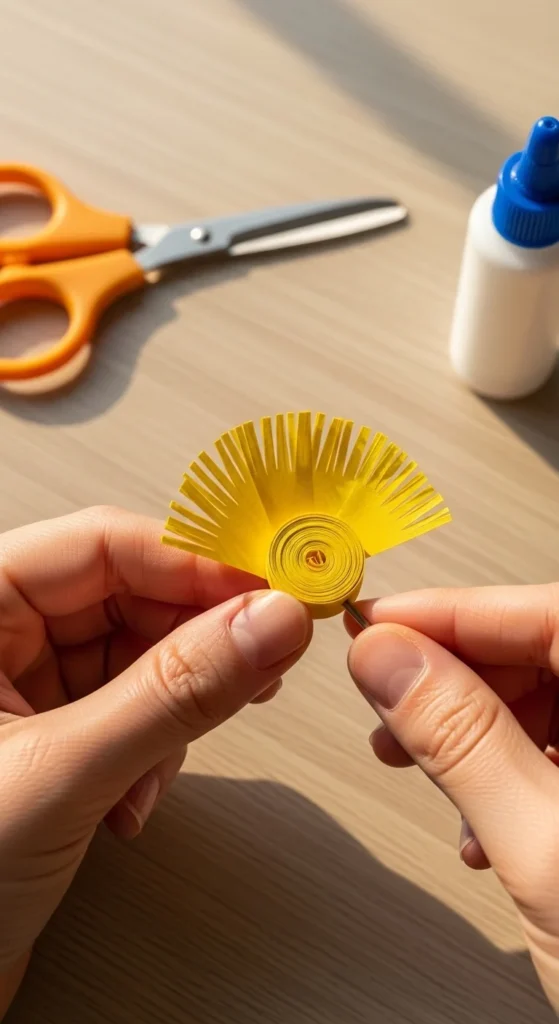
Pro tip: If the fringe looks stiff, gently fluff it with your fingers after the glue sets.
Step 2: Cut and Prepare the Petals
For a full daisy, you’ll make two layers of petals.
Petal size guide
- About 1 x 2.25 inches for standard daisies
- Slightly rounded tip
- Straight or gently tapered base
How many petals
- First layer: 7 petals
- Second layer: 7 petals
This offset layering makes the flower look fuller.
Speed shortcut
- Stack paper and cut multiple petals at once.
- Or make a simple cardboard template to trace quickly.
Step 3: Curl the Petal Edges (Don’t Skip This)
Flat petals look like paper. Curled petals look like flowers.
Easy curling method
- Place the petal on your finger.
- Pull the tip gently across a pencil or marker.
- Curl slightly outward.
Shape tip
- Pinch the base of each petal just a little.
- This creates a soft cup shape.
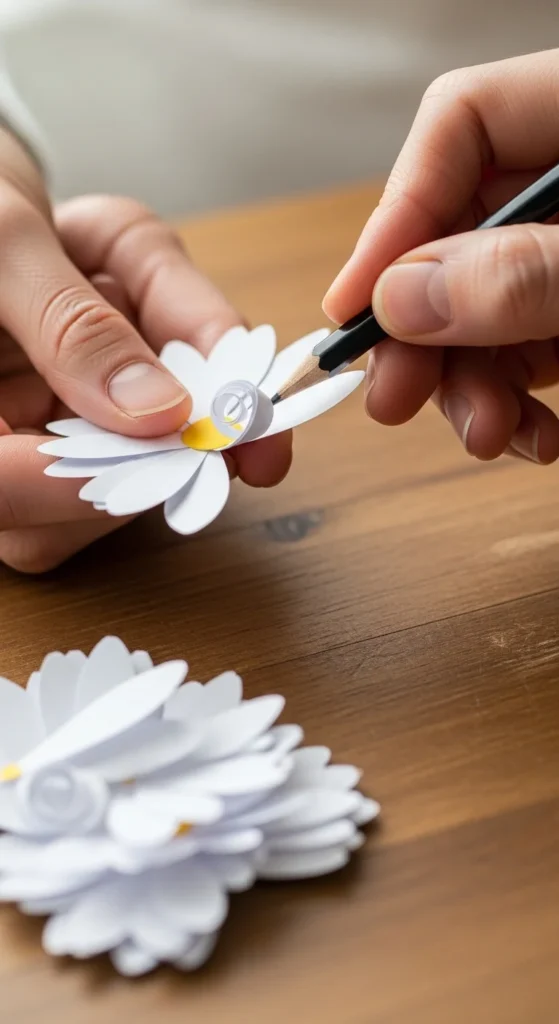
Keep it subtle
Too much curl makes petals look artificial. Small curves look best.
Step 4: Assemble the Daisy Layers
Now your flower starts to come together.
First layer
- Apply small glue dots to the base of each petal.
- Attach 7 petals evenly around the yellow center.
- Keep bottoms aligned with the base of the center.
Second layer
- Place the next 7 petals behind the first layer.
- Offset them between the front petals.
- Press gently so everything sits flat at the base.
Clean look tip
- Use tiny glue dots only at the bottom.
- Avoid glue near petal tips.
Optional sepal
- Cut a small green star shape.
- Glue to the back to hide the petal bases.
Step 5: Add the Stem and Leaves
This step makes your daisy bouquet-ready.
Attach the stem
- Glue floral wire or a bamboo skewer to the back.
- Reinforce with a small strip of paper glued over the stem.
Wrap the stem
- Use green floral tape from top to bottom.
- Stretch slightly as you wrap so it sticks well.
Make the leaves
- Cut long oval leaf shapes from green paper.
- Fold each leaf down the center.
- Curl slightly backward for dimension.
Attach leaves
- Glue leaves about halfway down the stem.
- Wrap that spot with floral tape for a clean finish.
Easy Variations to Try
Once you master the basic daisy, try these fun upgrades.
Coffee filter daisies
- Dye filters lightly with diluted paint.
- Let dry before cutting petals.
- Creates a soft, natural texture.
Mini bouquet daisies
- Use smaller petals.
- Group 5–7 flowers with twine.
Giant backdrop daisies
- Scale petal templates larger.
- Use thicker cardstock.
- Add extra petal layers for fullness.
Color twist
- Try soft pink or pale peach centers for a whimsical look.
Quick Fixes for Common Problems
- Petals look flat: Curl edges more and pinch the base slightly.
- Center looks messy: Use thinner glue lines when rolling fringe.
- Flower looks sparse: Add an extra petal layer behind the first.
- Stem feels loose: Reinforce with a paper strip before wrapping.
Takeaway
Paper daisies are perfect for beginners because the steps are simple but the results look beautiful. Focus on three things: fluffy fringed centers, gently curled petals, and clean layered placement. Once you get the rhythm, you can make a full bouquet in an afternoon.
Save this guide for later and try a small bunch in a mason jar — they instantly brighten any space. 🌼


