Rustic signs have a way of making a space feel warm, welcoming, and lived-in. They add character without feeling overdone, and the best part is that they’re surprisingly easy to make yourself. You don’t need advanced tools or fancy supplies—just a few simple materials and a relaxed approach.
Let’s walk through easy DIY methods to create rustic signs that feel authentic and timeless.
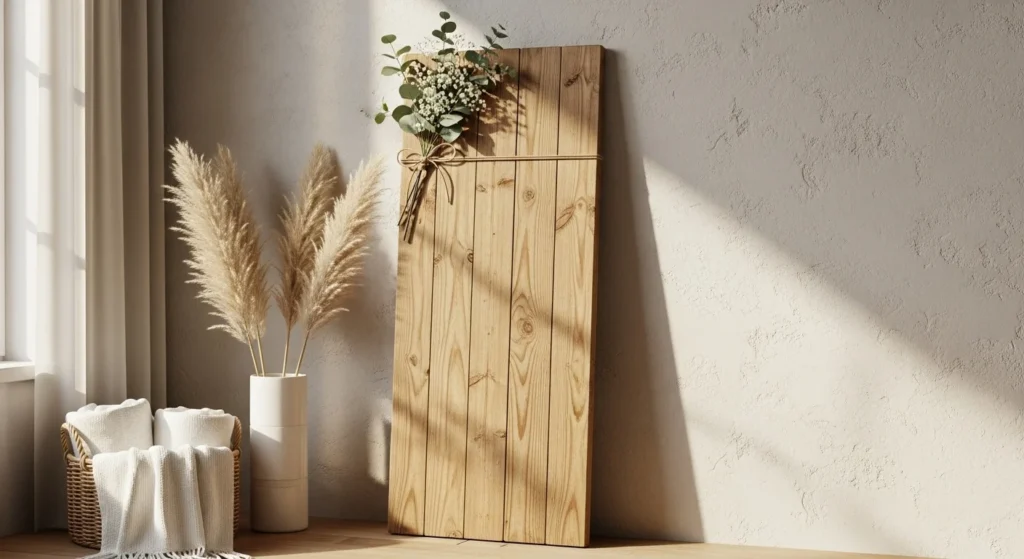
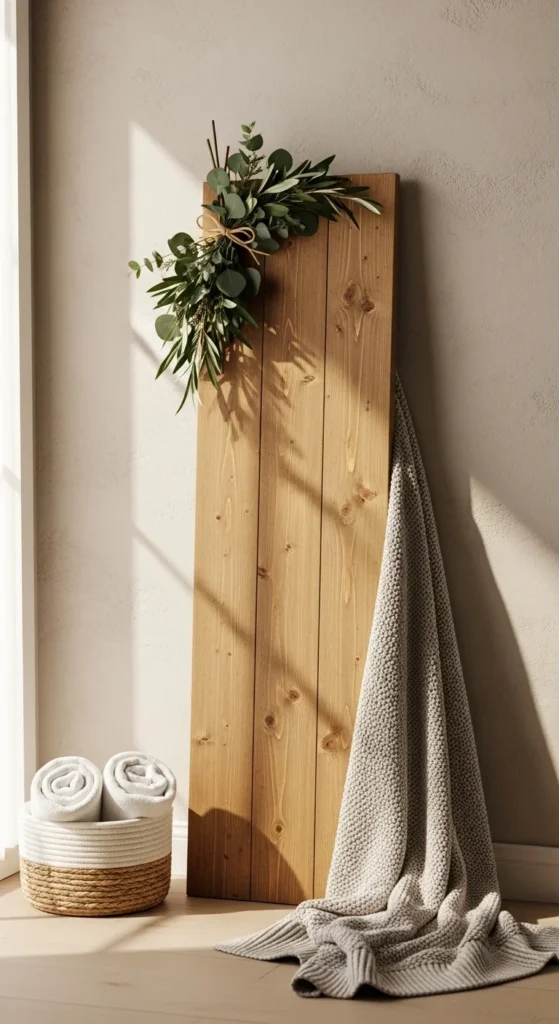
Choose the Right Wood for a Rustic Feel
The base of your sign sets the tone. Rustic decor works best with wood that shows natural grain and texture.
Good wood options include:
- Reclaimed or scrap wood
- Pine boards
- Pallet wood
- Pre-cut craft boards
Small imperfections, knots, and uneven edges actually add charm—so don’t aim for perfection.
Prep the Wood Simply
You don’t need to over-sand rustic signs. The goal is smooth enough to touch, but still natural.
Easy prep steps:
- Lightly sand rough edges
- Wipe off dust with a dry cloth
- Leave some texture visible
Skipping heavy sanding keeps the sign looking aged and authentic.

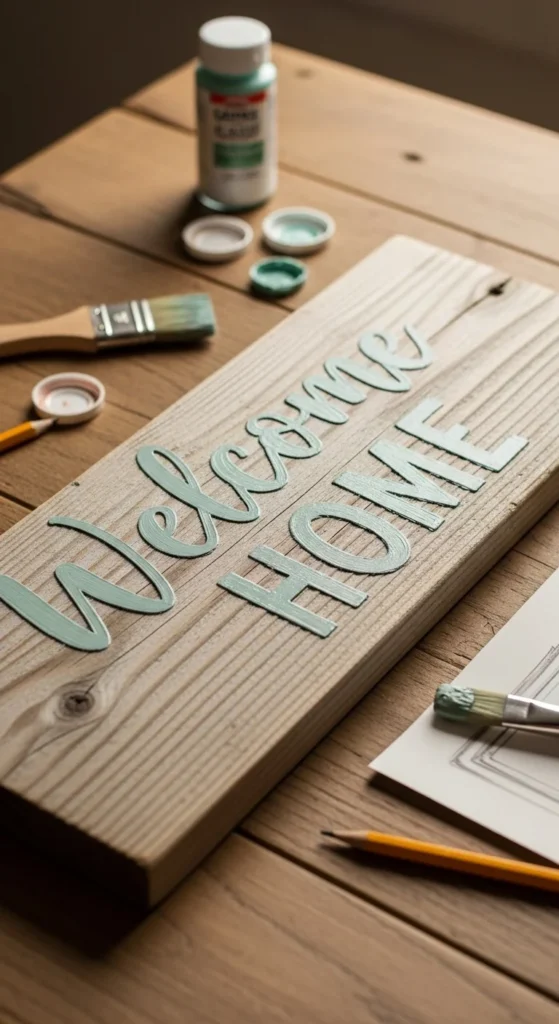
Use Soft Paint or Stain Techniques
Rustic signs usually look best with subtle color rather than bold finishes.
Beginner-friendly options:
- Light wood stain
- Soft white or beige paint
- Dry-brush paint technique
Apply paint unevenly and wipe some off while it’s still wet to let the wood show through.
Create Lettering the Easy Way
You don’t need perfect handwriting or special tools to add words to your sign.
Simple lettering methods:
- Pencil sketch + paint over
- Stencils for clean shapes
- Freehand block letters
Keep lettering simple and readable. Rustic signs look best with relaxed, imperfect lines.
Add a Distressed Finish
Distressing is what gives rustic signs their aged look.
Easy distressing ideas:
- Lightly sand edges and corners
- Rub areas with a dry cloth
- Leave paint uneven in spots
Focus on places that would naturally wear over time, like corners and edges.
Use Simple Hardware for Hanging
Rustic signs often look great with basic hanging methods.
Easy options:
- Twine or rope
- Simple hooks
- Small nails or brackets
Natural materials keep the look cohesive and casual.

Keep Designs Minimal
Less is more with rustic decor. Overcrowding the sign can make it feel busy.
Good design tips:
- Use short phrases or single words
- Leave plenty of empty space
- Center text or keep it slightly off-center
Negative space helps the sign breathe and look intentional.
Seal the Sign Lightly
If your sign will be handled or displayed often, sealing helps protect it.
Simple sealing options:
- Clear matte sealer
- Light wax finish
Use thin coats so the sign keeps its natural, rustic appearance.
Style Rustic Signs Around Your Home
DIY rustic signs are versatile and easy to move around.
Style them:
- Leaning on shelves
- Hanging in entryways
- Resting on mantels
- Paired with greenery
They work well alone or layered with other decor.

Final Takeaway
Making DIY signs with a rustic look is all about keeping things simple and imperfect. Natural wood, soft finishes, and relaxed lettering come together to create decor that feels warm and handmade.
Save this guide for later, and the next time your space needs character, make a rustic sign yourself 🌿


