Garlands are one of the easiest DIY decor projects you can make—and one of the most versatile. They instantly add softness, movement, and personality to a space. Whether you hang them on shelves, walls, mantels, or tables, garlands made with simple supplies can work for everyday decor and special moments.
The best part? You don’t need crafting skills or expensive materials—just a few basics and a relaxed approach.
Let’s break it down step by step.
Start With Easy-to-Find Supplies
Simple supplies keep garland-making stress-free and budget-friendly.
Common DIY garland supplies:
- Twine, string, or yarn
- Paper or cardstock
- Fabric scraps or felt
- Faux or real greenery
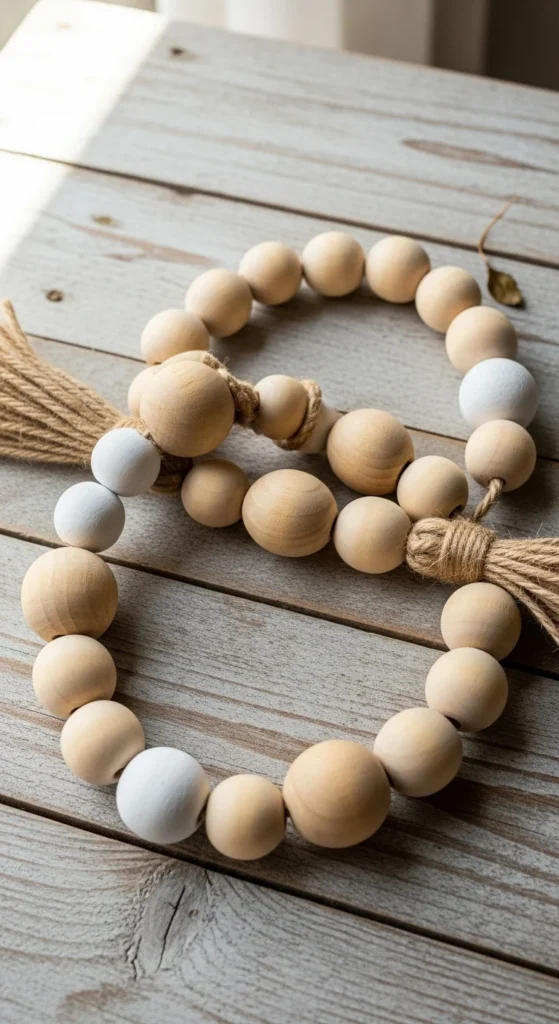
- Wooden beads
Choose materials you already have or can easily reuse for different styles.
Decide on a Garland Style First
Before assembling anything, decide what kind of garland you want. This helps avoid overdoing it.
Popular beginner styles:
- Bead garlands
- Paper shape garlands
- Greenery garlands
- Fabric or tassel garlands
Keeping one clear style makes the finished garland look more intentional.
Make a Simple Bead Garland
Bead garlands are one of the easiest options and work in almost any space.
How to make one:
- String wooden beads onto twine
- Tie knots at both ends
- Leave ends loose for a relaxed look
You can mix bead sizes or leave them natural for a clean, neutral style.
Create Paper or Cardstock Garlands
Paper garlands are lightweight, affordable, and easy to customize.
Simple paper ideas:
- Circles
- Triangles
- Leaves
- Abstract shapes
Cut shapes, punch holes, and string them evenly. Spacing doesn’t need to be perfect—slight variation adds charm.
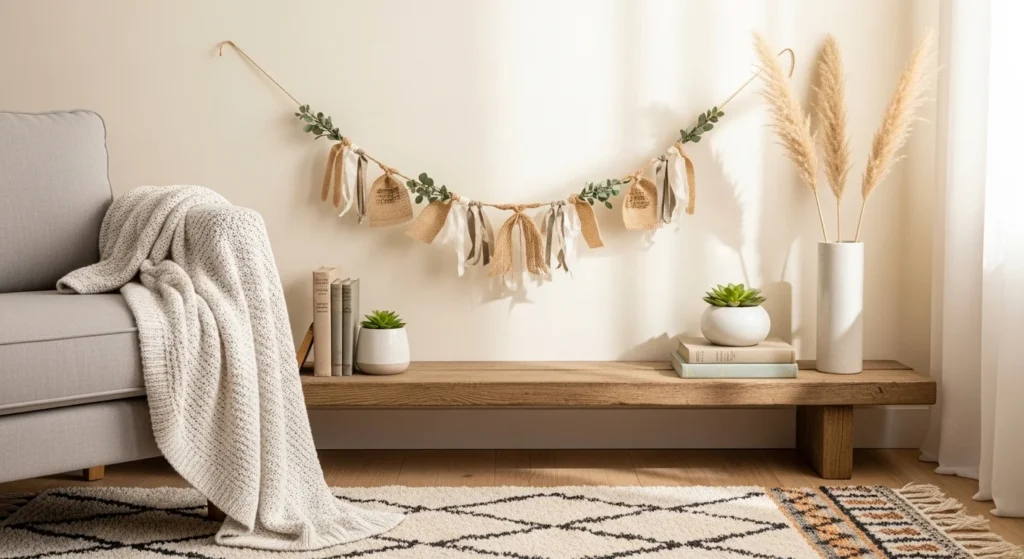
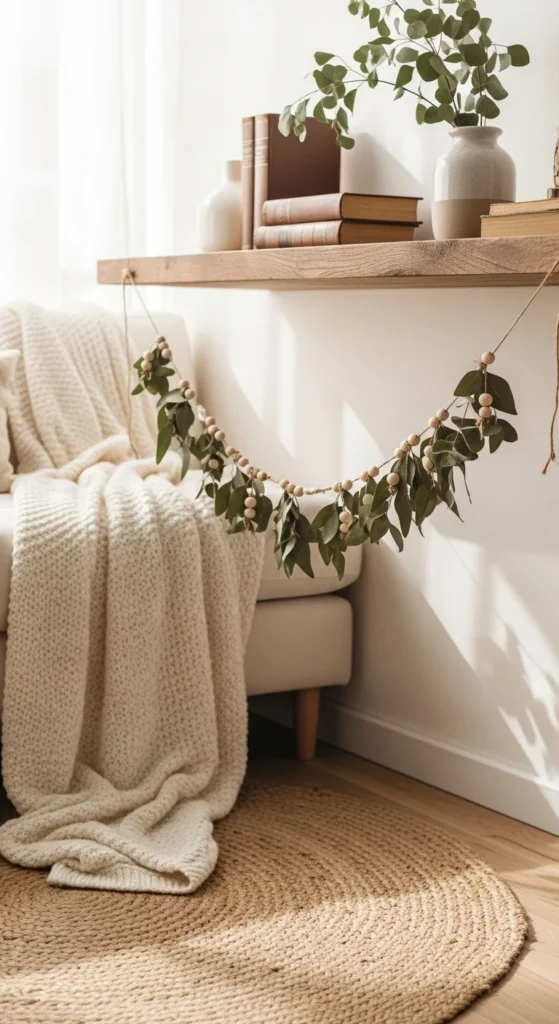
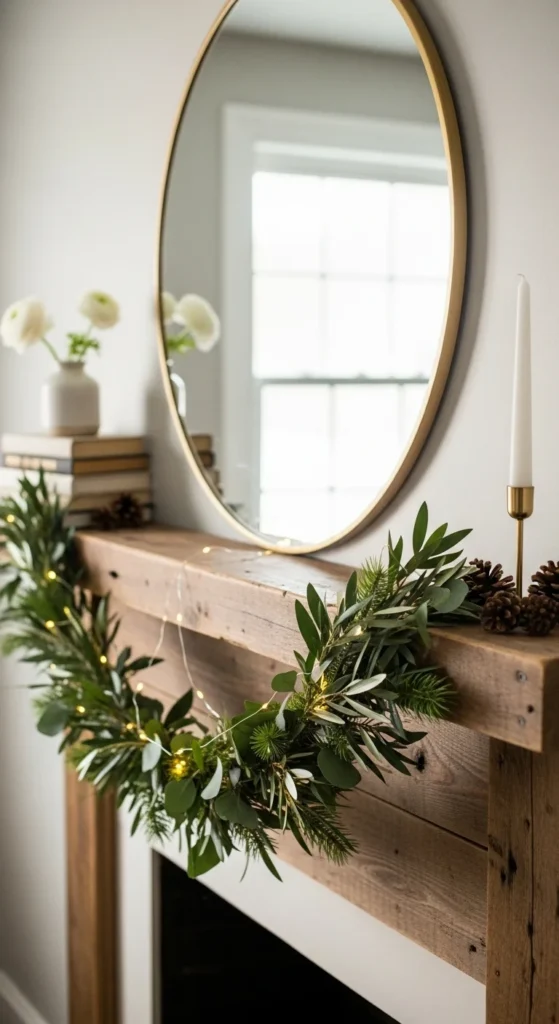
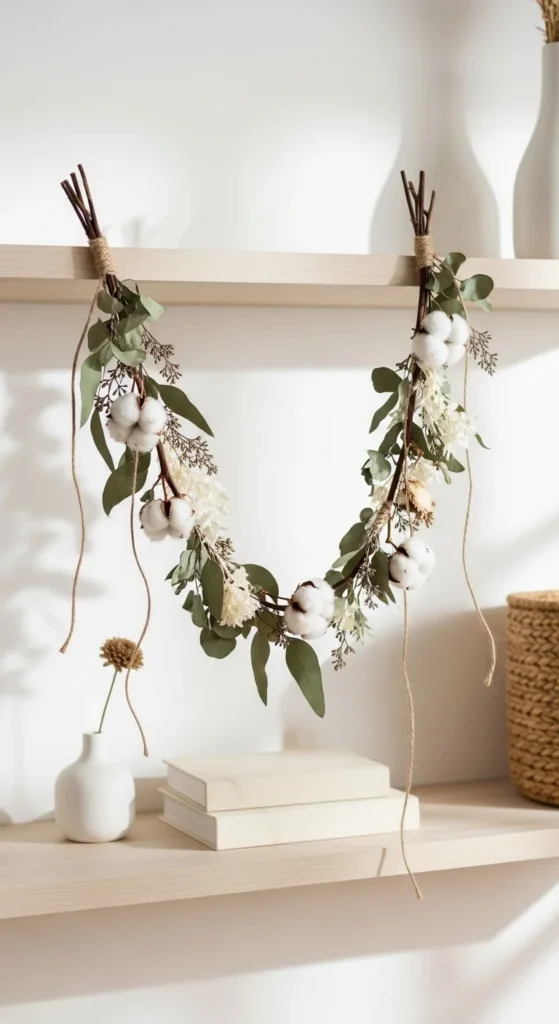
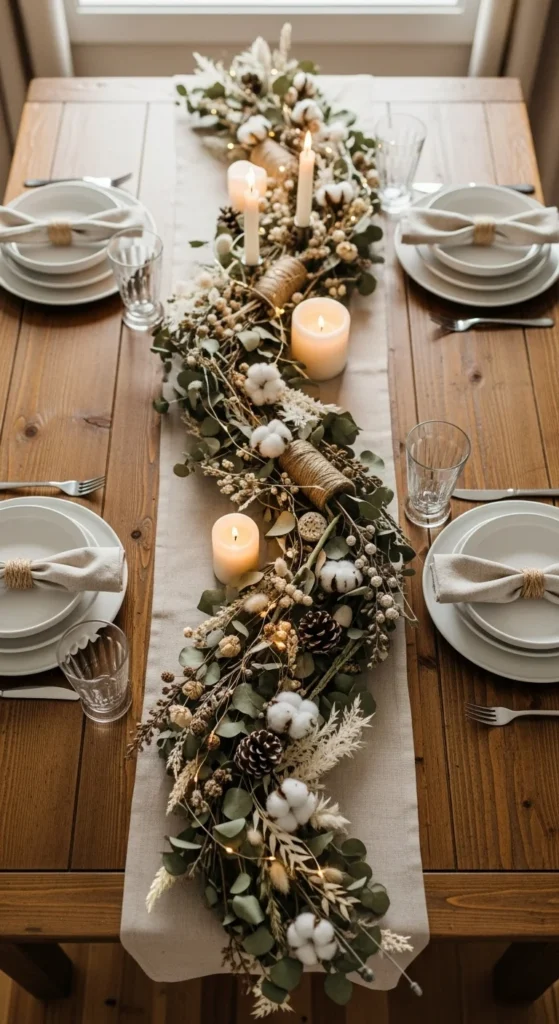
Use Greenery for a Natural Look
Greenery garlands instantly make a space feel fresh and cozy.
Easy greenery options:
- Faux vine strands
- Real greenery tied to twine
- Mixed greenery with small accents
Attach greenery loosely so it drapes naturally instead of looking stiff.
Try Fabric and Tassel Garlands
Fabric garlands add texture and softness, especially in cozy spaces.
Beginner-friendly ideas:
- Fabric strips tied onto string
- Simple yarn tassels
- Felt shapes sewn or glued
Stick to a small color palette so the garland doesn’t feel busy.
Keep the Length Flexible
Garlands look best when they’re not stretched tight.
Helpful tips:
- Make them slightly longer than needed
- Let them drape naturally
- Avoid pulling too tight when hanging
Loose draping gives a relaxed, styled look.
Mix Textures, Not Styles
Texture adds depth, but too many styles can look messy.
Good texture combinations:
- Wood + fabric
- Paper + twine
- Greenery + beads
Limit yourself to two or three textures for a balanced look.
Display Garlands in Creative Ways
Garlands aren’t just for walls.
Try placing them:
- Across shelves
- Along mantels
- On tables as runners
- Over mirrors or frames
Smaller garlands work beautifully indoors without overwhelming the space.
Store and Reuse Your Garlands
One of the biggest perks of DIY garlands is reusability.
Storage tips:
- Wrap gently around cardboard
- Hang on hooks
- Store in labeled bags
Neutral garlands can be reused year-round with small changes.
Final Takeaway
Creating garlands with simple DIY supplies is an easy way to add warmth and personality to your home. With basic materials, soft textures, and relaxed draping, you can make garlands that feel thoughtful and timeless.
Save this guide for later, grab some string and supplies, and start creating your own garland magic ✨

DiyVisual is a DIY ideas resource for makers of every level. Our small editorial team researches and curates easy, budget-friendly craft, home decor, and handmade gift projects — explained step by step so anyone can recreate them at home with simple materials.


