Simple rangoli designs are loved because they deliver big festive impact without complicated skills. Many beginners assume rangoli must be complex to look beautiful. That is not true. With the right patterns, even a quick design can appear detailed and impressive. This guide focuses on easy rangoli ideas that look advanced but stay beginner-friendly, budget-smart, and practical for real homes. Whether you are decorating for Diwali, Navratri, or daily doorstep charm, these ideas help you create eye-catching results using simple tools and affordable materials.
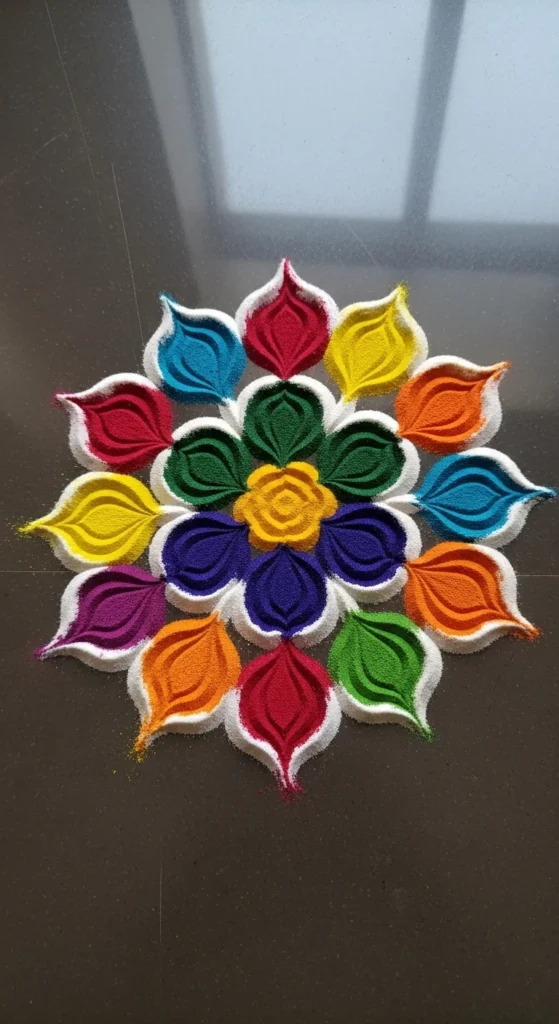
1. Classic Flower Petal Circle
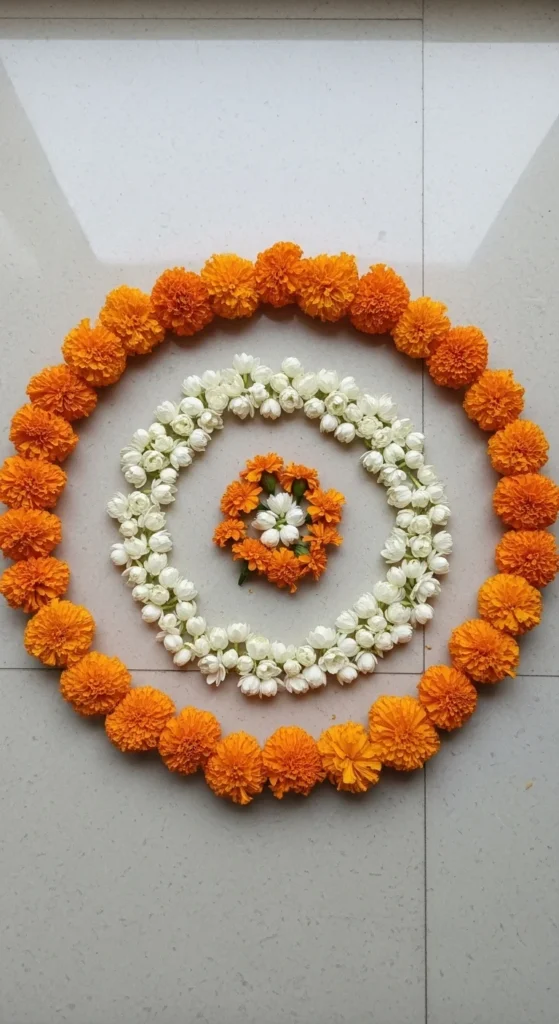
Start with the most forgiving design: the flower petal circle. It looks rich but is very easy.
Draw a light chalk circle first. This keeps your shape neat. Fill the center with yellow marigold petals. Then add an outer ring using white jasmine.
The secret is layering, not perfection. Even if petals fall unevenly, the design still looks full and festive.
Budget tip: Buy loose marigold garlands and pluck them yourself. It is much cheaper than buying loose petals.
For small spaces, use a steel plate as a tracing guide. For larger spaces, use a string tied to chalk.
Finish by placing one diya in the center. That single step makes the rangoli look much more detailed.
This design is perfect for beginners who want quick results with minimal mess.
2. Easy 7-Dot Star Pattern
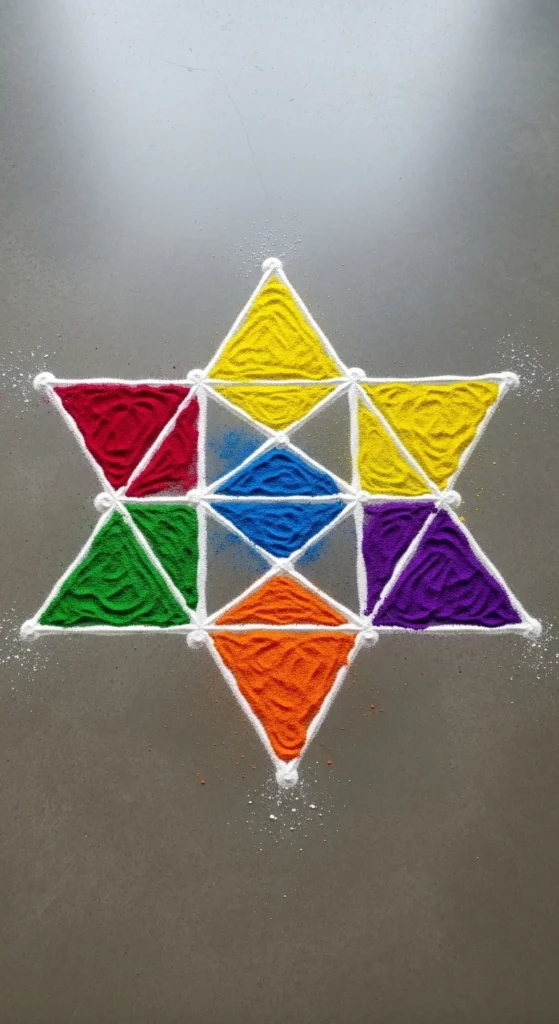
Dot rangoli gives you built-in symmetry. Start with a 7-dot grid in straight lines.
Connect the outer dots to form a star. Use white powder first. Once the outline looks clean, fill each section with bright colors.
Short tip: Always work from the center outward. This prevents smudging.
If straight lines feel tricky, use a spoon to control powder flow. Many beginners find this easier than using fingers.
Budget idea: Colored chalk powder works well if rangoli colors are not available nearby.
This design looks complex because of the star geometry, but the dot grid does most of the work for you.
It is perfect for apartment entrances or small doorways.
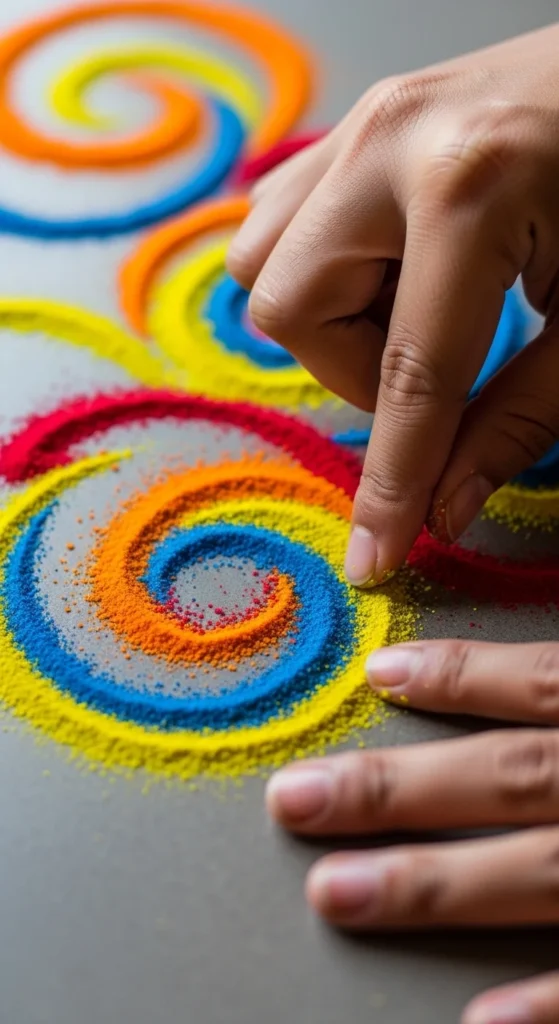
3. Freehand Spiral Rangoli
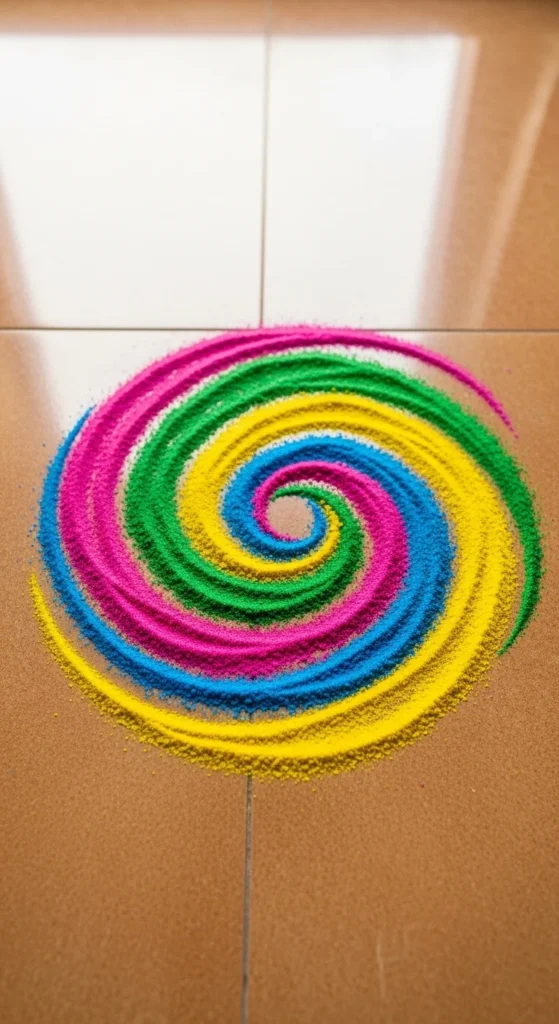
Freehand spirals are great when you do not want to measure anything.
Start from the center and slowly move outward in a circular motion. Keep your wrist relaxed. Do not rush.
Once the spiral is drawn, decorate the gaps with small petals or colored powder dots.
This design works well because imperfections actually add charm.
Quick hack: Practice the spiral once on paper before working on the floor.
Budget tip: Use plain white powder for the spiral and add color only in small accents. This keeps costs low.
If you want a festival look, place tiny diyas along the spiral curve.
This rangoli is ideal for busy evenings when you want something pretty in under 10 minutes.
4. Simple Swastik Auspicious Design

The swastik symbol is widely used in festive rangoli and is very beginner friendly.
Draw the shape lightly with chalk first. Keep the arms thick so filling is easy.
Use yellow petals for the main body and red powder for the border. This color pairing always stands out.
Important tip: Keep lines bold rather than thin. Thick lines hide small mistakes.
Budget option: Colored rice can replace rangoli powder if you are working with limited supplies.
Add four small diyas around the symbol to create a balanced look.
Because the structure is simple, this design comes together quickly but still feels festive and meaningful.
It works especially well for doorstep decorations.
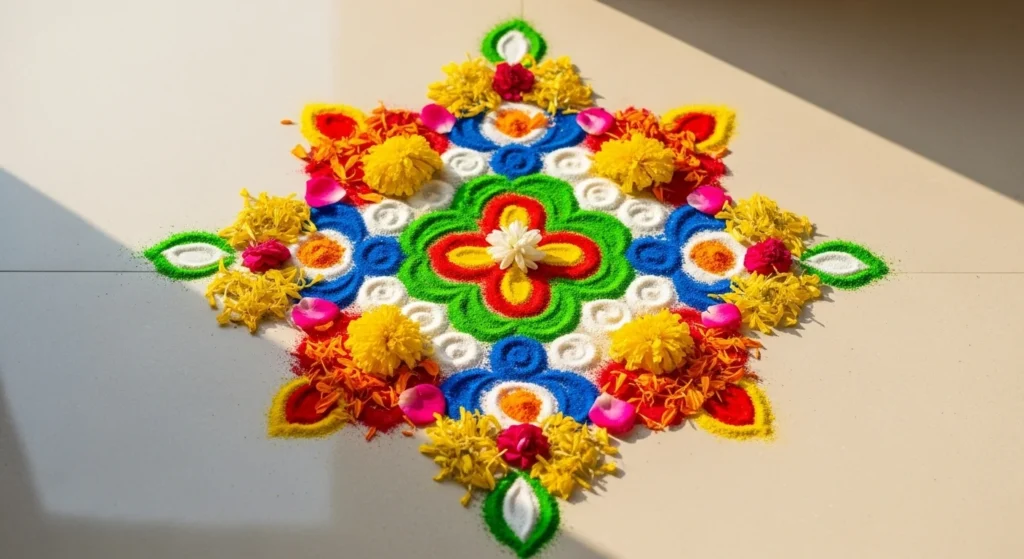
5. Concentric Ring Color Rangoli

If you can draw circles, you can create this design.
Use a plate or bowl to trace three or four rings. Fill each ring with a different color.
The magic comes from clean color contrast. Try yellow, pink, blue, and white.
Always fill from the center outward to avoid dragging powder across finished areas.
Budget tip: Mix a little white powder into strong colors to make them last longer.
To add detail, draw tiny white dots along each ring border.
This design looks polished in photos and works well for both daily and festival decor.
It is one of the fastest ways to create a rangoli that appears much more detailed than it actually is.
6. Beginner Peacock Outline
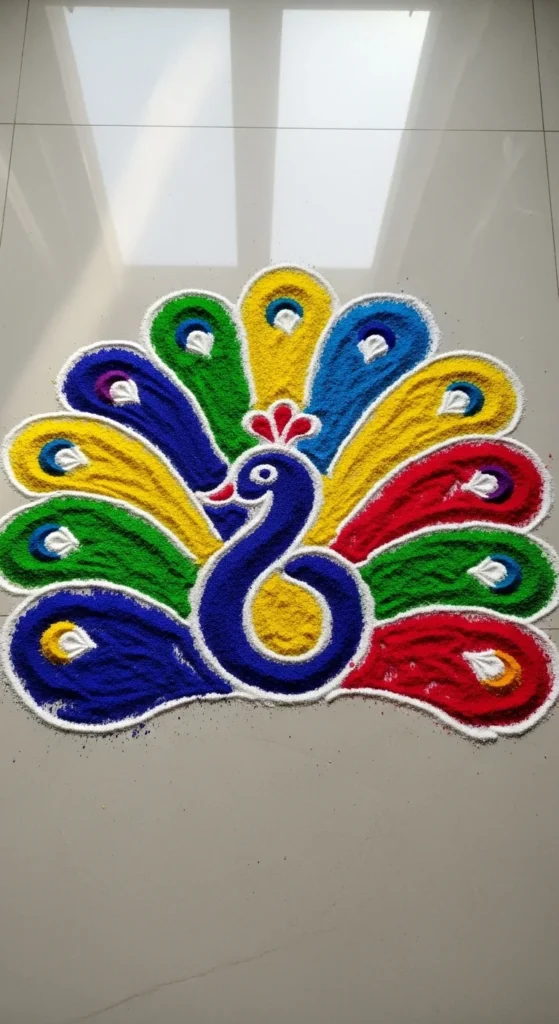
Peacock rangoli looks advanced but can be simplified easily.
Start by drawing a basic S-shaped neck. Then add a round body and fan tail.
Do not overthink feather details. Use repeated teardrop shapes for the tail.
Color tip: Blue body, green tail, and yellow highlights always look good together.
Budget trick: Use white powder to outline first. Fix mistakes before adding color.
If space is tight, make only half the peacock near a corner. It still looks beautiful.
This design is perfect when you want something festive without spending too much time.
7. Diya Frame Rangoli

This design focuses on framing rather than filling.
Draw a simple square or circle border. Decorate the border with repeating dots or petals.
Place diyas evenly around the frame. The light creates the visual impact.
Tip: Symmetrical diya spacing makes the design look professional.
Budget idea: Use tea lights if traditional diyas are not available.
Inside the frame, keep the center simple with one small motif.
This rangoli works well for night celebrations because the glow does most of the work.
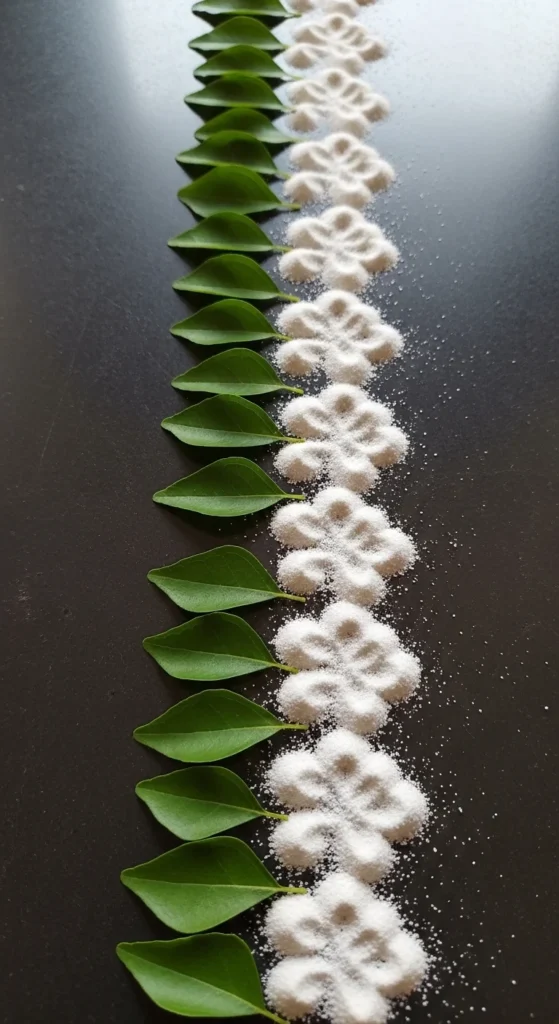
8. Leaf Border Rangoli
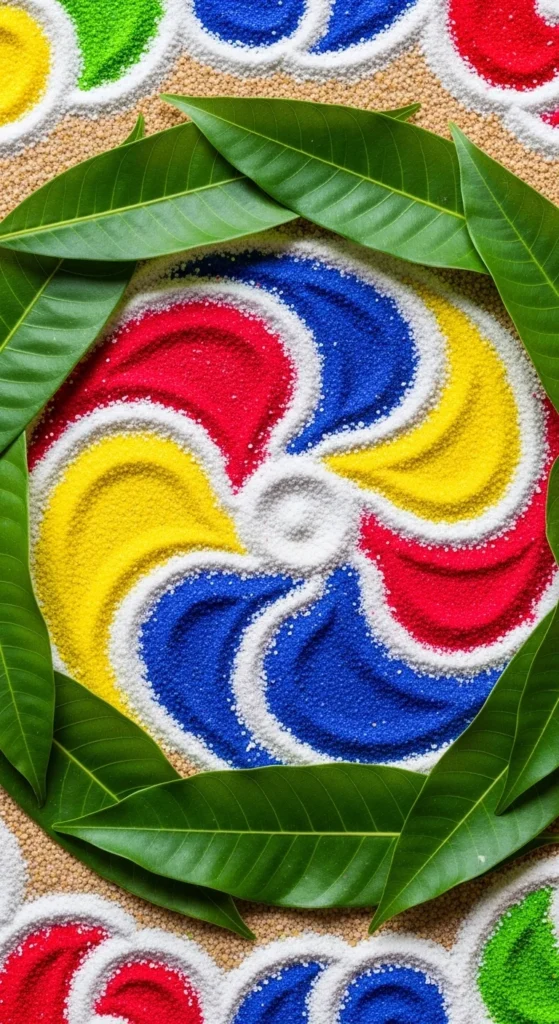
Borders can make even plain rangoli look special.
Draw your main shape first. Then create small leaf shapes around the edge.
Use green powder or real leaves if available.
Budget tip: Mango leaves or any garden leaves work well and cost nothing.
Keep leaf sizes consistent for a clean finish.
This trick is great when your center design is very simple but you still want a rich appearance.
9. Rice Flour Kolam Style
Kolam designs use flowing lines around dots.
Start with a small dot grid like 5-3-1. Loop white powder around the dots smoothly.
The beauty comes from continuous motion, not perfection.
Budget advantage: Rice flour is inexpensive and widely available.
Practice the looping motion slowly. Speed comes later.
This style is perfect for daily doorstep decoration.
10. Two-Color Minimal Rangoli
Limiting colors makes work easier.
Pick one light and one dark shade. Create a simple geometric pattern.
The strong contrast makes the design stand out even though it is simple.
Budget tip: Buying fewer colors saves money.
This is perfect for beginners who feel overwhelmed by multi-color designs.
11. Floating Flower Bowl Rangoli
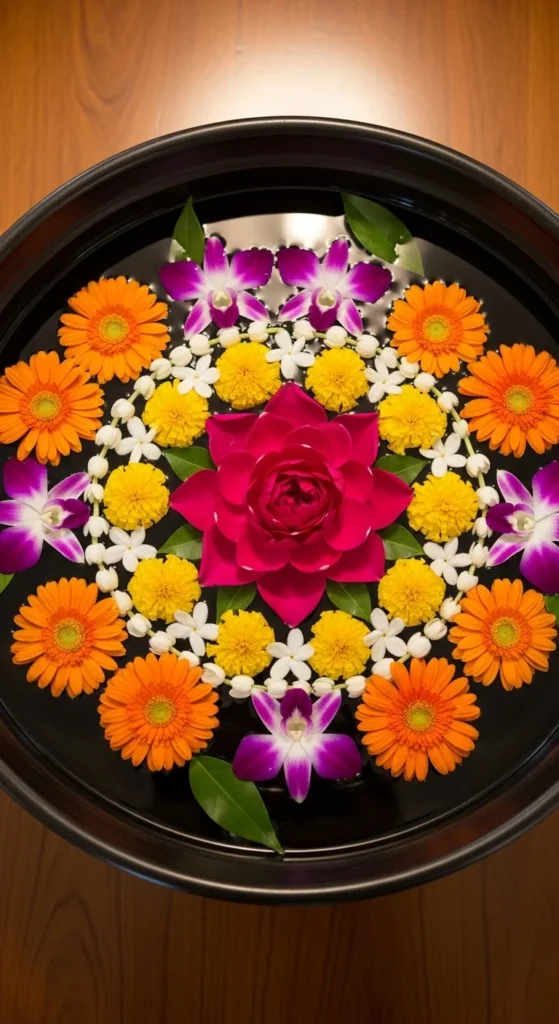
This is a no-mess indoor option.
Fill a wide bowl with water. Arrange petals on the surface in a circular pattern.
Add a floating candle in the center.
This works well for apartments where floor rangoli is not practical.
Budget tip: Use any local flowers.
12. Stencil-Assisted Quick Rangoli

Stencils remove the stress of symmetry.
Place the stencil flat and gently sprinkle powder.
Lift slowly to reveal clean edges.
Great for beginners who want neat results fast.
13. Chalk-Only Entrance Design

Sometimes simple white designs look elegant.
Use chalk to draw basic patterns.
This is perfect for daily decoration and costs almost nothing.
14. Pulse and Lentil Texture Rangoli
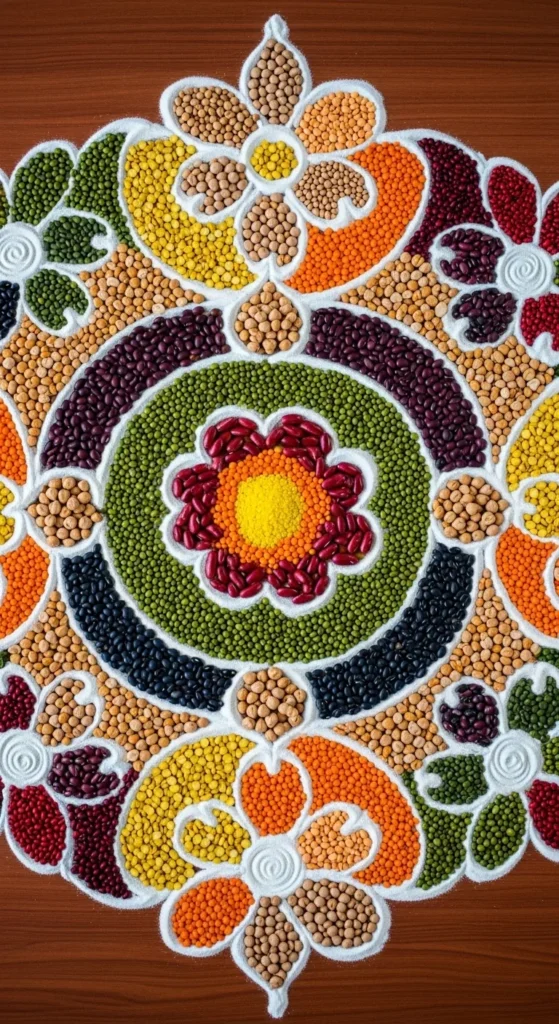
Kitchen staples can replace powders.
Use lentils, beans, or split pulses to fill shapes.
The texture adds visual interest.
Budget friendly and eco-smart.
15. Small Corner Rangoli

Not every space needs a big design.
Use corners creatively with triangular layouts.
Great for tight spaces.
16. Ganesha Simple Outline
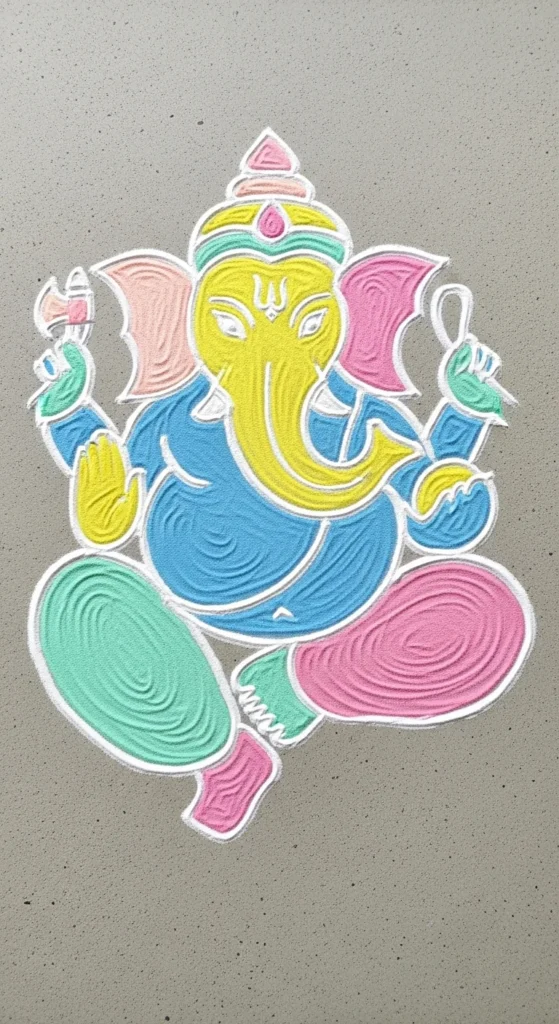
Draw a very simple curved trunk and round head.
Keep details minimal.
Use petals for filling.
Looks festive with little effort.
17. Finger-Drawn Quick Rangoli
Skip tools completely.
Use fingers to guide powder into curves.
Practice on newspaper first.
Fast and beginner friendly.
18. Symmetry Box Pattern

Draw a square and divide into four parts.
Fill each section with different colors.
Add small dots at intersections.
Very easy but looks structured.
19. Marigold Pathway Rangoli

Create small repeating circles along a path.
Use only marigold petals.
Perfect for entrances and walkways.
20. Five-Minute Dot Flower
Place a small dot grid.
Connect into a flower.
Fill quickly with two colors.
Ideal for daily practice.
21. Half-Moon Entrance Rangoli
Half designs save time but still look full.
Draw a large semicircle at your entrance. Divide it into curved sections like petals. Fill each section with different colors or petals.
This works well when your rangoli sits against a wall or doorstep.
Tip: Outline first in white powder to keep curves smooth. Thick borders help hide small slips.
Budget trick: Use leftover colors from previous designs instead of opening new packets.
Add three small diyas along the curved edge for evening glow.
Because only half the shape is drawn, this design feels detailed but takes much less effort.
It is perfect for busy festival mornings.
22. Simple Lotus Rangoli

The lotus is a festival favorite and easier than it looks.
Start with a small circle in the center. Around it, draw repeated almond-shaped petals. Keep them evenly spaced.
Fill petals with pink powder and outline with white for contrast.
Beginner hack: Draw only 8 petals instead of many. Fewer petals keep the design clean and manageable.
Budget tip: Mix a little white powder into pink to stretch your color supply.
Place a diya in the center for a soft focal point.
This rangoli works beautifully for puja rooms and small doorways.
23. Easy Grid Flower Rangoli

If freehand feels tricky, the grid method helps.
Draw a small square dot grid like 5 by 5. Connect dots to form a flower shape.
Once the outline looks neat, fill with two or three colors.
Work slowly around the dots. Rushing is the main cause of uneven lines.
Budget idea: Use white rice flour for the grid and save colored powder for filling only.
Add tiny white dots around the flower to give a finished look.
This pattern is great for daily practice because it builds confidence with symmetry.
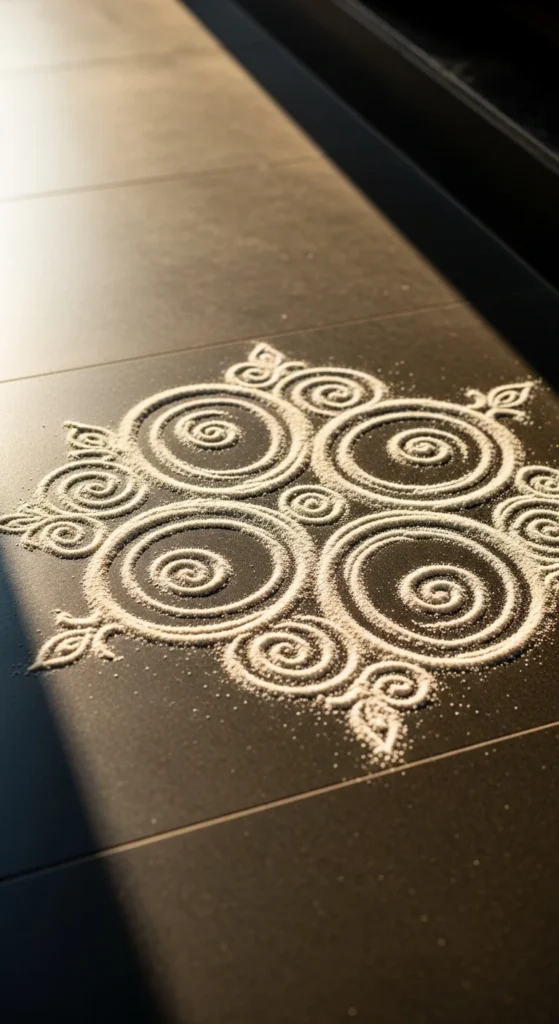
24. Spiral With Dot Accents

This design builds on the basic spiral.
Draw one large spiral from the center outward. Then place evenly spaced white dots along both sides of the curve.
Those small dots make the design look much more detailed.
Spacing tip: Use your fingertip width as a guide between dots.
Budget trick: Use plain white powder for dots since only small amounts are needed.
You can also add tiny petals between dot clusters for extra texture.
This rangoli looks decorative but comes together quickly.
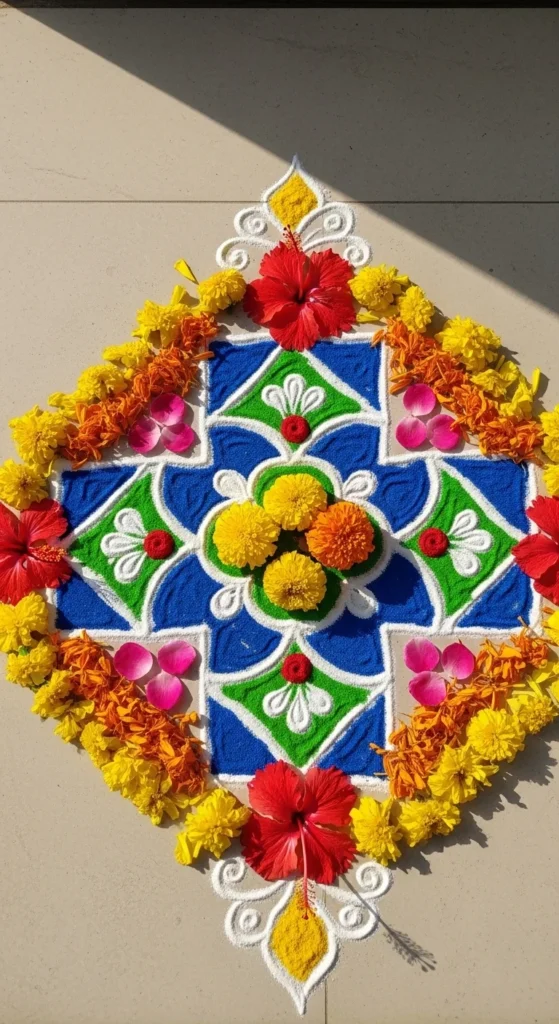
25. Simple Square Frame Rangoli
Frames make basic designs look polished.
Draw a large square border first. Inside, create a smaller square or circle.
Fill the center with bright color and keep the border white.
Clean corners matter. Use chalk lightly to guide your edges.
Budget tip: White borders use less colored powder but still create strong contrast.
Place four diyas at the corners during evening celebrations.
This design works well when you want something neat and balanced.
26. Petal Drop Rangoli Pattern
Instead of one large design, use repeated small motifs.
Create tiny teardrop shapes arranged in a circle or line. Fill each with a single color.
The repetition makes the design look more detailed than it is.
Keep sizes consistent for the best visual effect.
Budget tip: Use one main color and one white outline to reduce material use.
This pattern works well along door thresholds and narrow spaces.
27. Diya Center Focus Rangoli
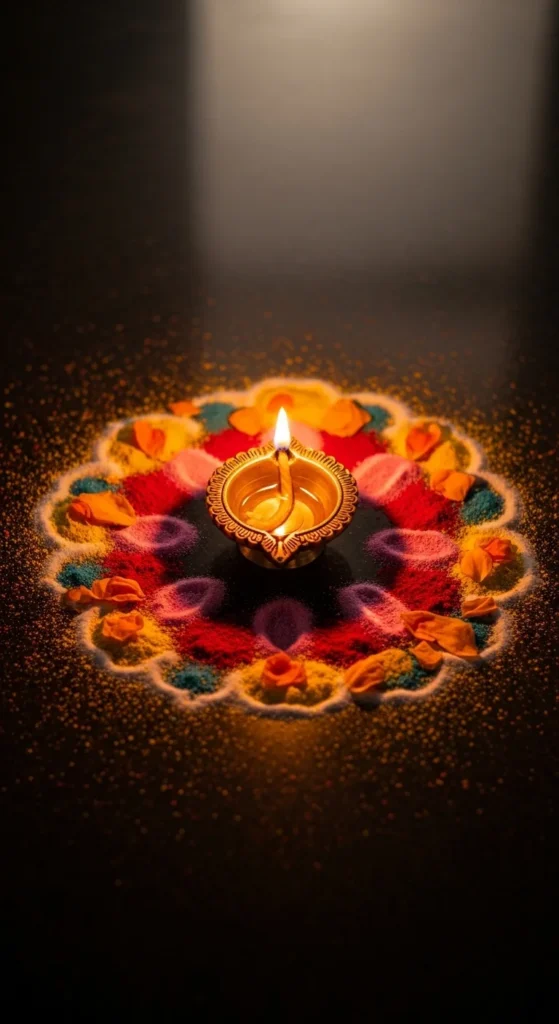
Sometimes the diya should be the star.
Draw a simple circular base using white powder. Add soft color shading around the edges.
Place one bright diya in the middle.
The light creates most of the visual impact.
Even spacing around the diya makes the design feel balanced.
Budget tip: Keep the powder work minimal and let the lamp do the heavy lifting.
This is perfect when time is short but you still want a festive look.
28. Leaf and Dot Border Design
Borders alone can decorate an entrance beautifully.
Create a simple circular or square outline. Around it, alternate small leaf shapes with white dots.
This pattern frames any plain center nicely.
Keep the rhythm consistent for a tidy finish.
Budget idea: Use real garden leaves if available. They add texture at no cost.
This design is great when you want something decorative without filling large areas.
29. Mini Daily Practice Rangoli

Practice makes rangoli easier.
Create a tiny flower using just five dots. Connect and fill with two colors.
Keep it small and quick.
Doing one mini rangoli daily builds hand control fast.
Do not worry about perfection. Focus on steady movement.
Budget tip: Use leftover powder from larger designs.
Within a week, your lines will look much cleaner.
This is perfect for beginners building confidence.
30. Multi-Ring Festival Rangoli
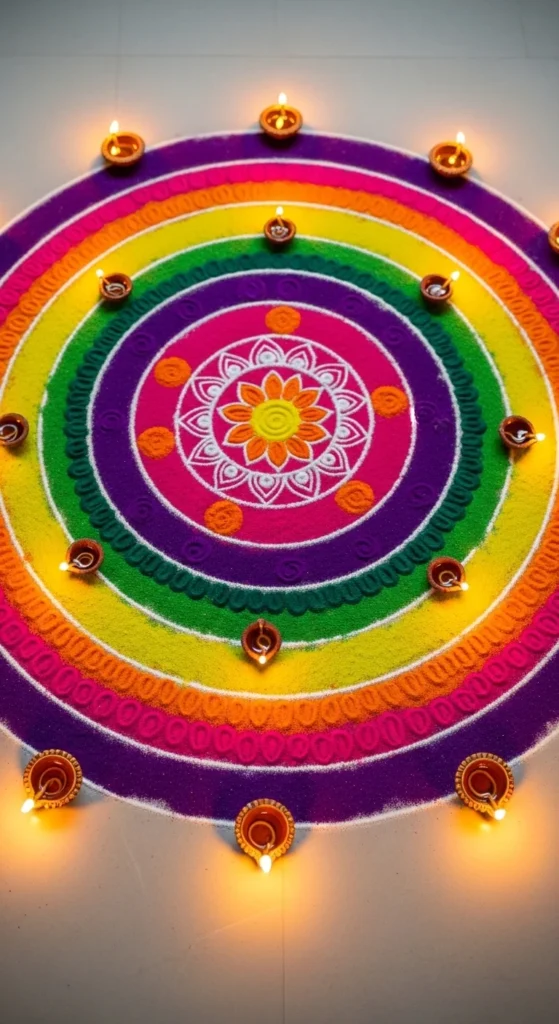
This design looks grand but follows a simple system.
Trace four or five concentric circles. Fill each ring with a different color.
Add tiny white dots between rings for extra detail.
Work from the center outward to avoid smearing.
Budget trick: Alternate strong colors with white rings to save colored powder.
Place diyas evenly around the outer ring for night events.
This rangoli is perfect for Diwali entrances and larger spaces while still staying beginner friendly.
Conclusion
Beautiful rangoli does not require complicated patterns or expensive materials. With simple shapes, smart color choices, and a few beginner tricks, you can create designs that look far more detailed than the effort involved. Start small, practice often, and use what you already have at home. Even a five-minute rangoli can bring warmth and festive charm to your space.


