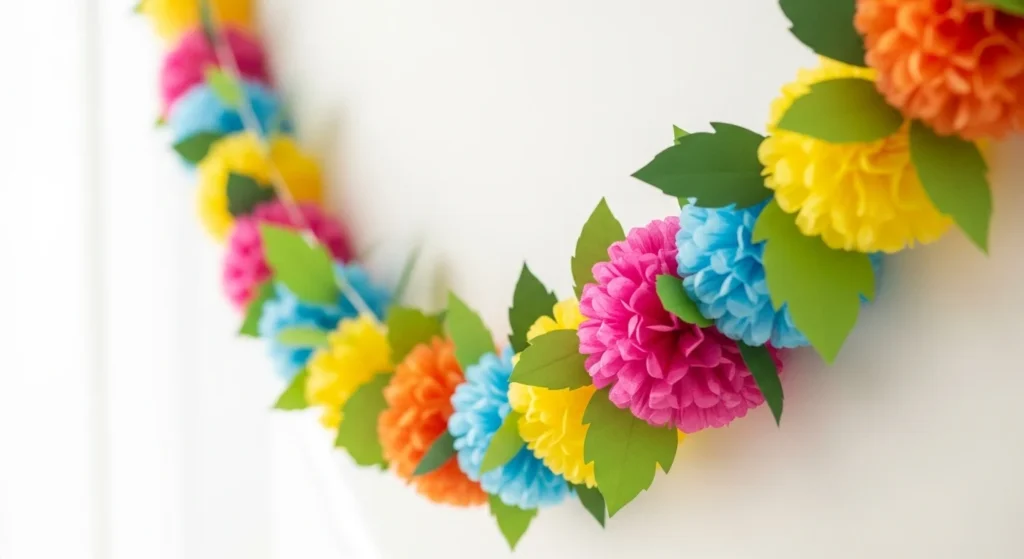
A paper flower garland is one of the easiest ways to transform a party space fast. It adds color, movement, and a handmade touch that looks amazing in photos. The best part? You can make a full garland in an afternoon using simple supplies.
Whether you’re decorating for birthdays, baby showers, classrooms, or holidays, this step-by-step guide will help you create a garland that looks full and polished without spending much.
Choose Your Garland Style
Before crafting, decide the overall look. This helps you pick the right flowers and spacing.
Popular party styles
- Tissue pom-pom strand: fluffy and quick
- Layered cardstock flowers: clean and structured
- Crepe fringe garland: soft and flowing
- Cascading drops: dramatic photo backdrop
Beginner tip:
If this is your first garland, start with tissue pom-poms. They are fast and very forgiving.
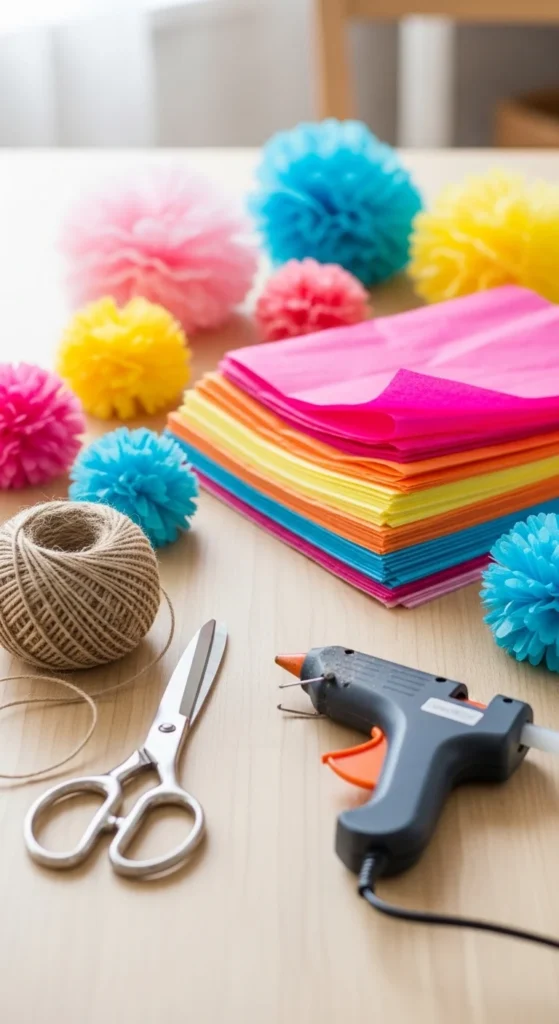
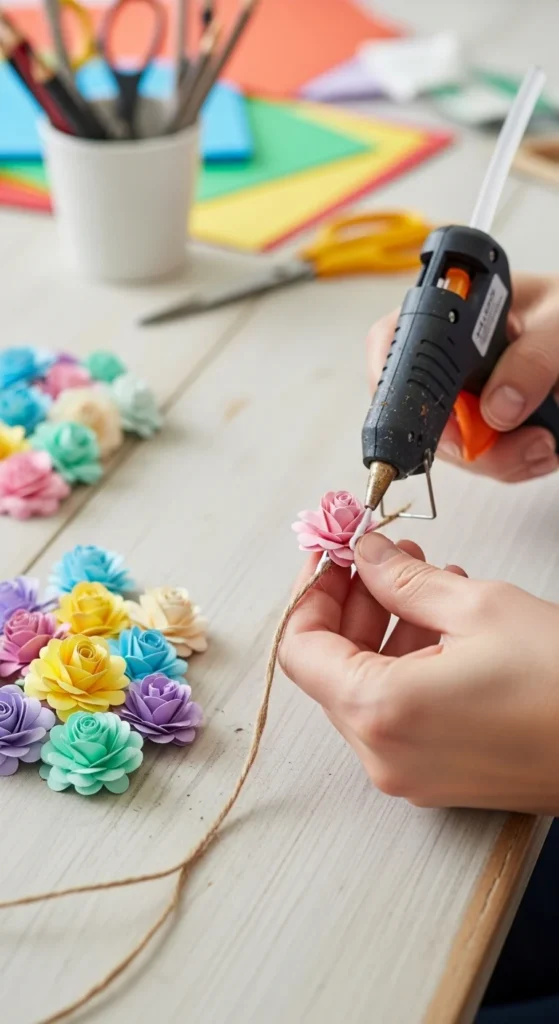
Gather Simple Supplies
You probably already have most of these at home.
String base
- Twine (rustic look)
- Fishing line (floating effect)
- Ribbon (decorative)
Flower materials
- Tissue paper (fastest)
- Crepe paper (soft texture)
- Cardstock (structured blooms)
Tools
- Scissors
- Hot glue gun or tacky glue
- Needle or hole punch
- Tape
- Optional: straw pieces for spacers
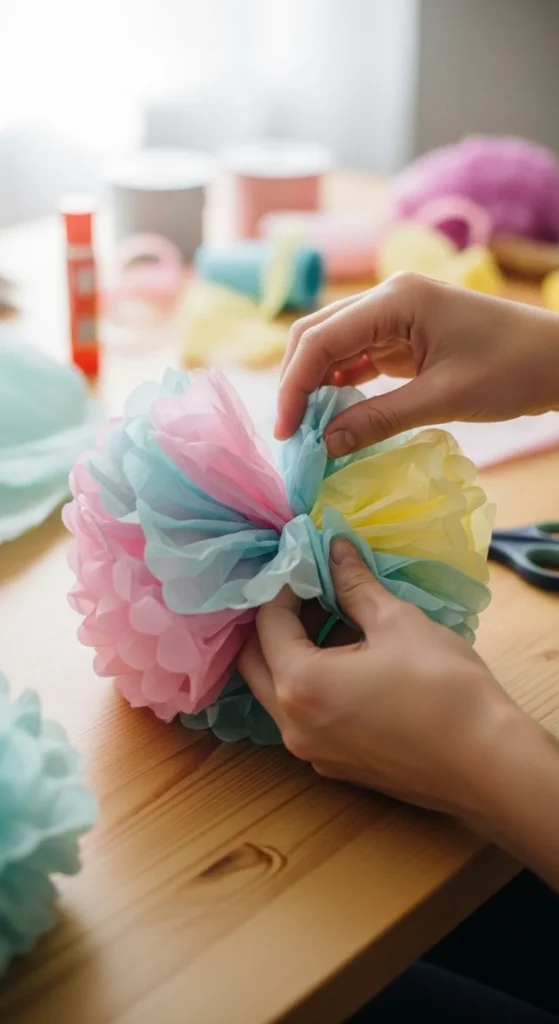
Make Quick Tissue Pom-Pom Flowers
These fluffy flowers are perfect for party garlands.
Step-by-step
- Stack 6–8 sheets of tissue paper.
- Fold accordion-style (about 2–3 cm per fold).
- Tie the center tightly with thread or thin wire.
- Round or point the ends with scissors.
- Gently separate each layer and fluff outward.
Size guide
- Small: 15 cm sheets
- Medium: 20 cm sheets
- Large: 25–30 cm sheets
Pro tip:
Pull slowly when fluffing to avoid tearing.
Prepare Leaves and Fillers
Leaves break up the color and make the garland look fuller.
Simple leaf method
- Cut green paper into ovals
- Fold each leaf down the center
- Slightly curl the tips
Optional fillers
- Mini paper buds
- Small daisies
- Tiny folded paper shapes
Spacing idea
- 1 large flower
- 1–2 leaves
- 1 small flower
Repeat this pattern along the string for balance.
String the Flowers the Right Way
This is where many garlands go wrong. Proper spacing prevents clumping.
Method 1: Tie-on method (best for pom-poms)
- Leave long center threads on each pom-pom.
- Tie directly onto the twine.
- Slide to adjust spacing.
Method 2: Pierced flower method (cardstock blooms)
- Punch a small hole in the flower center.
- Thread onto string.
- Tie overhand knots on both sides to lock position.
Method 3: Glue-on method (fastest)
- Place a small glue dot on the back.
- Press onto twine.
- Hold a few seconds.
Anti-clump trick
Use tiny straw pieces between flowers as hidden spacers.
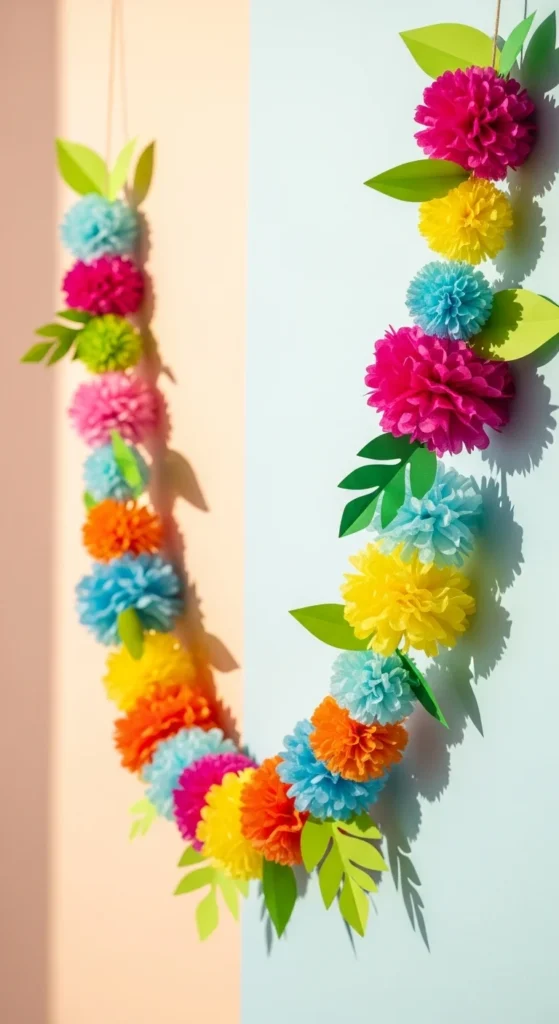
Create a Cascading Party Look (Optional)
Want that Pinterest-style backdrop? Try a drop garland.
How to do it
- Cut several vertical strings at different lengths.
- Place larger flowers toward the bottom.
- Keep smaller blooms near the top.
- Hang from a horizontal main strand.
Length guide
- Short drop: 30–45 cm
- Medium drop: 60–75 cm
- Long drop: 90+ cm
This creates beautiful visual movement behind dessert tables or photo booths.
Fluff and Final Adjustments
Before hanging, take a minute to shape everything.
Quick finishing checklist
- Fluff all tissue layers fully
- Rotate flowers to face forward
- Spread leaves outward
- Check spacing along the string
- Trim any visible glue strings
If the garland twists when hung, lightly tape the ends to the wall to keep it facing forward.
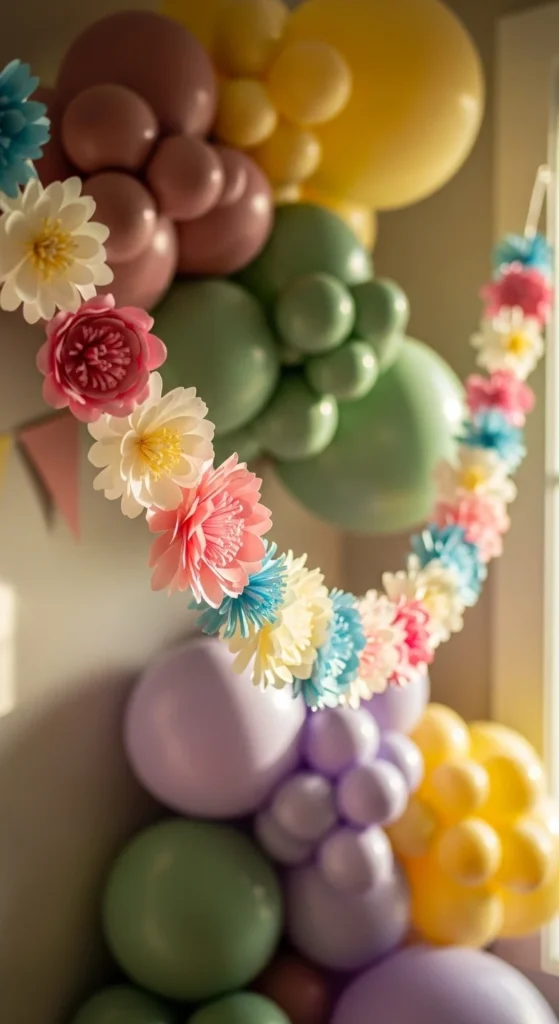
Smart Color Combos for Parties
Color makes a big difference in photos.
Easy winning palettes
- Pink + gold + white (birthdays)
- Pastel mix (baby showers)
- Bright rainbow (kids’ parties)
- White + green (minimal theme)
- Purple + lavender (spring events)
Rule of thumb
Use 2 main colors + green leaves for the cleanest look.
Storage and Reuse Tips
Good news — paper garlands can be reused.
To store
- Wrap loosely around cardboard
- Avoid crushing the flowers
- Keep in a dry box
To refresh
- Re-fluff tissue layers
- Replace any flattened flowers
- Add extra leaves if gaps appear
Conclusion
A paper flower garland is one of the fastest ways to make a party space feel styled and festive. With simple tissue pom-poms, balanced spacing, and a sturdy string base, you can create decor that looks far more expensive than it is.
Make one this weekend, experiment with colors, and reuse it for future celebrations. Save this guide so your next party setup comes together in minutes!


