Some nights you want a project that feels calming, not complicated. The best easy crafts for adults use what you already have, keep steps short, and still give you something you’re proud to display or gift. Think Mod Podge, scrap fabric, jars, paper, and a few Dollar Tree finds. Pick one idea below, set a timer for 30–60 minutes, and let “good enough” be the goal. Clean edges, simple color choices, and a quick seal at the end make even basic crafts look polished.
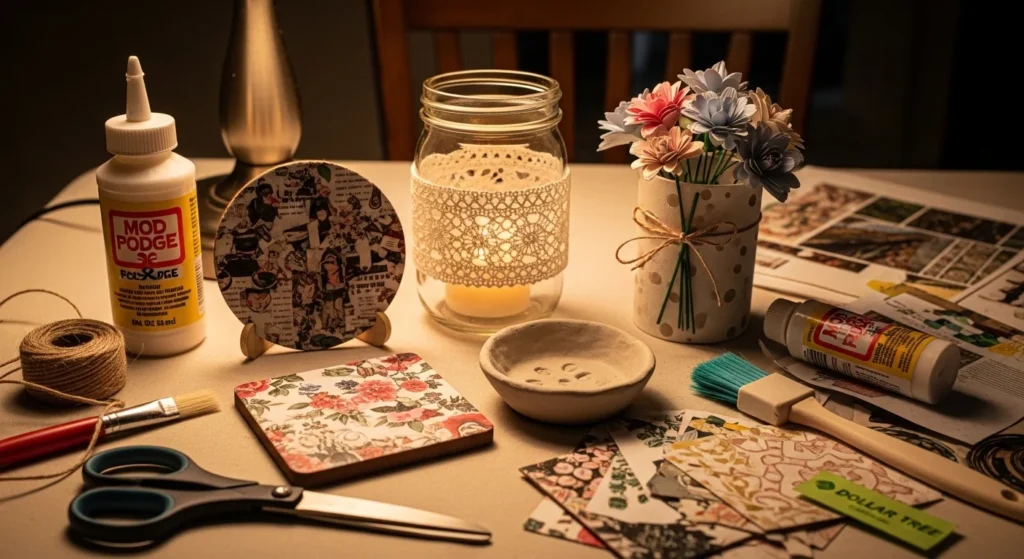
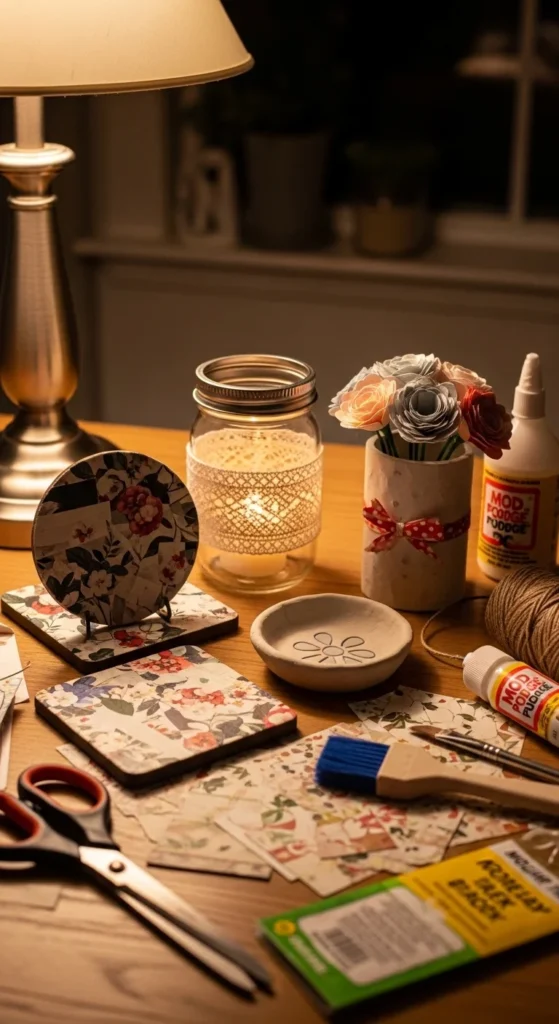
1) DIY Photo Coasters With Mod Podge
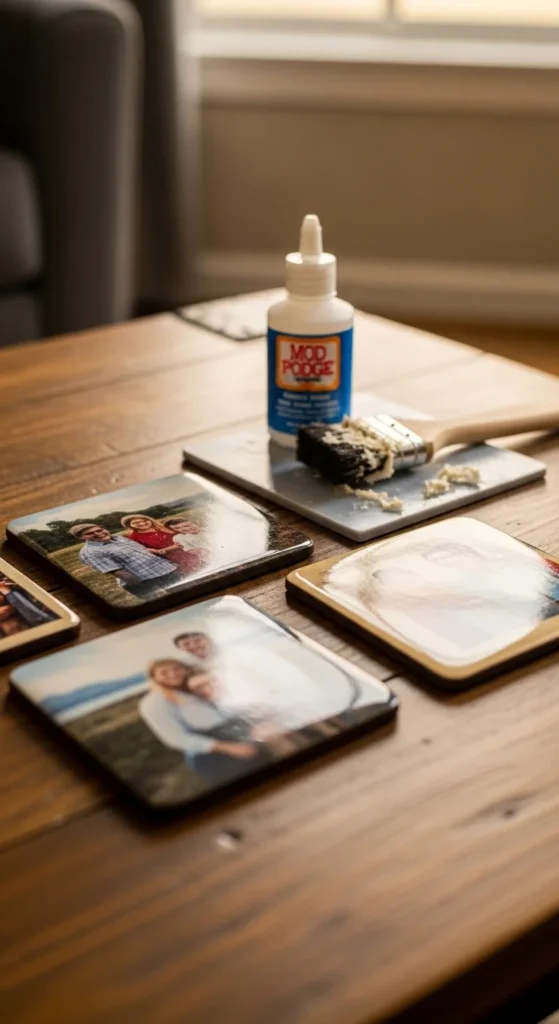
This is a fast gift that looks personal. Start with plain tile coasters or cheap wood squares. Print photos on regular paper. Keep images simple and high-contrast so they read well.
Brush a thin layer of Mod Podge on the coaster. Press the photo down and smooth from the center out with a card. Let it dry for 10–15 minutes.
Trim edges with a craft knife. Then seal the top with two more thin coats. Let each coat dry before the next. Thin coats look cleaner than one thick coat.
Budget tip: use scrapbook paper instead of photos for a set that matches your living room colors. That makes them look “store-bought.”
DIY example: make four coasters using travel photos for a friend. Or make a set with vintage-style botanical paper for your own coffee table.
Add felt pads underneath so they don’t scratch furniture.
2) Upcycled T-Shirt Fabric Bowls
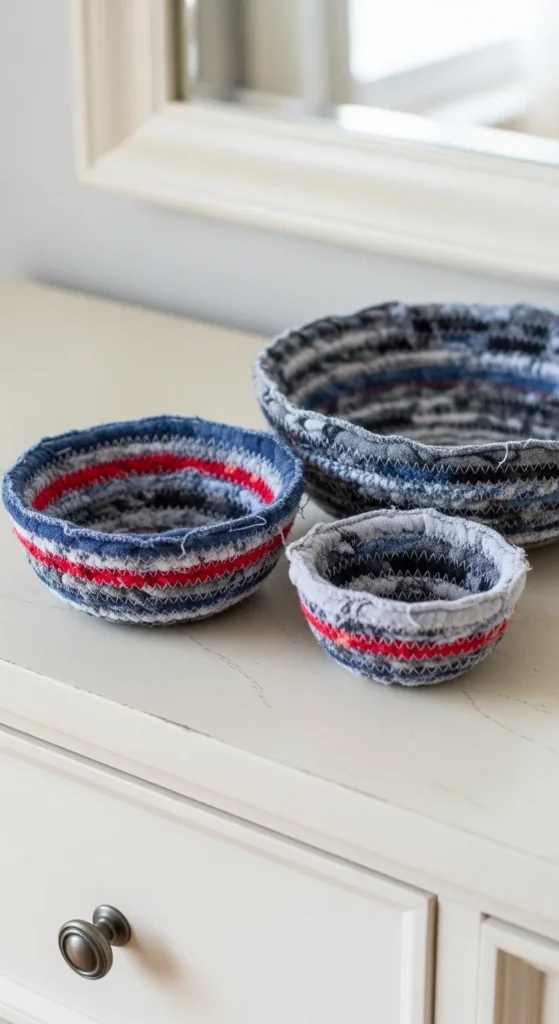
Fabric bowls are perfect for scraps and old tees. Cut a t-shirt into long strips. Twist or braid two or three strips together for a thicker “rope.”
Coil the rope into a flat spiral and glue as you go with hot glue. Once the base is wide enough, start building up the sides by stacking the rope coil higher.
Keep your bowl small so it stays neat. A 4–6 inch bowl finishes faster and looks more intentional.
Budget tip: use one solid color shirt. Monochrome bowls look cleaner than mixed colors.
DIY example: make a bowl for your bedside table to catch rings and hair clips. Or make two matching bowls for a bathroom shelf.
If you don’t have hot glue, use strong craft glue and clips. It takes longer to dry, but it still works.
3) Lace-Wrapped Mason Jar Lantern
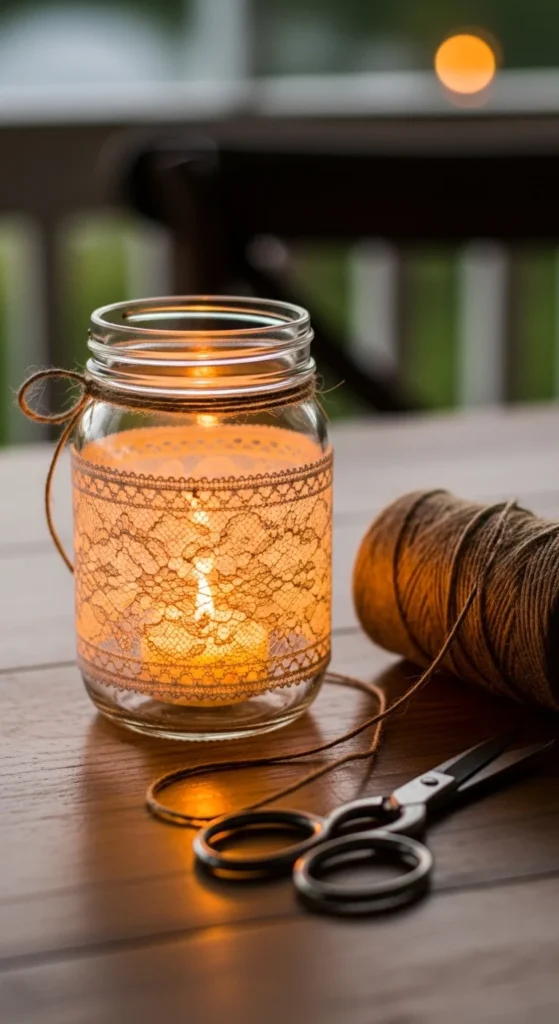
This one is relaxing and fast. Grab a mason jar, a lace strip, and glue. Wrap the lace around the jar and trim to fit. Glue the edge and press it down.
Add a twine bow around the top for a finished look. Place a battery tea light inside for easy use indoors.
Budget tip: thrift stores often have lace trim and jars for very little. You can make a set without spending much.
DIY example: make three jars in slightly different lace patterns and group them as table decor.
If you want color, lightly dab acrylic paint over the lace once it’s dry. Keep it subtle so the lace texture shows.
4) Leaf-Imprint Air-Dry Clay Jewelry Dish
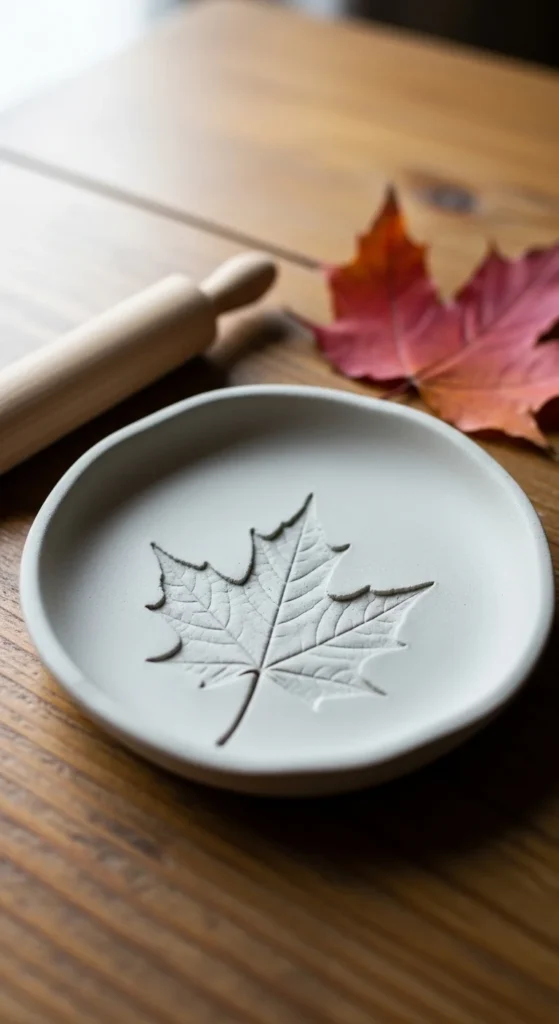
This looks fancy but is beginner-friendly. Roll air-dry clay into a smooth circle. Press a clean leaf into the clay firmly, then peel it away to reveal the texture.
Lift the clay circle into a small bowl to form a gentle curve. Smooth the rim with a damp finger.
Let it dry overnight. Then paint lightly if you want, or keep it natural. A thin clear seal coat helps it stay clean-looking.
Budget tip: use a single paint color and highlight only the raised leaf veins.
DIY example: make one dish for keys by the door and one for rings near the sink.
Keep it small so drying is quicker and cracking is less likely.
5) Paper Flower Bouquet for a Vase
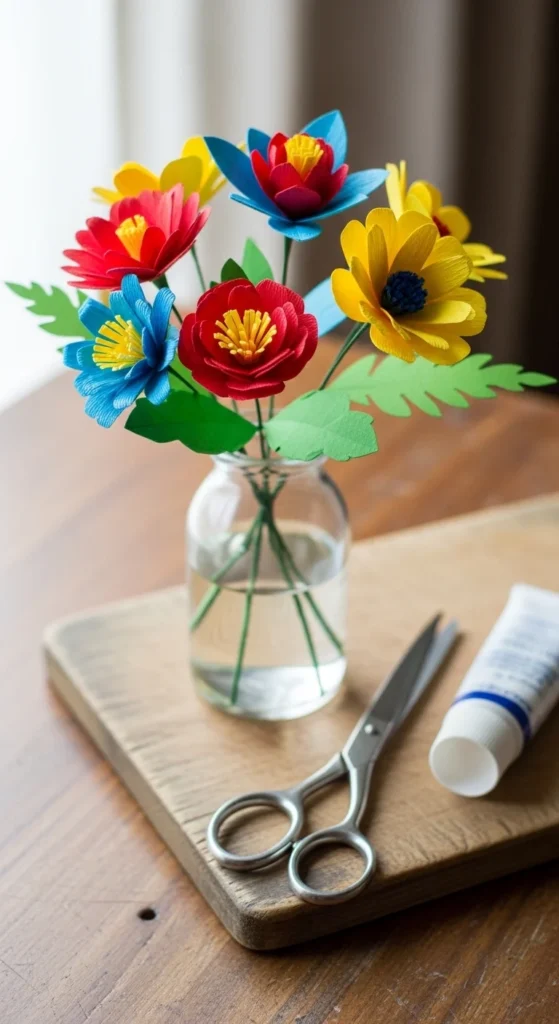
Paper flowers give a big visual reward fast. Use colored paper or scrapbook paper. Cut petal shapes and wrap them around a tight paper center.
Make three flower sizes. Small, medium, and large. Mix them for a natural look.
Budget tip: use pages from an old book or brown kraft paper for a neutral, modern bouquet.
DIY example: make a bouquet for a dining table centerpiece. Or make single flowers as gift toppers.
For a cleaner look, pick one color family. Matching tones look polished.
6) Glittery Clear Phone Case (Sealed)
Use a cheap clear case. Brush a thin layer of clear glue inside the case and sprinkle glitter lightly. Tap off extra glitter.
Seal with a second thin coat of clear glue or a clear sealer once the first layer dries. Thin layers prevent clumps and keep it looking smooth.
Budget tip: choose one glitter color and one fine glitter size.
DIY example: make a case in a soft neutral shimmer for daily use, or a bold color for weekends.
Let it dry fully before putting it on your phone.
7) Decorative Switch Plate Makeover
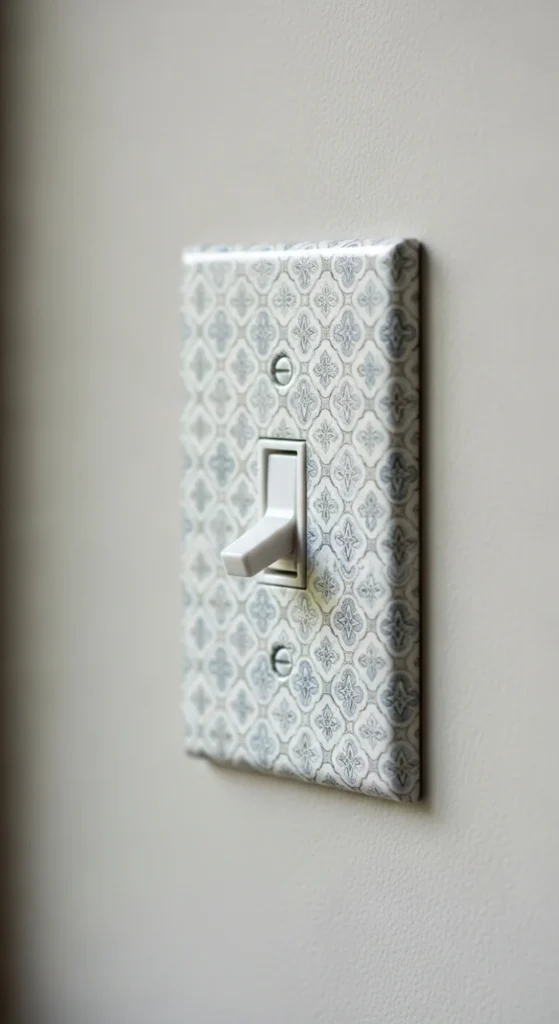
This tiny project makes a room feel styled. Remove the switch plate and clean it. Cut scrapbook paper to fit the front.
Glue paper down with Mod Podge and smooth it flat. Trim holes carefully with a craft knife. Seal with one or two thin coats.
Budget tip: use the same paper on two plates in the same room for a matched look.
DIY example: use a subtle floral print for a bathroom, or a geometric print for a desk area.
Reinstall once fully dry.
8) Photo Glass Gem Magnets
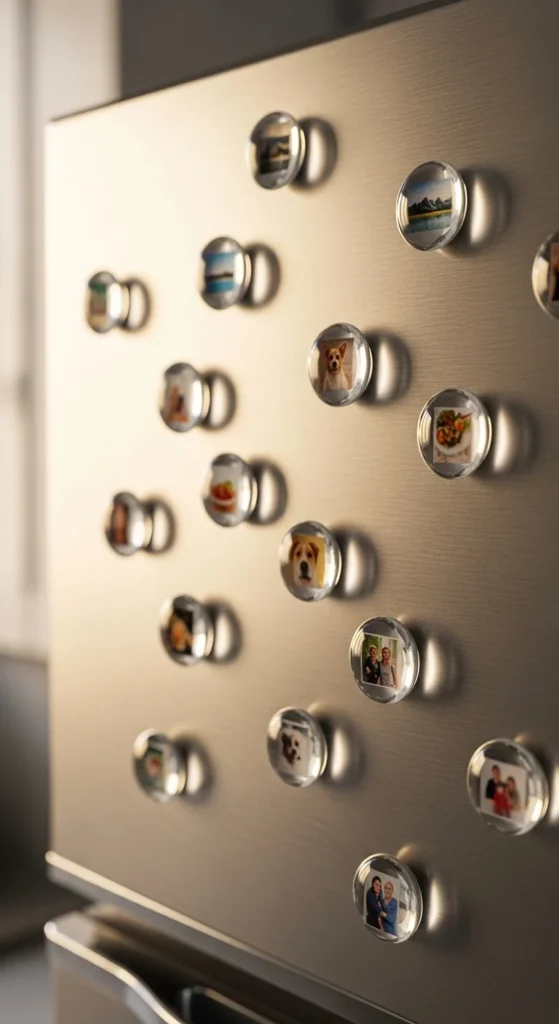
Print tiny photos and cut them into circles. Glue each photo to the flat side of a glass gem. Once dry, glue a small magnet to the back.
Budget tip: use patterned paper instead of photos for a cohesive set.
DIY example: make magnets of family faces for gifting, or a matching set in your kitchen colors.
Let glue dry fully so the images don’t shift.
9) Cork Trivet With Simple Pattern
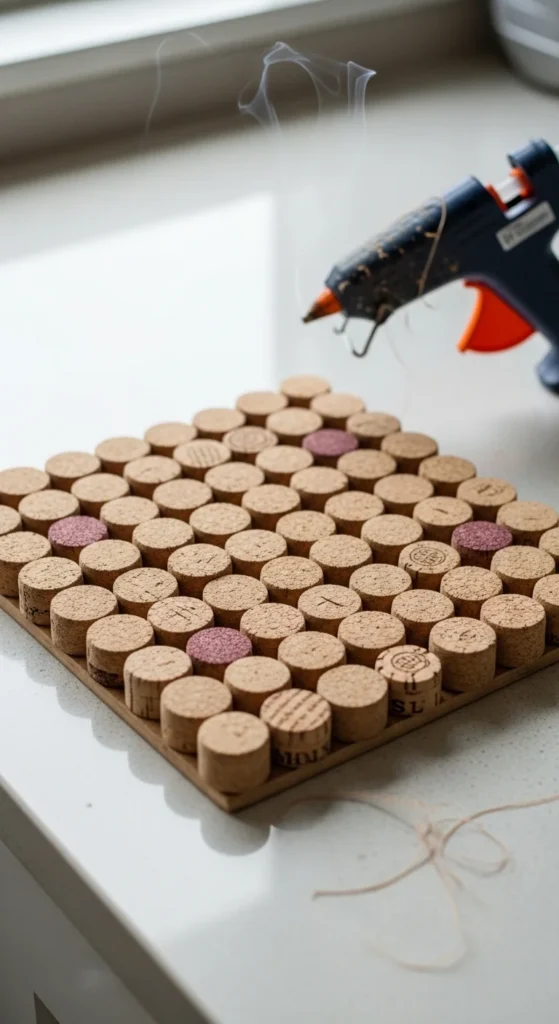
Save corks or buy cork tiles. Arrange them in a simple grid and glue them tightly together.
Sand edges lightly if needed. Seal with a clear coat so it wipes clean.
Budget tip: keep the shape basic—square or rectangle.
DIY example: make one trivet for hot pans and one smaller one for a teapot.
10) Painted Bangles With Stencil Details
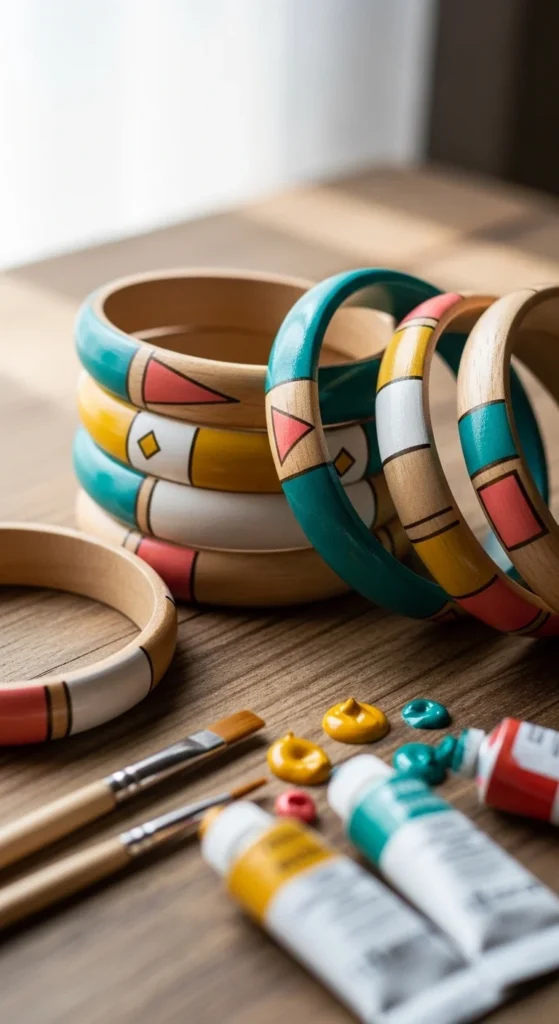
Use plain bangles and acrylic paint. Paint a base coat, let it dry, then add simple lines or dots.
Budget tip: pick two colors only. Two-tone looks crisp.
DIY example: make a small set for a friend’s gift. Or make a neutral set for everyday wear.
Seal with clear varnish for durability.
11) Tassel Earrings (Fast Party Craft)
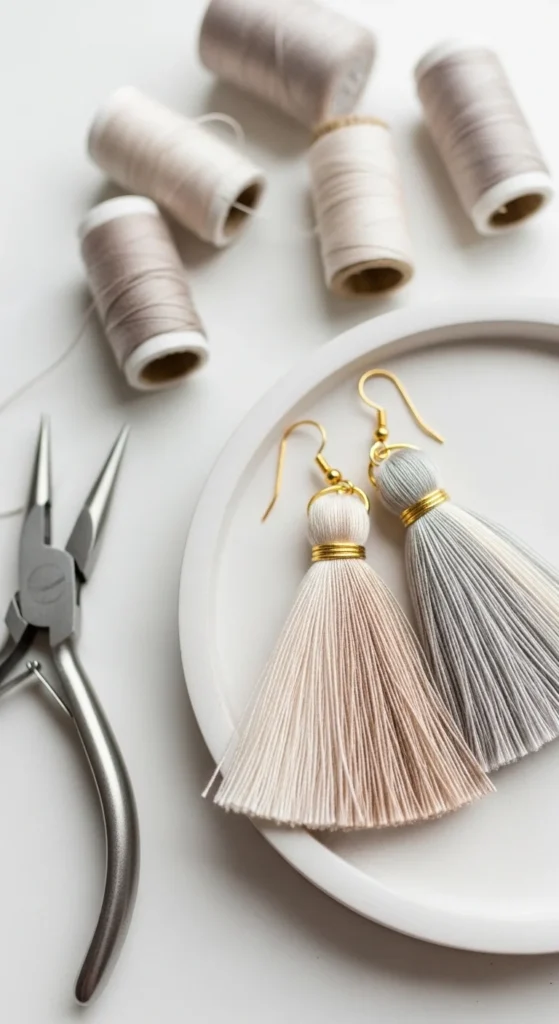
Wrap embroidery floss around a small card. Tie at the top and cut the bottom to form a tassel. Attach a jump ring and earring hook.
Budget tip: use one tassel color and matching hooks.
DIY example: make a pair in a neutral color for daily wear and a bold pair for weekends.
Keep tassels short for a neat finish.
12) Felt Ball Garland for a Cozy Corner
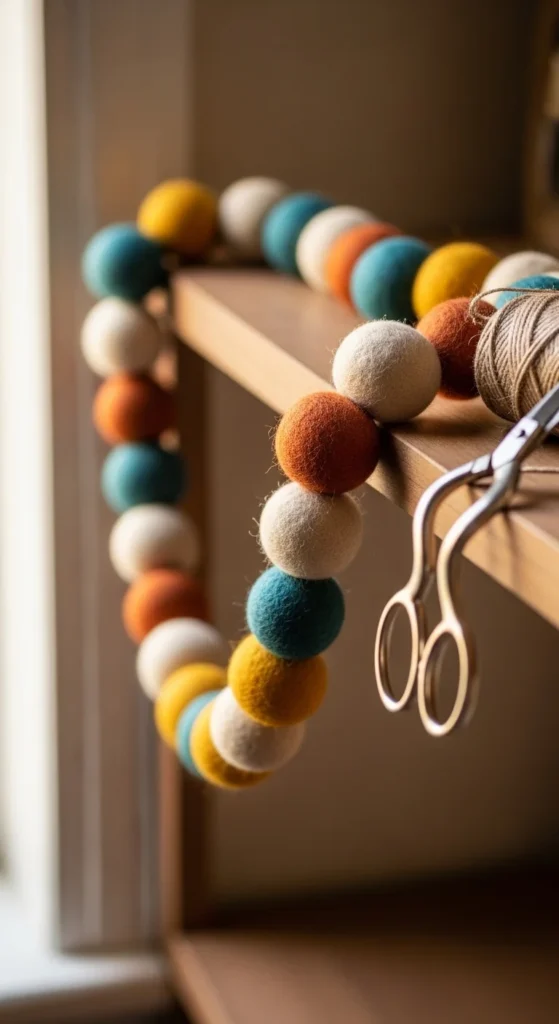
String felt balls onto twine with a needle. Space them evenly and tie off the ends.
Budget tip: choose one palette (neutrals or pastels).
DIY example: hang above a desk, bed, or shelf for instant cozy decor.
13) Denim Scrap Bunting
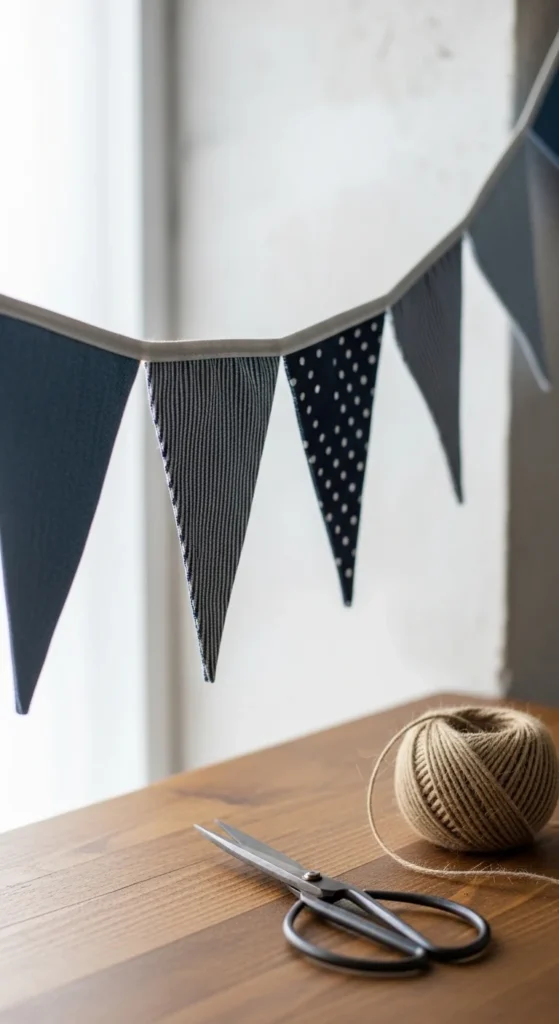
Cut triangles from old denim. Punch holes and string onto twine. Add small fabric scraps for contrast if you want.
Budget tip: denim hides messy edges well.
DIY example: use for party decor, then store for later.
14) Bath Salts Jar Gift

Mix Epsom salt with a small amount of fragrance oil or dried herbs. Layer it in a jar for a pretty look.
Budget tip: keep it simple with one herb like dried lavender.
DIY example: gift it with a small washcloth or sponge.
Use oils lightly so salts stay dry.
15) Clay Ornaments (Simple Shapes)
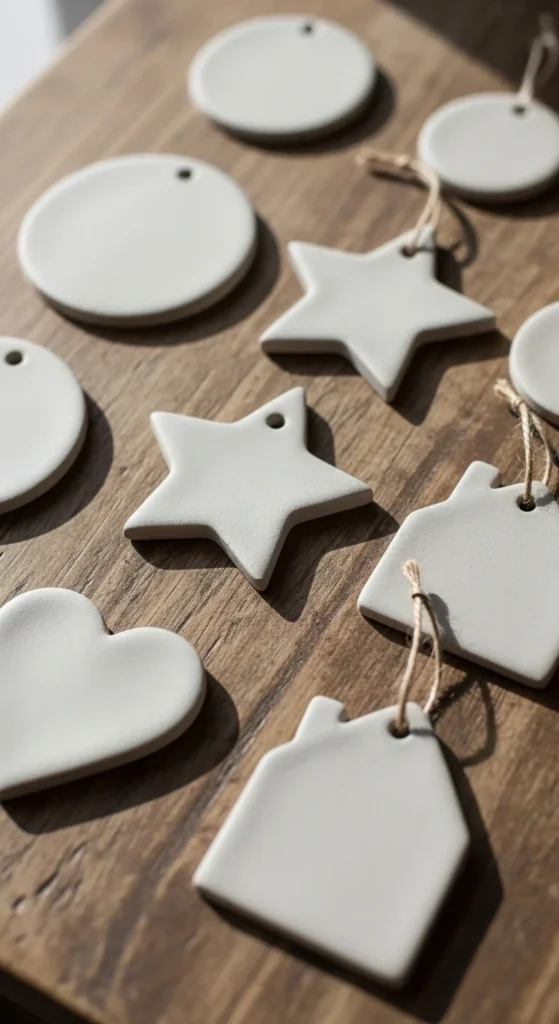
Cut clay shapes with cookie cutters. Punch a hole for hanging. Let dry, then paint or seal.
Budget tip: paint one color for a modern set.
DIY example: use as gift toppers or seasonal decor.
16) Decorative Clothespin Photo Clips
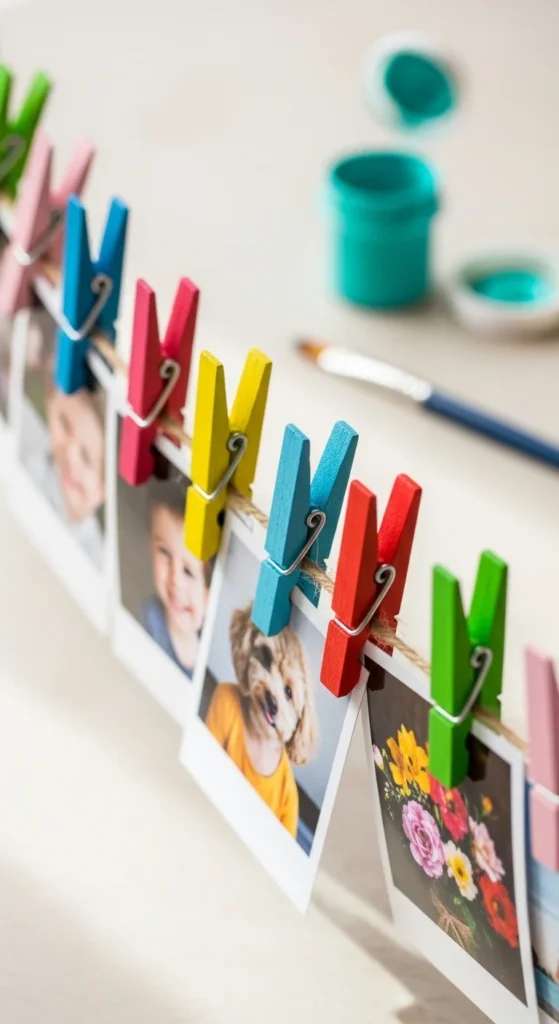
Paint clothespins in one or two colors. Let dry. Clip photos onto twine for quick wall decor.
Budget tip: keep colors minimal for a clean look.
DIY example: create a photo line above a desk.
17) Upcycled Jar Storage With Painted Lids
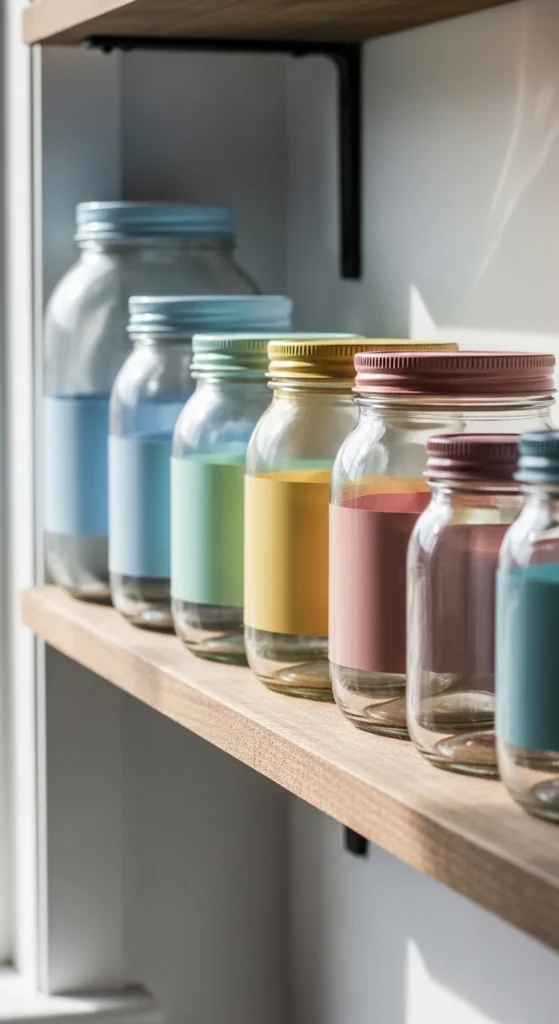
Paint jar lids in one matching color. Use jars for cotton pads, buttons, spices, or snacks.
Budget tip: matching lids make the set look expensive.
DIY example: line three jars on a bathroom shelf.
18) Simple Bead Keychain Charm
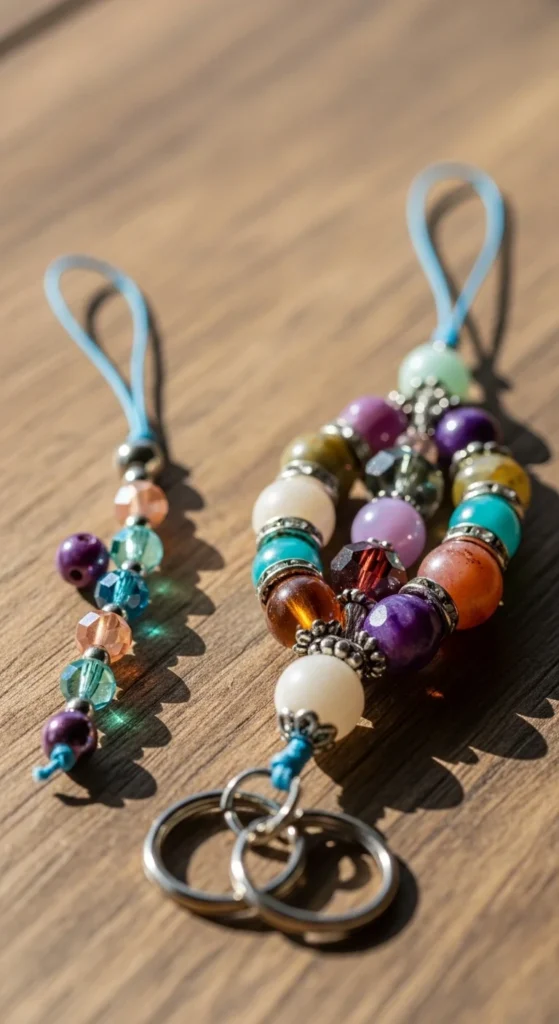
String beads in a repeating pattern. Tie securely. Add a key ring.
Budget tip: stick to two bead colors.
DIY example: make one for keys and one for a bag zipper pull.
19) Washi Tape Planter Makeover
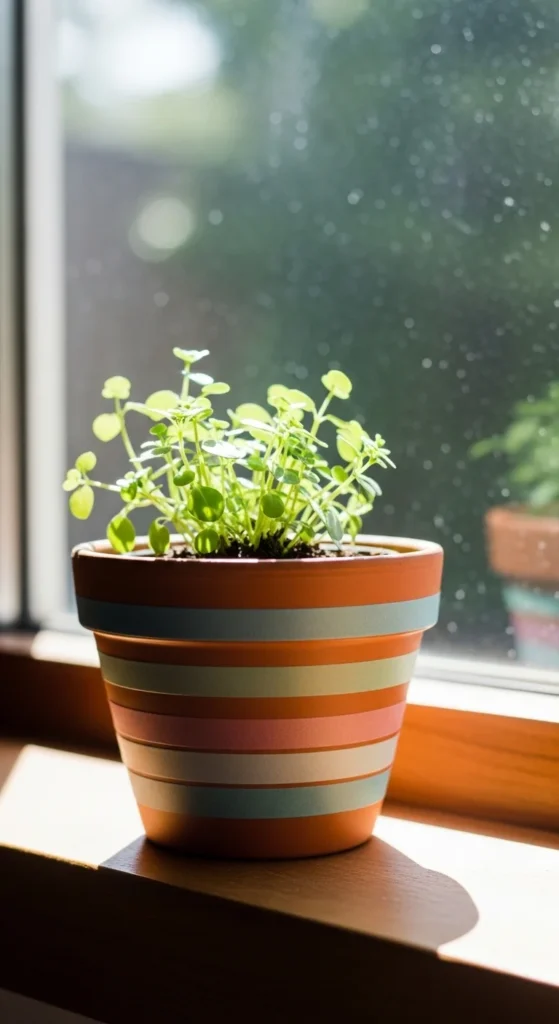
Wrap tape in straight lines. Press edges down firmly. Add a light seal if you want longer wear.
Budget tip: decorate two pots with the same tape.
DIY example: add herbs to your kitchen window.
20) Faux Marble Coaster Set (Paint + Clear Coat)
Paint a white base. Add faint gray veining with a thin brush. Seal when dry.
Budget tip: keep veining light so it looks clean.
DIY example: make a set for gifting.
21) Simple Paper Quilling Mini Art (Beginner Strips)
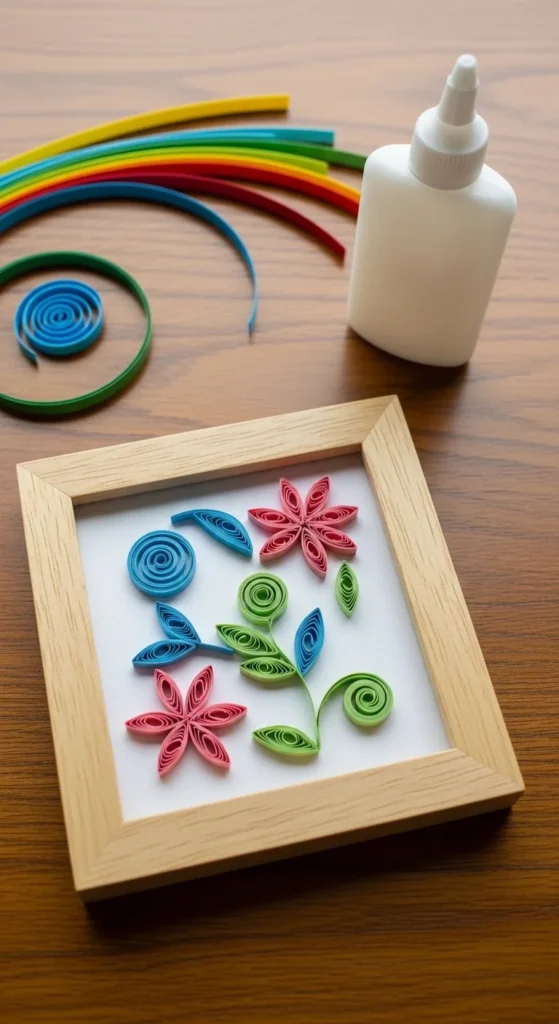
Roll paper strips into coils and pinch into teardrops. Glue into a simple floral cluster.
Budget tip: cut strips from leftover cardstock.
DIY example: frame one tiny design for a desk.
22) Painted Doormat (Stencil Style, No Words)
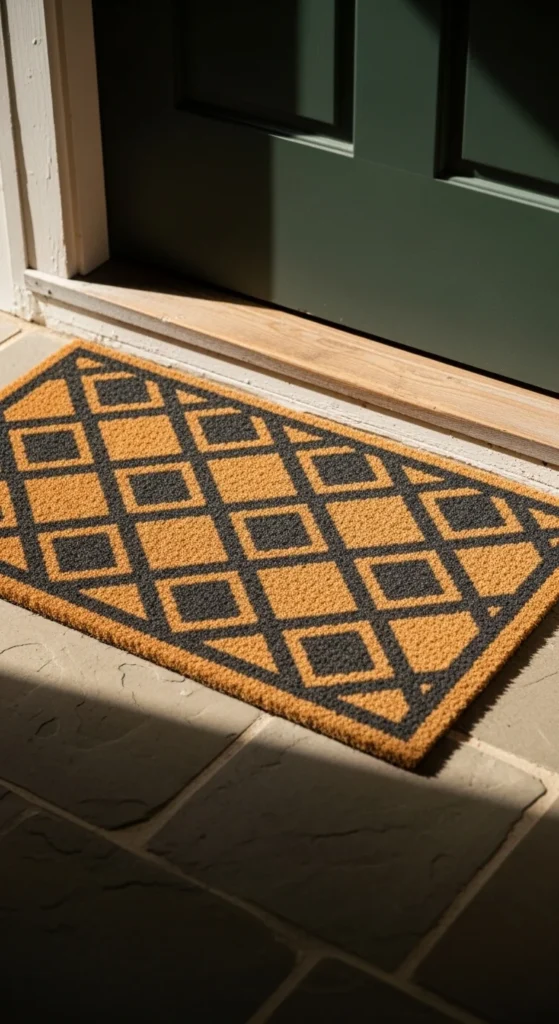
Use painter’s tape to create clean shapes. Paint with outdoor paint. Let dry fully.
Budget tip: patterns look cleaner than lettering.
DIY example: make stripes or a geometric border.
23) Mini Cork Board Frame (No Writing)
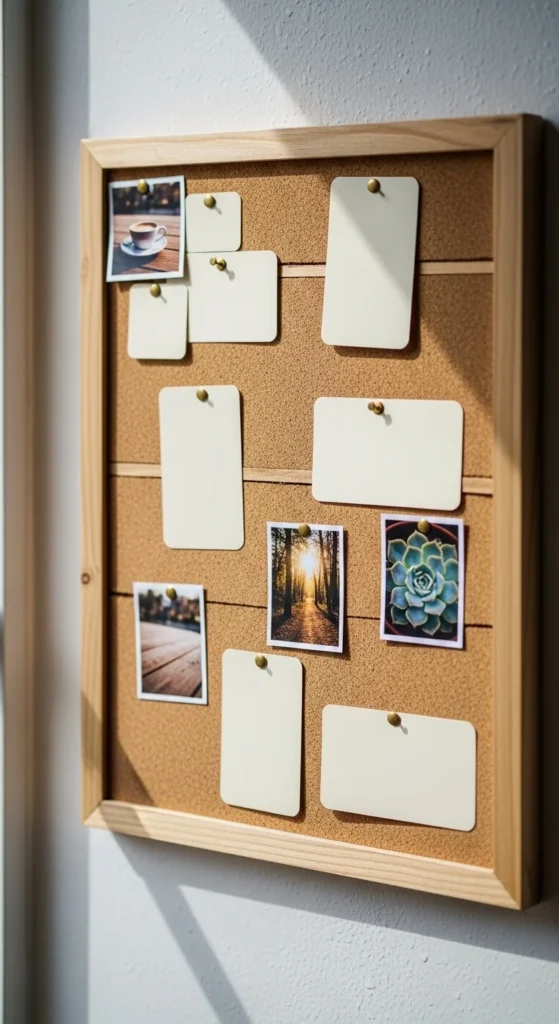
Frame a small cork board with scrap strips. Pin photos and blank cards.
Budget tip: keep it neutral for a clean look.
DIY example: hang near your desk.
24) Fabric-Wrapped Notebook Cover
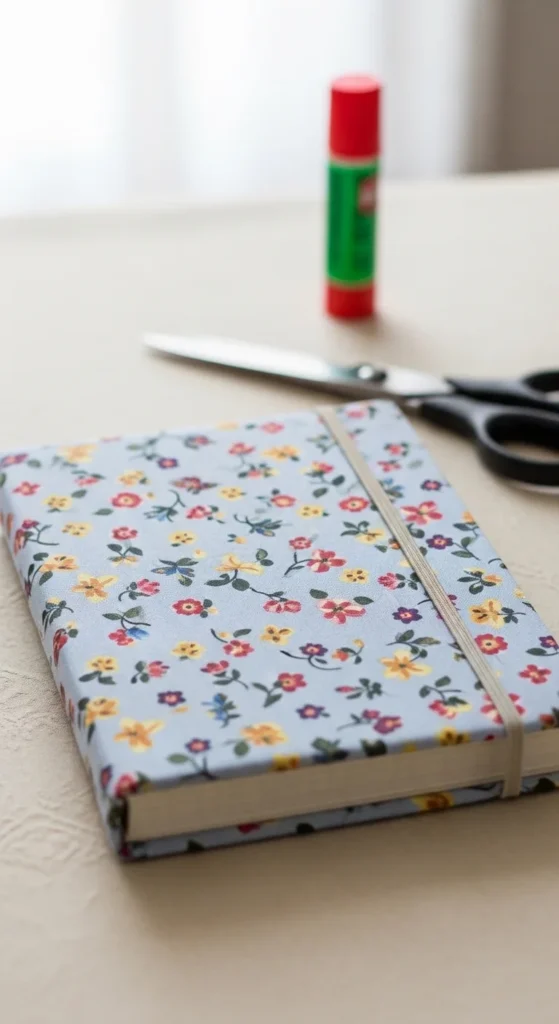
Wrap fabric around a notebook cover and glue inside edges neatly.
Budget tip: use scrap fabric from an old shirt.
DIY example: make two notebooks in matching fabric.
25) Mini Rope Basket (No Sew)

Coil rope and glue as you go. Build sides gradually.
Budget tip: make it small and one color.
DIY example: use it for remotes or craft supplies.
26) Decorative Cloth Napkin Rings
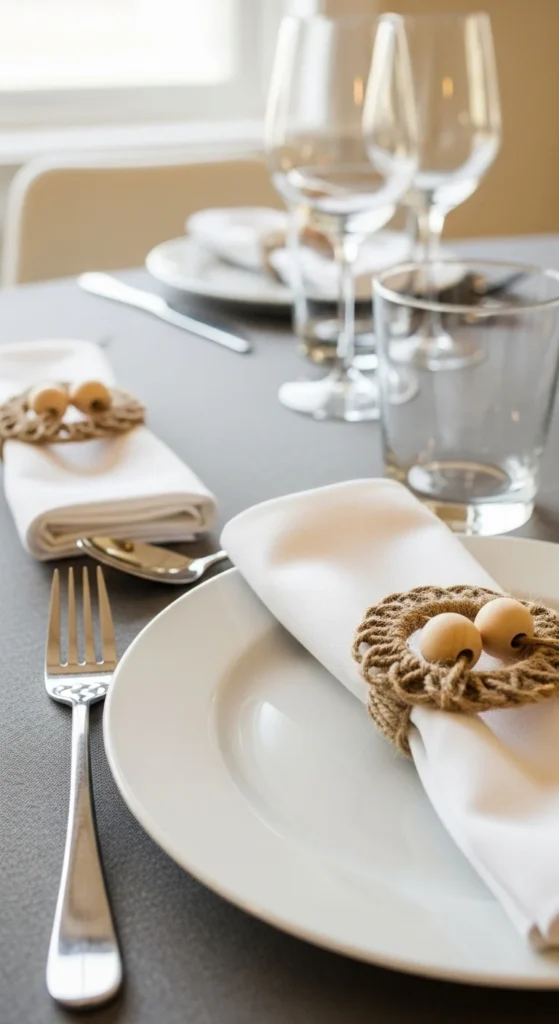
Wrap twine into loops, glue ends, add beads. Make a full set for a cohesive look.
Budget tip: keep bead shapes consistent.
DIY example: use for dinner guests or gifting.
27) Photo Tile Mini Wall Art (Mod Podge)
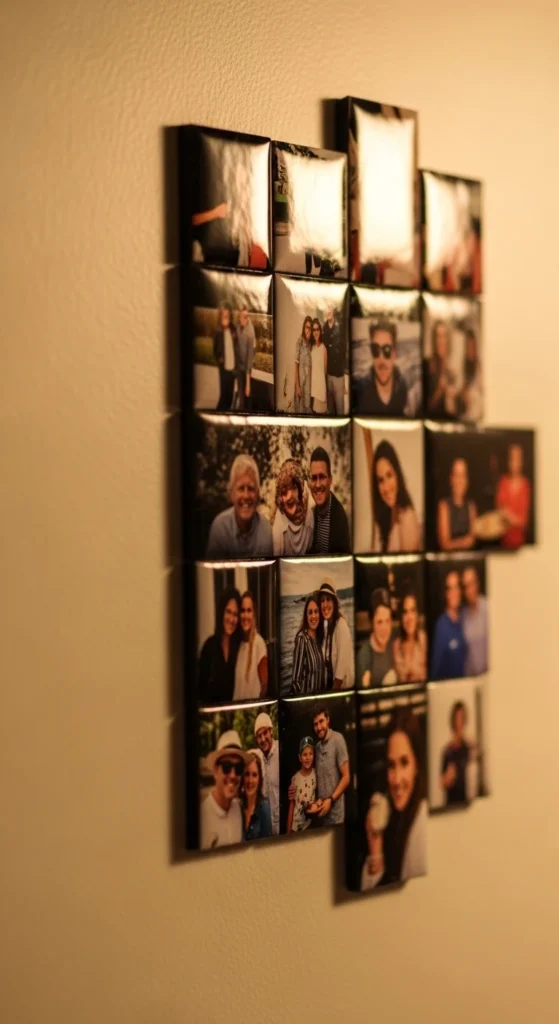
Glue photos onto small tiles or wood squares. Seal with thin coats for a smooth finish.
Budget tip: use one theme (travel, family, pets) for a cleaner wall look.
DIY example: make a 2×2 grid as a tiny gallery.
Conclusion
Easy crafts work best when steps stay short and your materials stay simple. Choose one idea for tonight, keep colors limited, and finish with a seal coat for a clean look. You’ll end the night with something useful, gift-ready, or ready to display—without a huge mess or a long supply list.


