Old books don’t have to collect dust on a shelf. With a few simple supplies, those yellowed pages can turn into beautiful decor that feels warm, nostalgic, and stylish. DIY book page art is popular because it’s affordable, beginner-friendly, and perfect for gifts or home styling. Whether you love wall art, paper flowers, or clever folded designs, these ideas help you create something meaningful without spending much. Grab a thrifted book, your basic craft tools, and try one of these creative projects today.
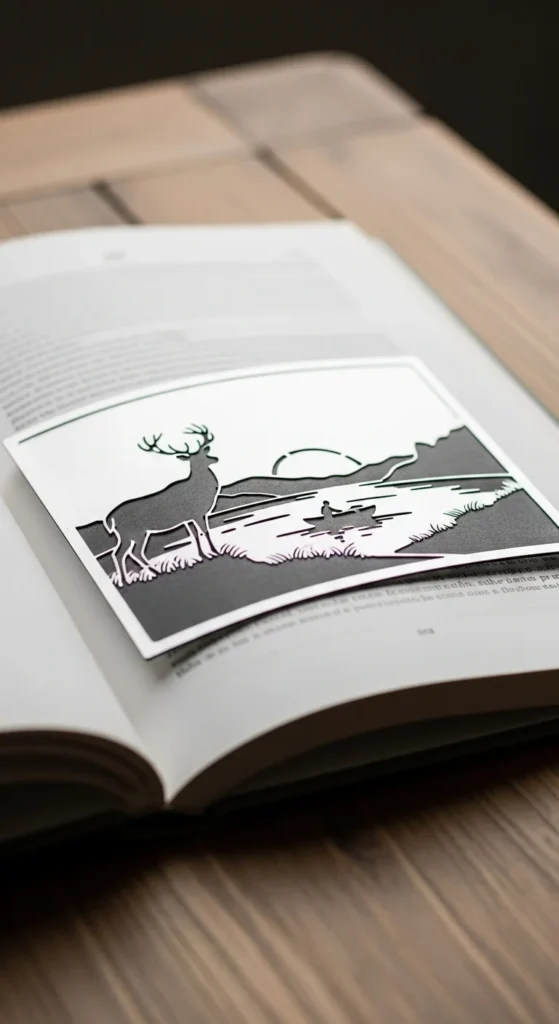
1. Framed Botanical Book Page Prints
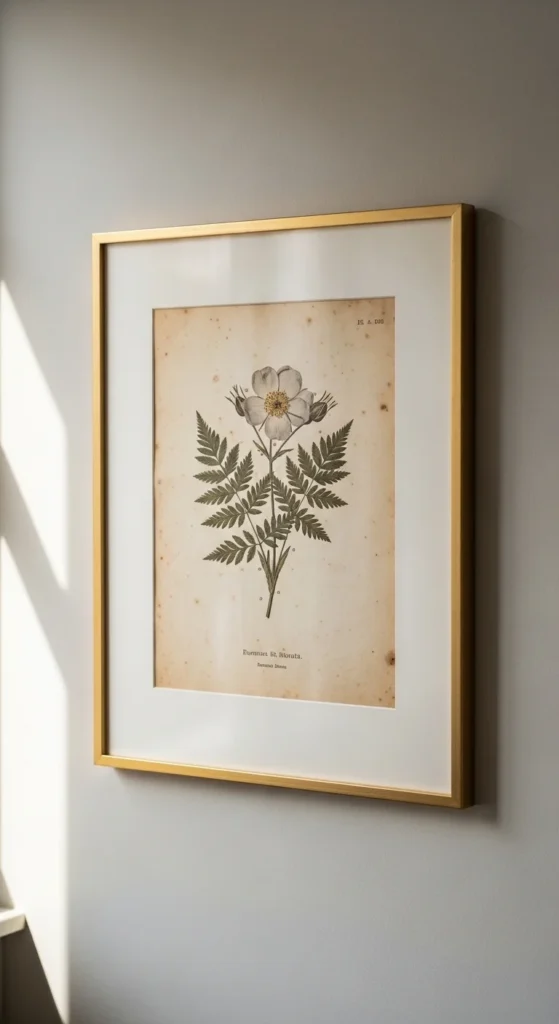
Botanical prints on book pages create instant vintage charm. Start by finding old dictionary or novel pages with warm, yellow tones. Print a simple floral PNG at low opacity so the text still shows through. This layered effect looks beautiful and intentional.
Use a basic home printer and regular ink. If your paper is thin, feed one page at a time. Let the ink dry fully to avoid smudging. Slide the finished page into a thrifted frame. Many dollar stores sell frames for under $5.
For extra detail, lightly shade petals with watercolor pencils. Keep it subtle. The printed text should remain visible. Hang one piece alone or group three together for a gallery wall look.
This project works well for beginners. It’s quick, affordable, and looks far more expensive than it is.
2. Folded Book Heart Sculpture

Folded book art looks complex but starts with simple steps. Choose a thick paperback you don’t mind repurposing. Using a ruler and pencil, mark equal fold points along the top edge of the pages.
Fold each page inward toward the spine. Work slowly and keep folds crisp. Patience matters here. After enough pages are folded, a heart shape begins to appear when the book is opened.
Set the finished piece on a shelf or coffee table. It works well for weddings, anniversaries, or cozy home decor. If you want a faster version, search for beginner fold patterns online.
Budget tip: library discard sales often sell books for very little. That makes this project almost free.
3. Watercolor Wash Book Page Art
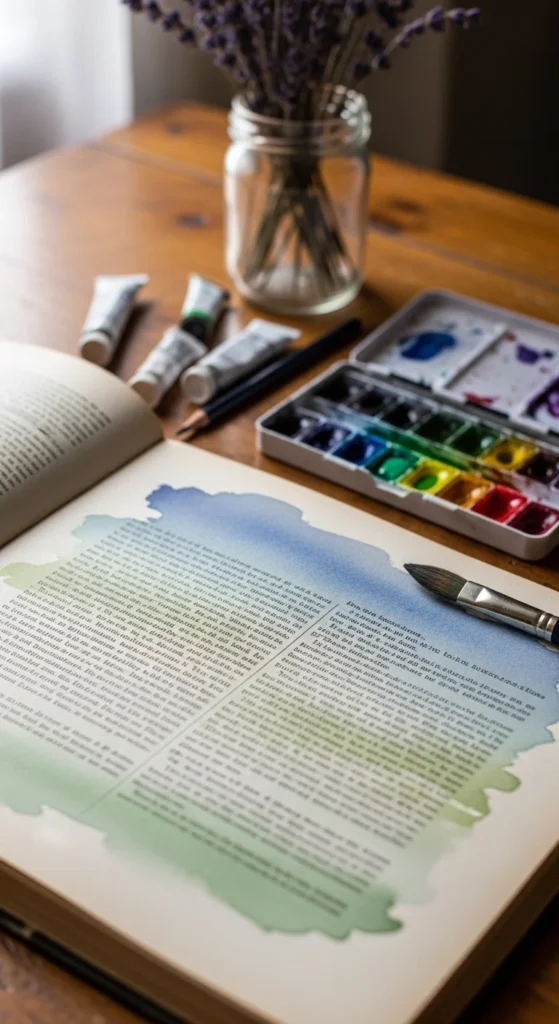
Watercolor adds soft color while keeping the printed words visible. Start with thicker book pages so the paper handles moisture better. Lightly tape the page to your work surface to reduce warping.
Use diluted watercolor paint. Apply gentle washes rather than heavy layers. Pale blues, dusty pinks, and sage tones work well for a vintage look. Let each layer dry before adding more color.
After drying, you can sketch simple shapes using Micron pens or fine liners. Try leaves, birds, or abstract lines. Frame the finished piece or clip it to a string display.
Low-cost tip: student watercolor sets work perfectly. You don’t need expensive paints for this project.
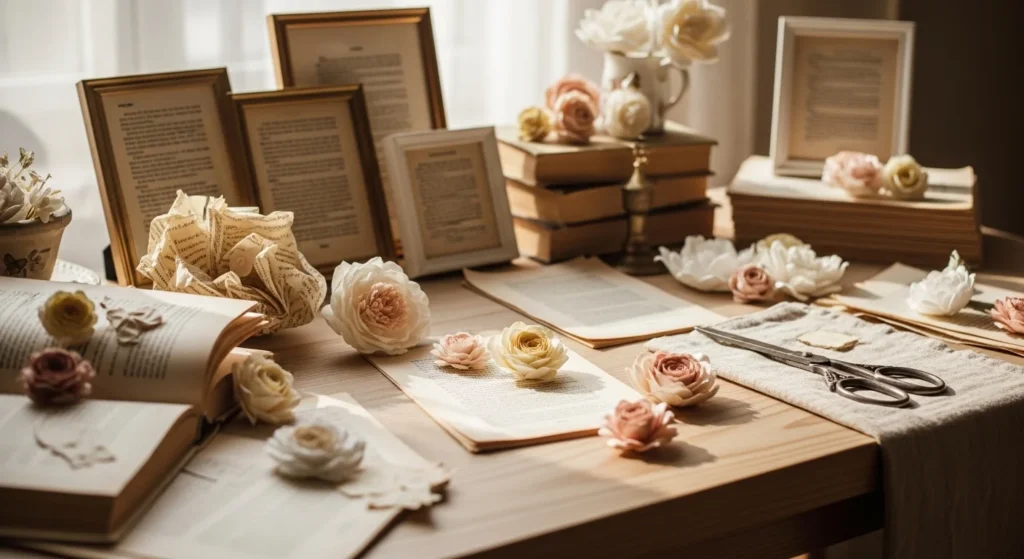
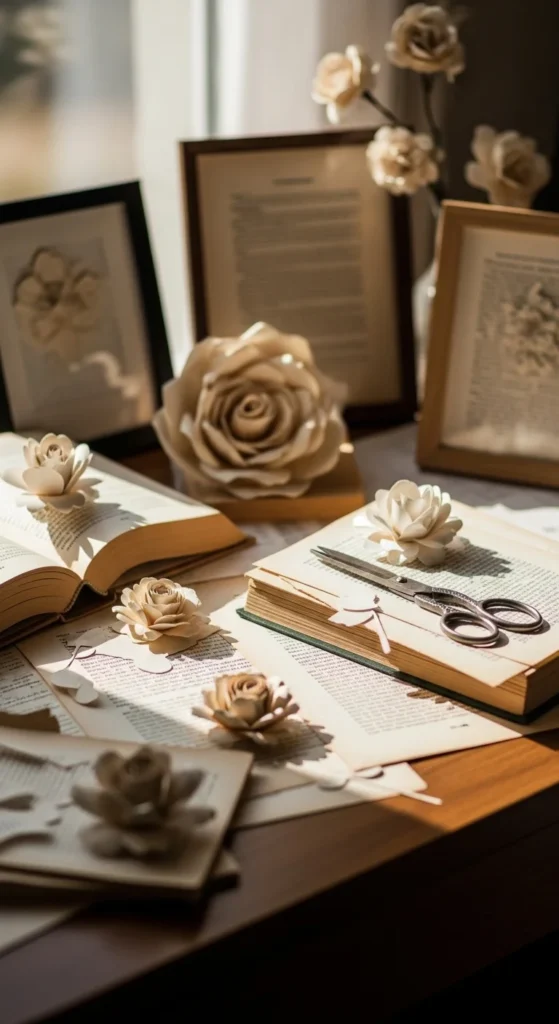
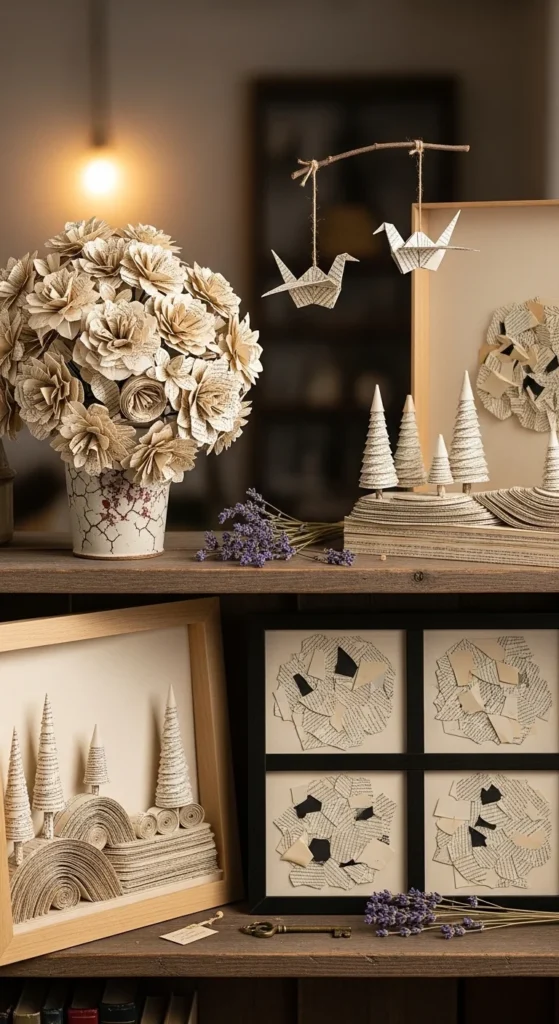
4. Book Page Paper Roses
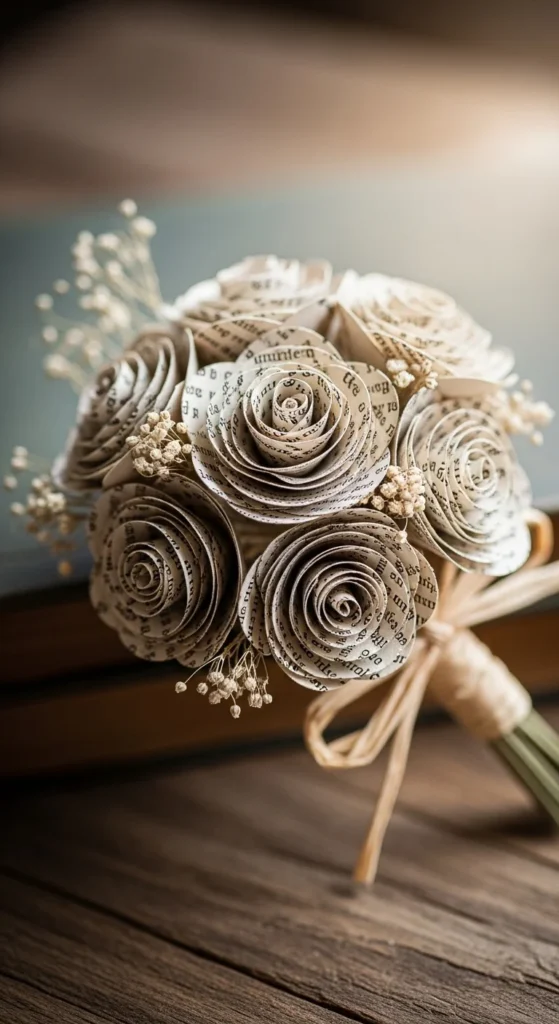
Paper roses made from book pages look romantic and timeless. Cut spiral circles from several pages. Roll from the outer edge toward the center, then glue the base to hold the flower shape.
Slightly curl the edges using scissors for a natural look. Group several roses together in a small jar or attach them to a wreath base.
These flowers last forever and cost very little. Use Mod Podge or basic craft glue to secure the layers. If you want subtle color, brush a tiny amount of watercolor on the petal edges.
This project works great for wedding decor, shelf styling, or handmade gifts.
5. Vintage Book Page Garland
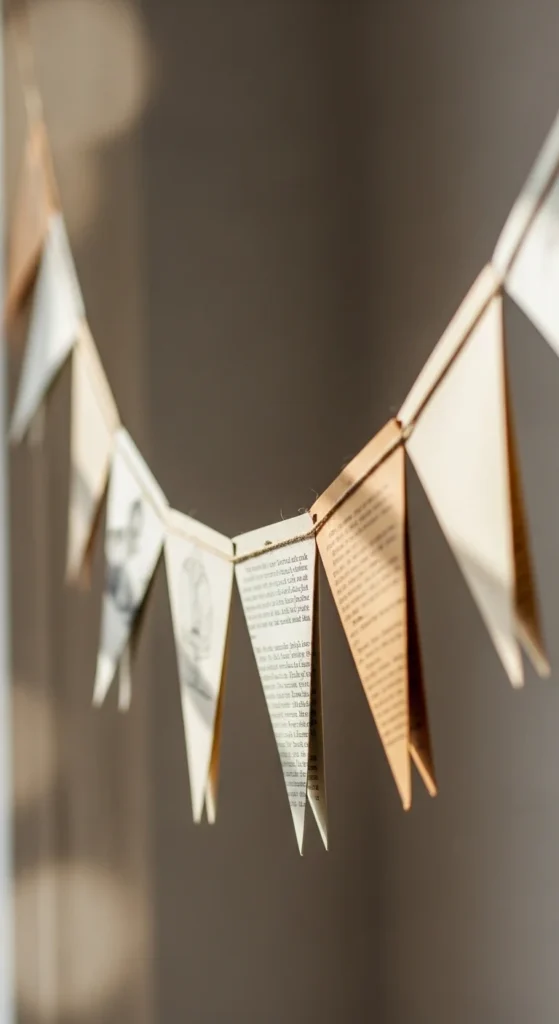
Garlands are one of the fastest book page projects. Cut triangles, circles, or leaf shapes from multiple pages. Punch small holes at the top of each piece.
Thread twine or cotton string through the holes. Space the pieces evenly. Hang the garland across a mantel, shelf, or party table.
For extra charm, lightly ink the edges with a brown stamp pad. This creates an aged effect. You can also mix in sheet music pages for variety.
Budget tip: one paperback can make several garlands, making this perfect for party decor on a tight budget.
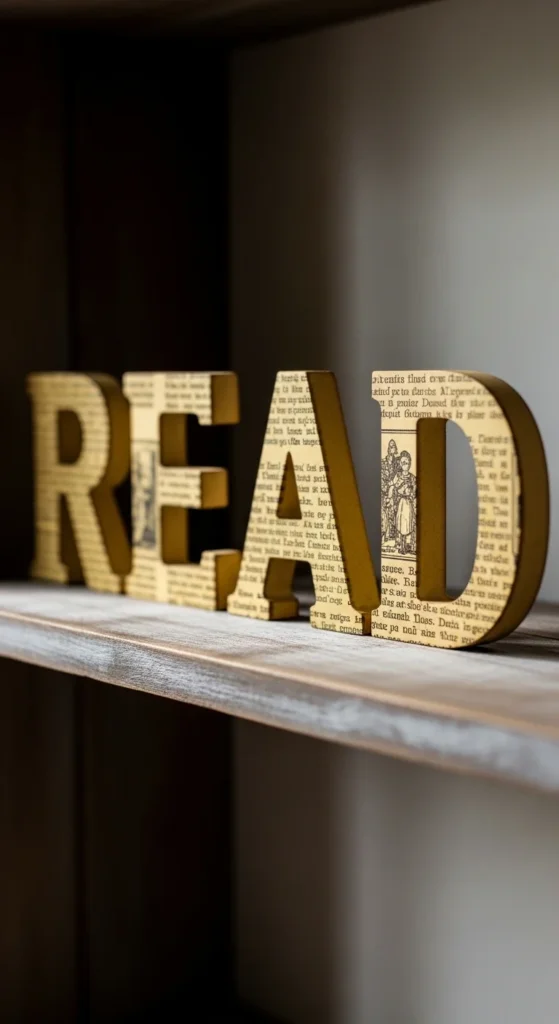
6. Dictionary Word Wall Art
Dictionary art feels personal and thoughtful. Find a page featuring a meaningful word like “love,” “home,” or “dream.” Lightly circle or highlight the word with a fine pen.
Keep the design simple. The charm comes from the typography and aged paper. Place the page in a thin black or wooden frame.
This makes a thoughtful handmade gift. It also works well in gallery walls mixed with photos and prints.
If you want variation, add a small watercolor heart or underline the definition. Keep markings subtle so the page still looks classic.
7. Mod Podge Book Page Canvas
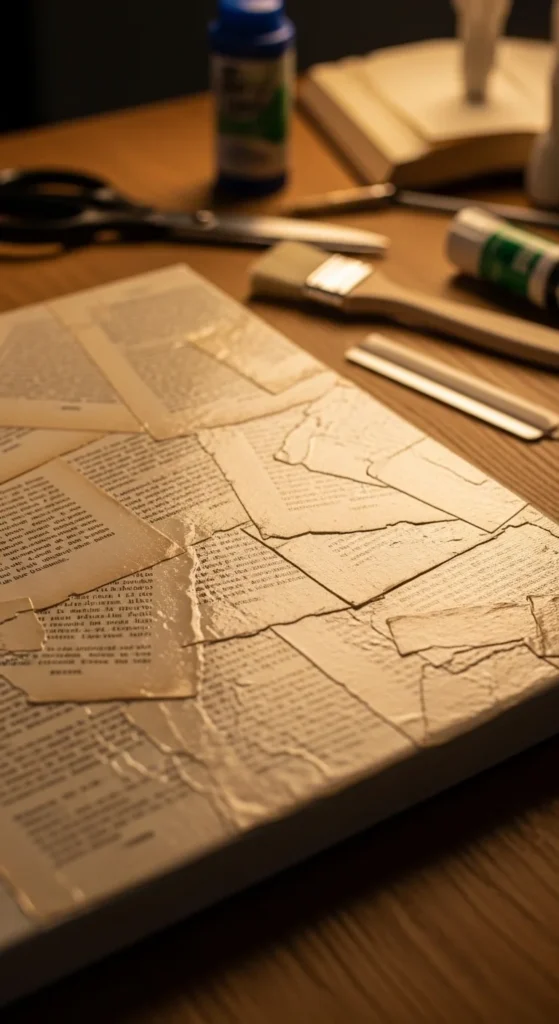
This project turns loose pages into textured wall art. Tear book pages into uneven pieces. Brush a thin layer of Mod Podge onto a blank canvas.
Press the paper pieces down, slightly overlapping them. Smooth out bubbles with a soft brush. Once dry, seal the top with another thin coat.
You can leave it as neutral background art or paint simple shapes on top. Many people add silhouettes or abstract brush strokes.
Use inexpensive canvases from craft stores. Even small canvases look stylish when grouped together.
8. Stenciled Silhouette Book Art
Stencils make book page art beginner-friendly. Place your stencil over the page and lightly dab acrylic paint with a sponge.
Black silhouettes look especially striking against aged paper. Try birds, butterflies, or simple profiles.
Remove the stencil carefully and let the paint dry. Frame the page or mount it on cardstock for stability.
Low-cost tip: printable stencils work fine if you don’t own cutting machines.
9. Book Page Gift Bags
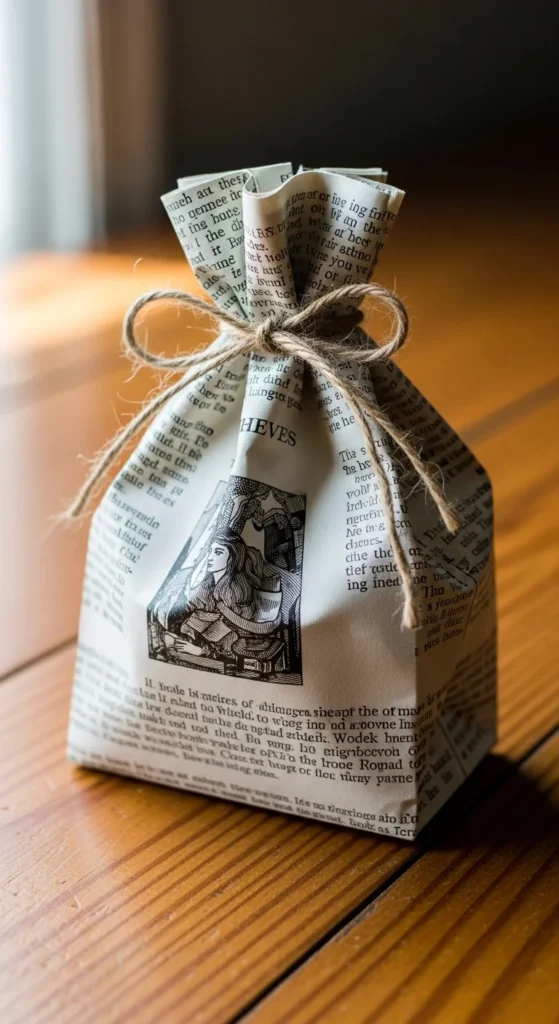
Turn book pages into small gift bags in minutes. Fold the page into a pouch shape and glue the side seams. Fold the bottom to create a flat base.
Punch two holes at the top and thread twine for handles. These bags work well for small gifts, party favors, or jewelry.
Use thicker pages when possible so the bag holds its shape. You can also reinforce the base with cardstock.
This project saves money on gift wrap and looks charming at the same time.
10. Layered Book Page Wall Collage

Wall collages fill empty space without spending much. Tear pages into varied shapes and arrange them on the wall using removable adhesive.
Overlap slightly for a relaxed look. Keep spacing uneven so it feels organic. Neutral pages work best for a calm visual effect.
You can frame the entire collage area with thin molding for a custom look. Or leave it free-form for a casual style.
One thrifted book can cover a surprisingly large wall section.
11. Cricut Precision Book Page Cuts
If you own a Cricut, book pages become even more fun. Use the machine to cut detailed shapes like monograms, florals, or seasonal icons.
Stick the page to a light-grip mat and use a fine blade setting. Handle the cuts gently when removing them.
Mount the finished piece on dark cardstock so the details stand out. Frame it for a polished result.
Even simple letter cutouts look professional with this method.
12. Book Page Leaf Wreath
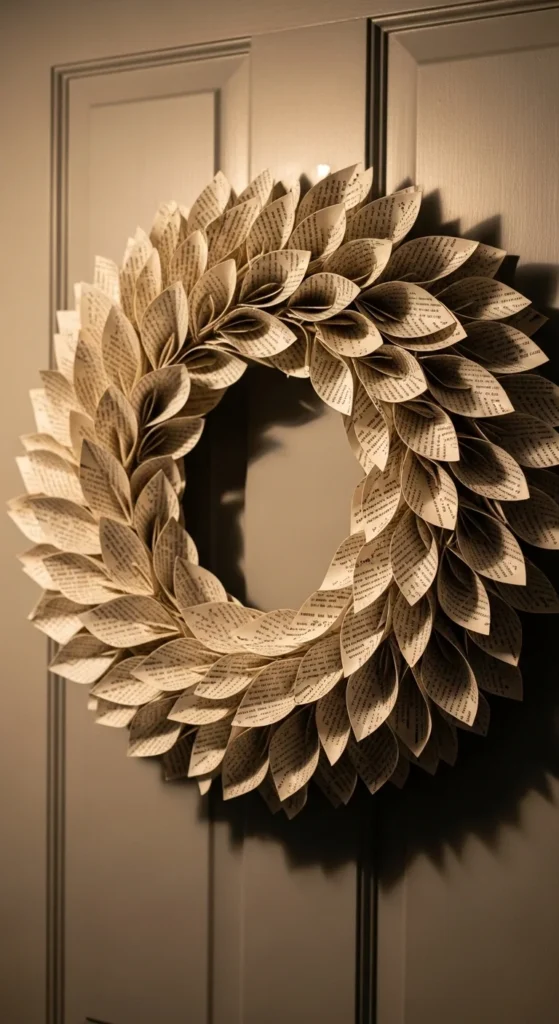
Create folded leaf shapes from many book pages and glue them around a cardboard wreath base. Layer the leaves slightly for fullness.
Keep the color neutral or lightly ink the edges for depth. Add twine at the top for hanging.
This wreath works year-round and costs very little. It’s also lightweight compared to many store-bought wreaths.
13. Sheet Music Book Page Swap

Sheet music gives the same vintage feel as book pages. Use old music sheets for any of the projects above.
The bold notes and staffs add visual interest. Mix sheet music with regular book pages for contrast.
Thrift stores often sell old music books cheaply, making this an easy material swap.
14. Gel Pen Highlight Accents
After finishing your book page art, add tiny gel pen highlights. White or metallic pens work best.
Use a light hand. Small dots or thin lines create depth without overpowering the design.
This step takes only minutes but adds a polished touch.
15. Mini Book Page Ornaments

Fold small shapes like stars or hearts from book pages. Add string loops and hang them on a branch or small tree.
These ornaments work for holidays or everyday decor. They also make thoughtful handmade gifts.
Use leftover paper scraps to keep the project budget-friendly.
16. Book Page Butterfly Wall Decor
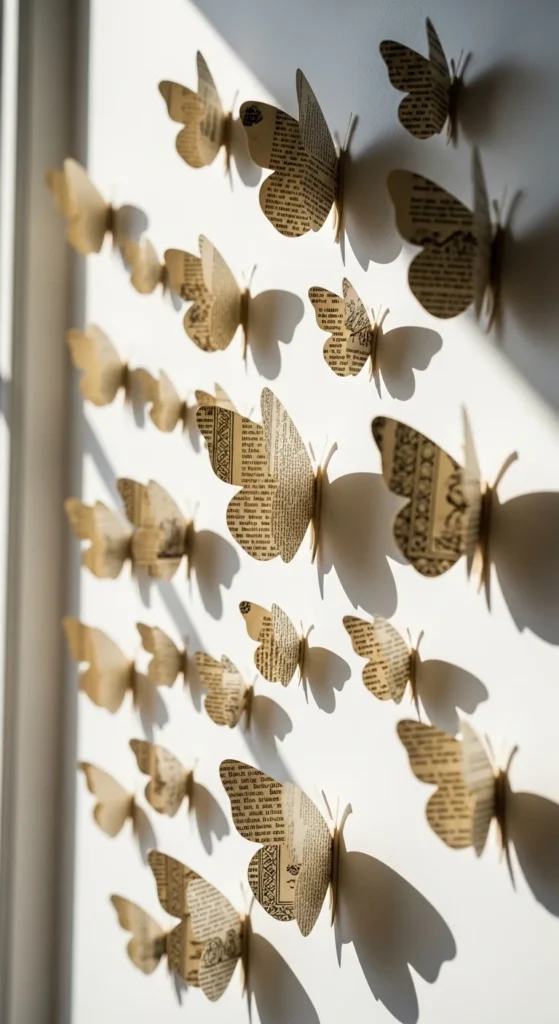
Butterflies made from book pages add soft movement to blank walls. Start by printing or tracing a simple butterfly template. Cut several sizes from aged pages for visual variety.
Gently bend the wings upward to create dimension. This small step makes a big difference. Attach the butterflies using removable wall putty so they appear to float.
Cluster them in a corner, swirl them upward, or scatter lightly across a gallery wall. The neutral paper tone keeps the look calm and timeless.
Budget tip: one paperback can produce dozens of butterflies. This makes it one of the most affordable wall decor projects you can try.
17. Rustic Book Page Mason Jar Wrap

Wrapping mason jars with book pages creates quick farmhouse-style decor. Cut a strip of paper sized to your jar height. Wrap it around the glass and secure with twine or a thin ribbon.
Place a tea light, fairy lights, or dried flowers inside. The printed text glows softly through the glass.
Lightly distress the edges with scissors for an aged look. You can also brush a thin wash of diluted paint for subtle color.
This project works well for centerpieces, shelf styling, or party tables. Most supplies are already at home, so the cost stays very low.
18. Book Page Envelope Set
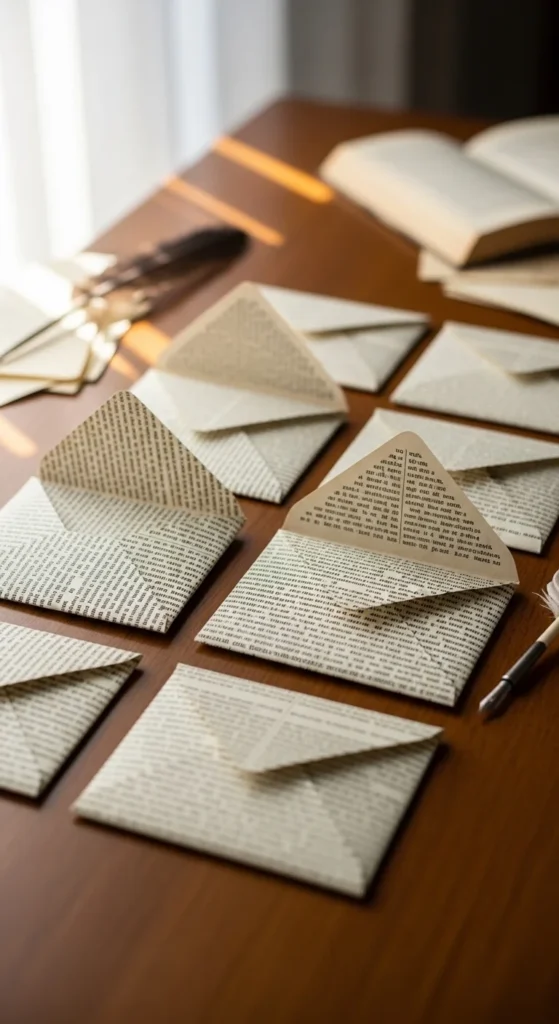
Handmade envelopes feel personal and thoughtful. Use an envelope template or trace around an existing envelope. Cut carefully and fold along clean lines.
Seal the side flaps with glue and leave the top open. These envelopes work beautifully for gift notes, thank-you cards, or small invitations.
Choose pages with interesting typography for the best effect. If the paper is thin, line the inside with plain paper for extra strength.
This is a great scrap-busting project. Even torn or partial pages can become stylish envelopes with very little effort.
19. Vintage Book Page Bookmark Tassels

Turn book pages into bookmarks that feel classic and useful. Cut long rectangular strips and laminate them using clear tape or self-adhesive sheets.
Punch a hole at the top and attach a simple tassel or piece of twine. For extra detail, round the corners with scissors.
You can also layer two different pages back-to-back for thickness. This helps the bookmark last longer.
These make excellent small gifts for readers and cost almost nothing to produce. One book can create many bookmarks in a single session.
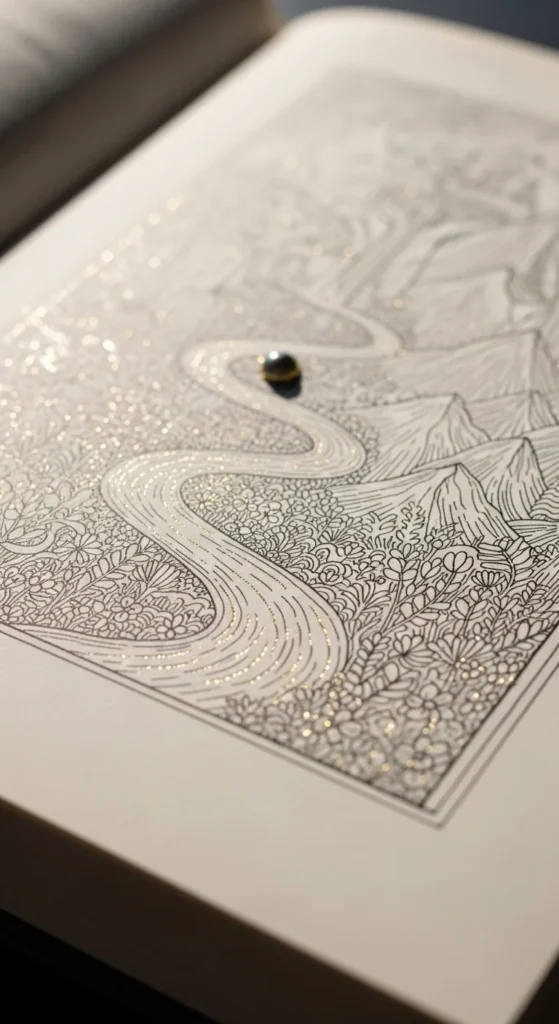
20. Book Page Quote Art
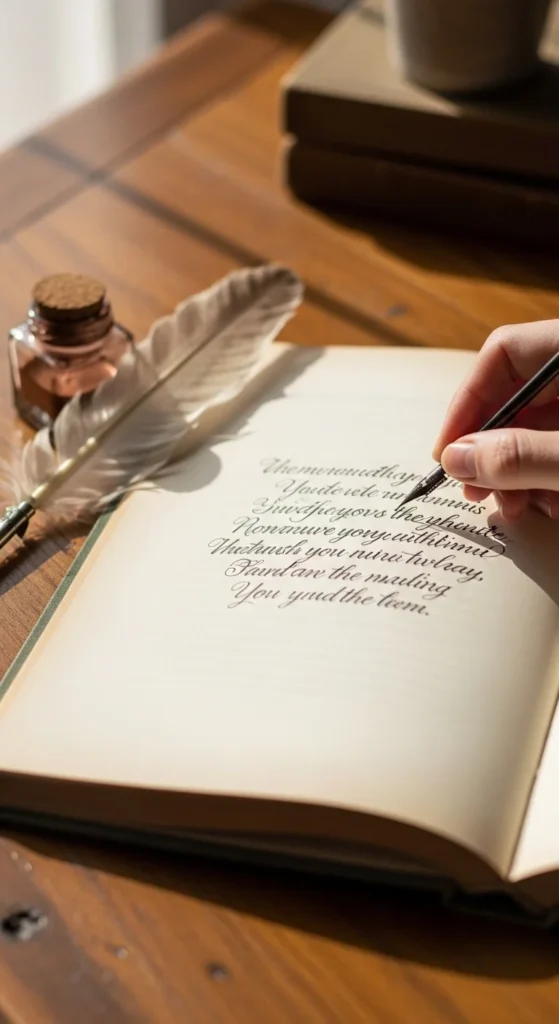
Quote art combines handwriting with vintage paper texture. Choose a short meaningful phrase and lightly pencil the layout first.
Use Micron pens or fine liners to write over the guide lines. Keep spacing even and letters simple.
If handwriting feels tricky, print the quote faintly and trace over it. Add light watercolor accents or small doodles if desired.
Frame the finished piece for wall decor or gift giving. This project works well because it feels personal without requiring expensive materials.
21. Folded Book Page Christmas Tree
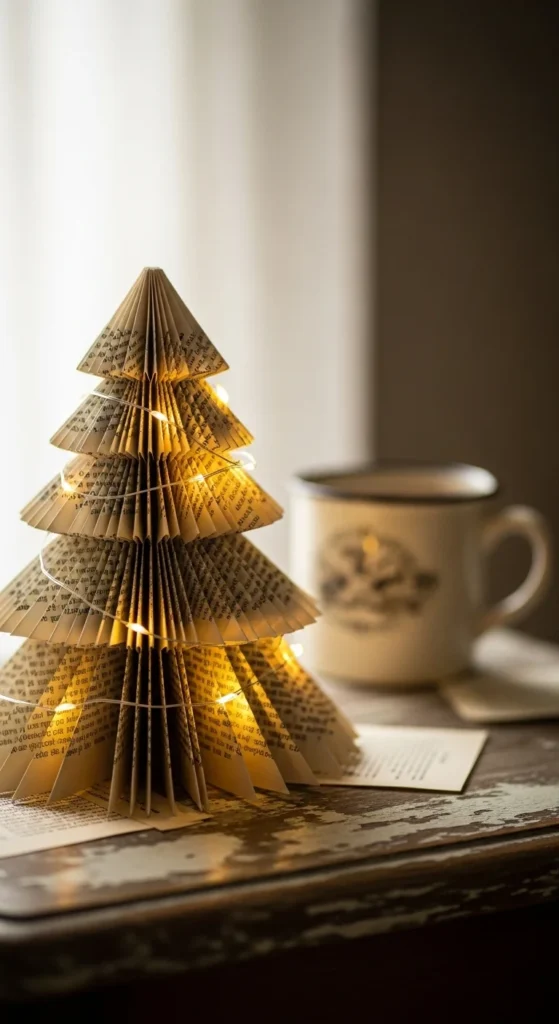
Folded page trees are perfect seasonal decor. Start with a paperback and fold each page inward toward the spine. Continue until the full book forms a cone shape.
For extra detail, lightly brush white paint along the edges to mimic snow. You can also wrap thin twine around the base.
Display the finished tree on shelves, mantels, or desks during the holiday season.
This project is simple but eye-catching. It’s also a great way to use books that are too worn for other crafts.
22. Book Page Feather Wall Art
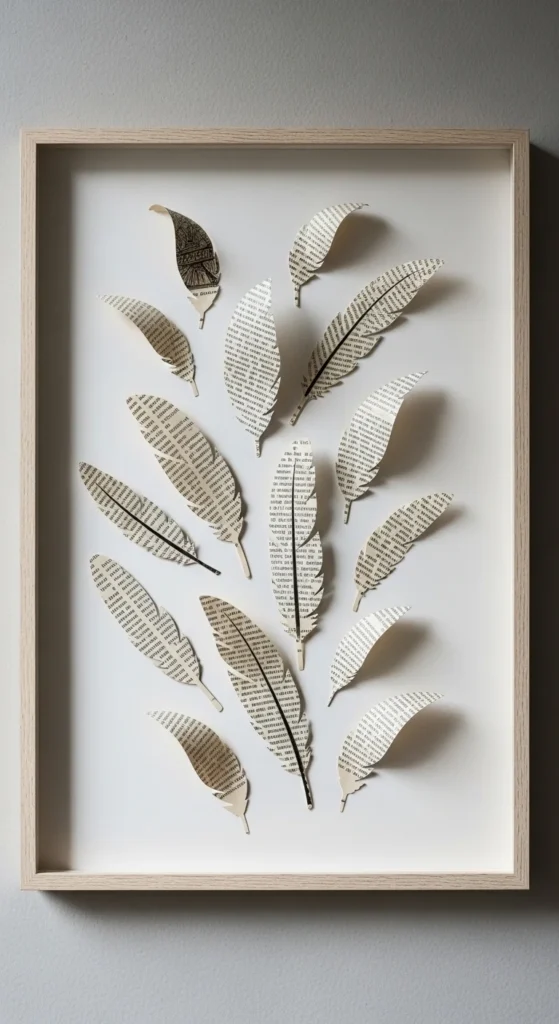
Feather shapes bring a light, airy feel to book page art. Sketch a simple feather outline and cut carefully along the edges.
Add small snips along the sides to mimic feather texture. This detail makes the piece look more realistic.
Mount the feather on dark cardstock for contrast, then frame it. The aged paper pops beautifully against deeper backgrounds.
This project is beginner-friendly and works well in neutral home decor themes.
23. Rolled Book Page Wall Flowers

Rolled paper flowers create bold wall decor from simple materials. Cut multiple square pieces from book pages. Roll each into a cone and glue the edge.
Arrange the cones in a circular pattern on a cardboard base. Layer tightly for a full flower look.
You can leave the center open or add a small paper circle to finish it. Hang the piece using a simple wall hook.
This is a great statement project for very little money.
24. Vintage Book Page Drawer Liners
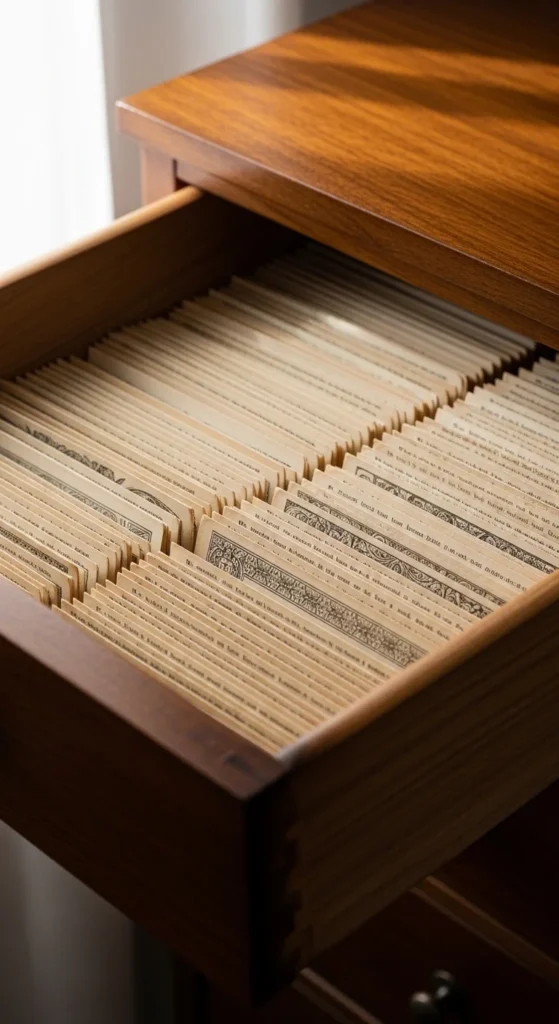
Line small drawers with book pages for hidden charm. Measure the drawer base and cut pages to fit.
Apply a thin coat of glue or Mod Podge and smooth the paper down carefully. Press out bubbles with a soft cloth.
This works beautifully inside desk drawers, jewelry boxes, or small cabinets.
It’s an unexpected way to use book pages while keeping the project practical and affordable.
25. Book Page Paper Leaf Branch
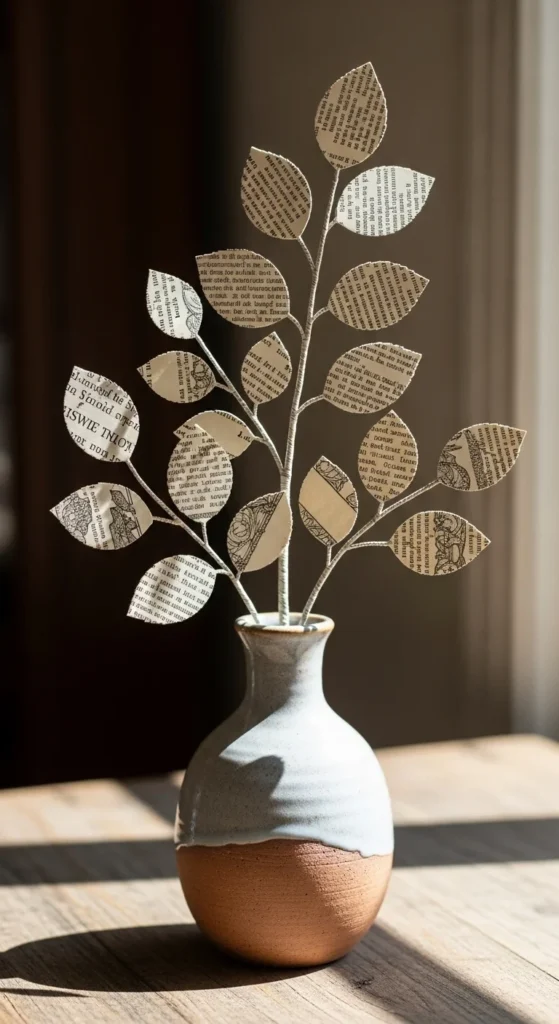
Create simple leaf shapes and attach them to thin branches using glue. Arrange the finished stems in a neutral vase.
Mix leaf sizes for a natural look. Slightly curl the edges with your fingers to add dimension.
This decor piece works year-round and costs almost nothing to assemble.
For subtle color, lightly brush diluted watercolor along the edges of a few leaves.
26. Layered Book Page Shadow Box
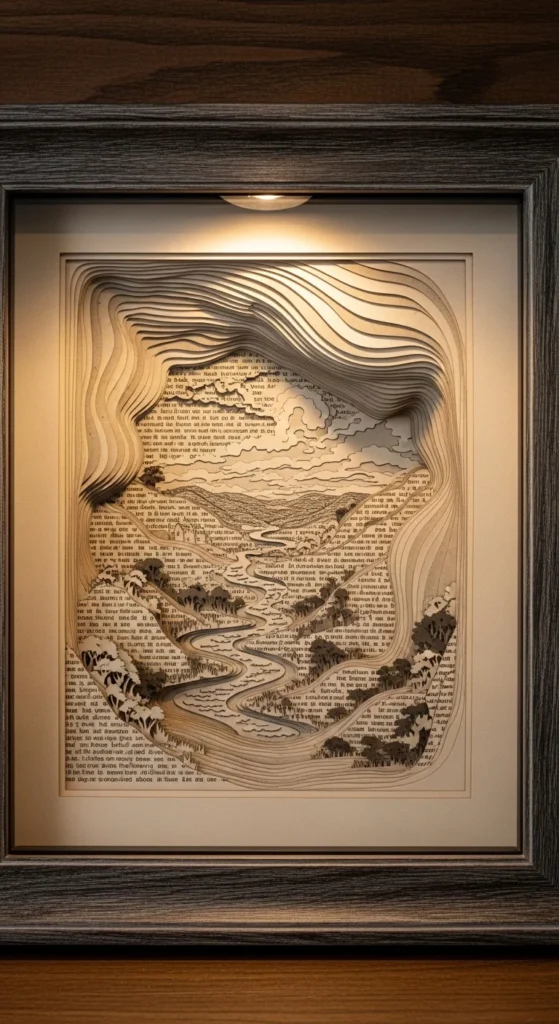
Shadow boxes add depth to flat paper art. Cut multiple shapes from book pages and mount them on foam tape inside a deep frame.
Layer the pieces slightly forward from each other. This creates gentle dimension without complicated tools.
Simple themes work best. Try hearts, birds, or botanical shapes.
Use thrifted shadow box frames to keep the cost low while achieving a polished finish.
27. Book Page Wrapped Wooden Letters
Wooden letters covered with book pages make personal decor. Brush glue onto the letter surface and press the paper down carefully.
Trim the edges with a craft knife or small scissors. Seal with a thin top coat for durability.
Spell names, initials, or short words. These look great on shelves or nursery decor.
Budget tip: craft stores often sell plain wooden letters cheaply.
28. Whole Book Upcycle Display
Instead of using just a few pages, challenge yourself to repurpose an entire book. Mix several projects from this list.
For example, create roses from some pages, wall art from others, and bookmarks from the rest. Display everything together as a themed collection.
This approach reduces waste and stretches your crafting budget. It also creates a cohesive vintage decor set for your home.
Working through one full book is surprisingly satisfying and keeps materials organized.
Conclusion
DIY book page art proves that beautiful decor doesn’t require expensive supplies. With thrifted books, simple tools, and a bit of patience, you can create pieces that feel warm and personal. Start with one easy project, then build your skills as you go. Before long, those forgotten pages can become some of your favorite handmade decor pieces.


