
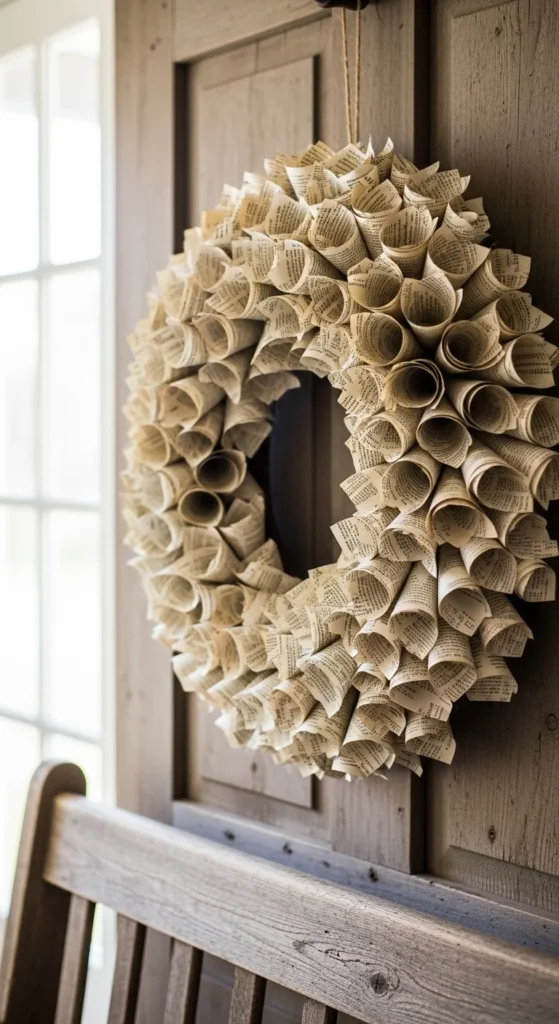
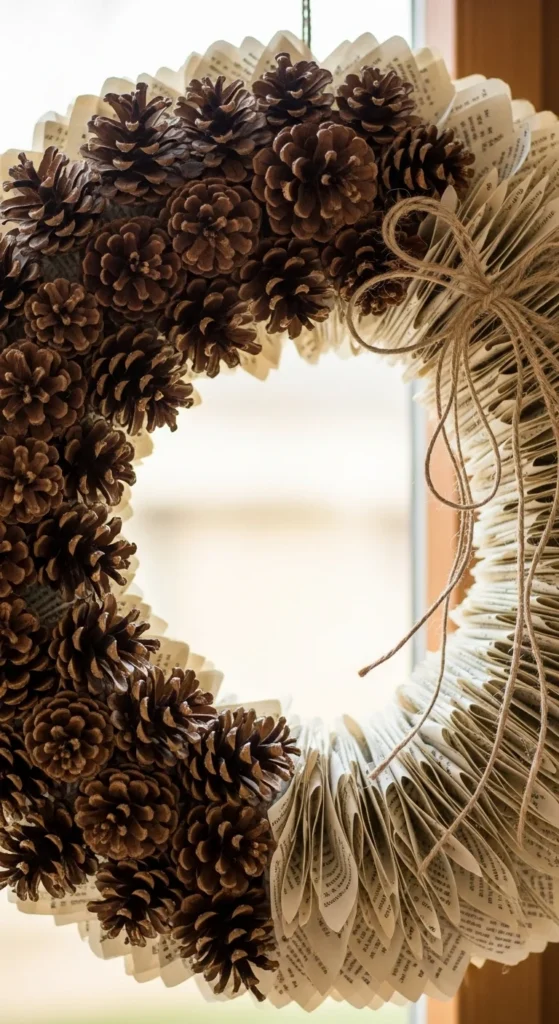
Book page wreaths are one of the easiest ways to turn old, worn books into rustic decor that looks handmade and cozy. Most styles start with a cardboard ring base, then you build texture using rolled cones or paper flowers like dahlias and hydrangeas. The fun part is that you can keep it simple with plain pages, or add seasonal touches with greenery, ribbon, and small picks. If you like farmhouse decor, holiday crafting, or upcycled projects that feel warm and vintage, these 25 ideas will keep you busy in the best way.
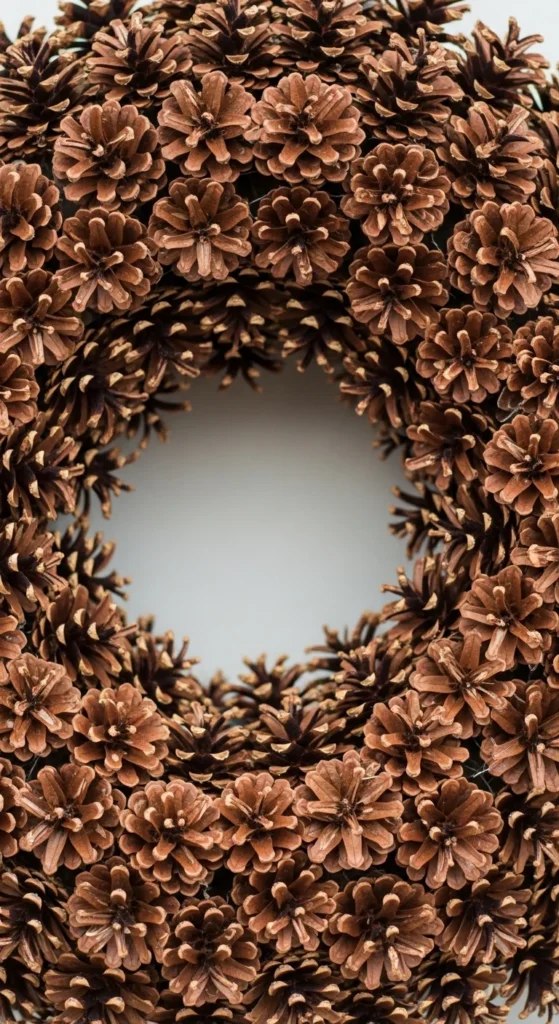
1. Classic Rolled Cone Book Page Wreath
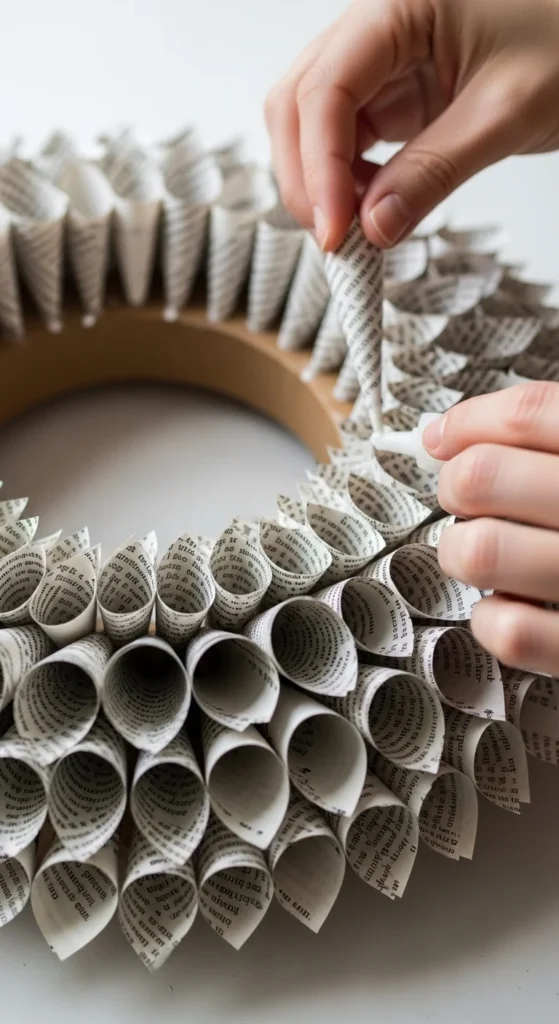
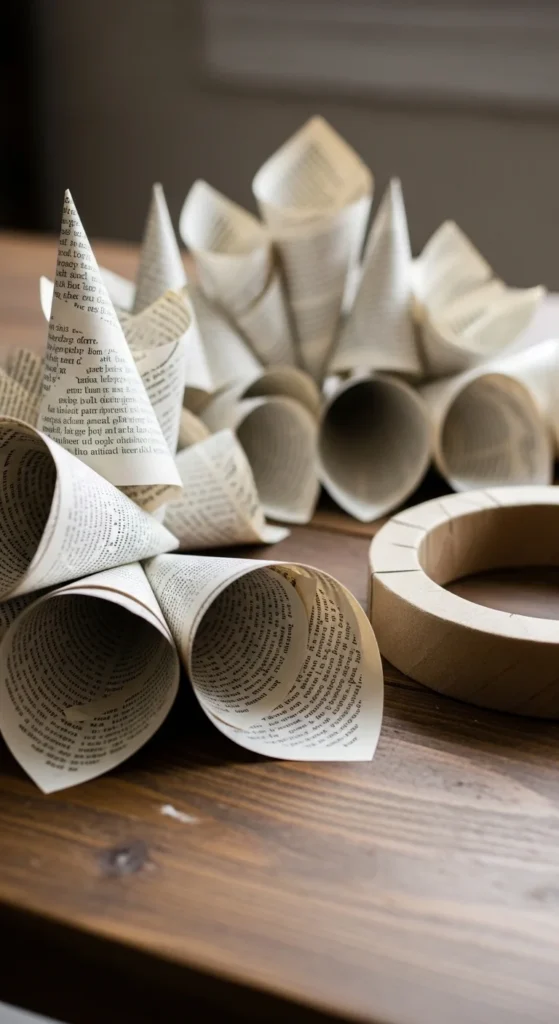
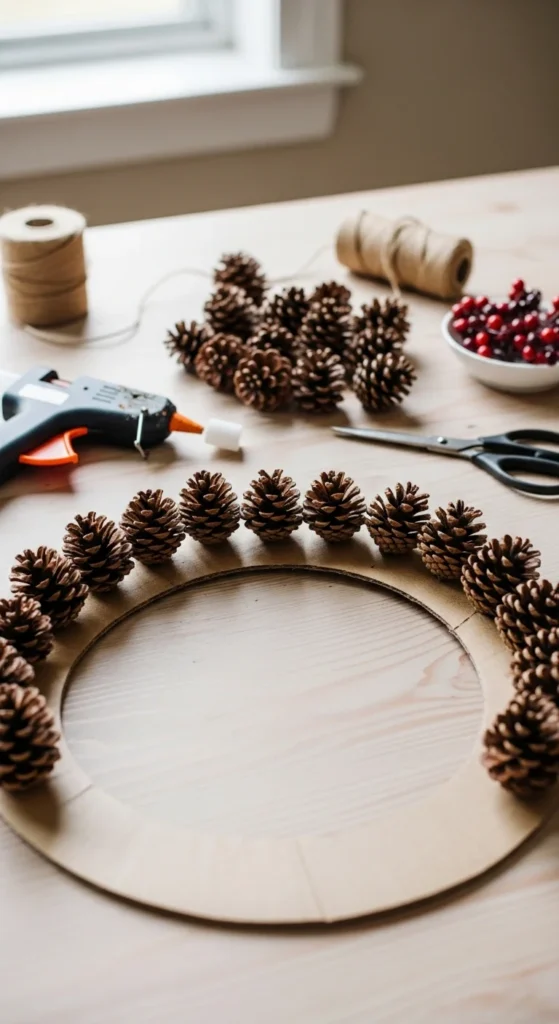
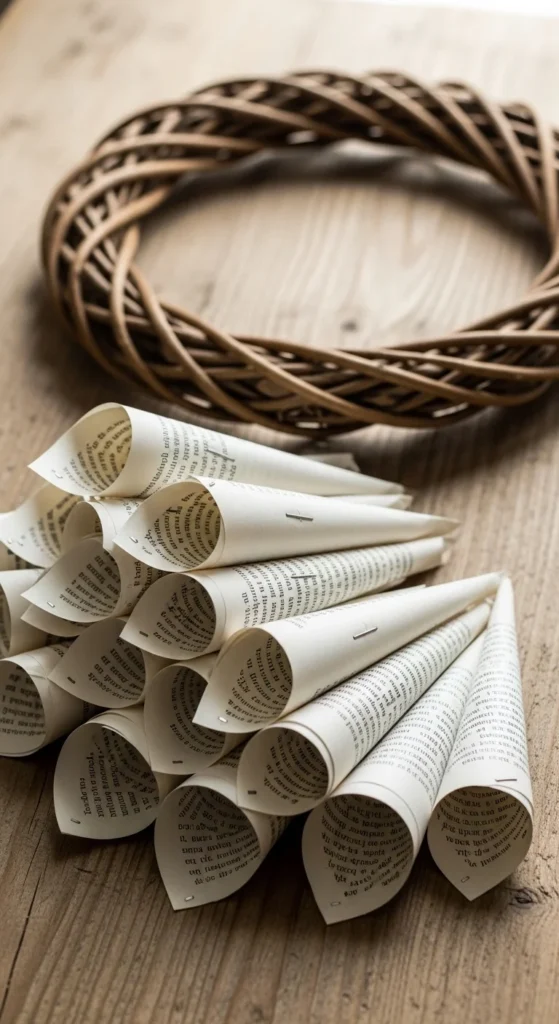
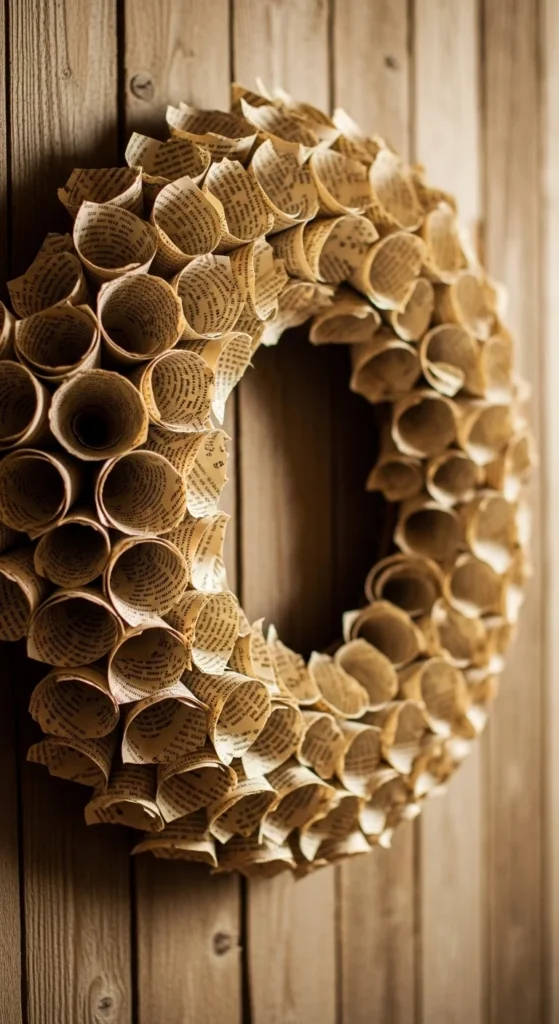
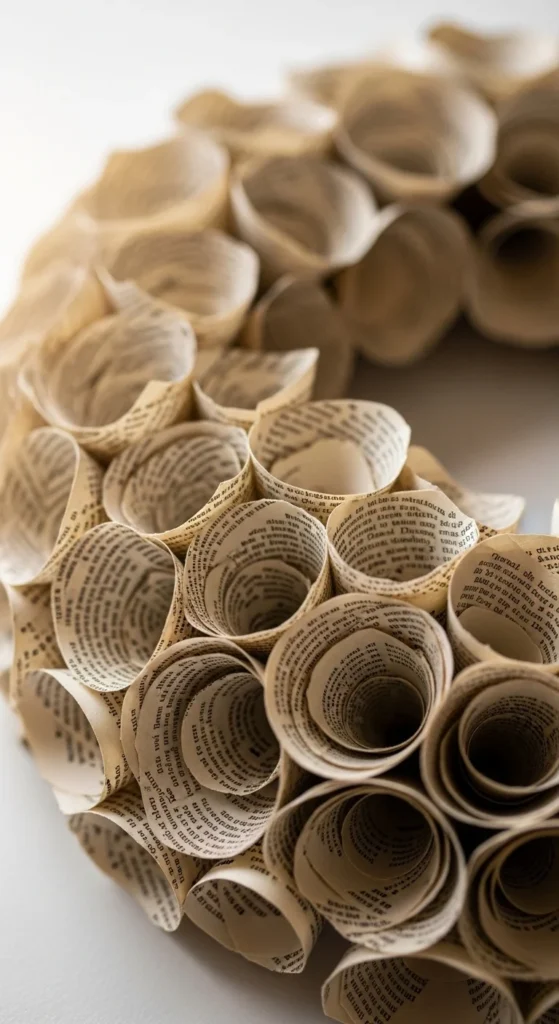
This is the traditional “book page wreath” look. Cut pages into squares or rectangles. Roll each piece diagonally into a cone, then glue the tip seam so it holds. Most people attach cones tip-down, with the wide opening facing outward for volume.
Start on the outer edge of a cardboard ring. Glue cones in a full circle. Then add a second row slightly inward, overlapping the wide ends so you don’t see gaps. Add a third row if you want deeper texture.
If your cones flatten, add a small tape strip inside the cone before gluing. It helps the shape stay open. If you’re worried about burns, use low-temp glue or press cones down with a scrap of cardboard.
Budget tip: use thrift-store dictionaries or old novels. The slightly yellowed paper instantly looks rustic. A twine loop on the back makes hanging easy without hardware.
2. 10 Cone Angles “Full Coverage” Wreath
Cone angle changes the whole look. Narrow cones create a tighter, spikier wreath. Wider cones create a softer, fuller wreath. Make a batch with different roll angles and mix them throughout the design.
Start with wider cones on the outer ring for fullness. Then use narrower cones for the inner rows so the center doesn’t look bulky. Mixing angles also hides seams and makes the wreath look more natural.
If you want a more rustic style, scrunch some cones lightly before gluing. Keep it random so it looks intentional, not crushed. For a cleaner look, keep cones crisp and uniform.
Budget tip: don’t overthink measurements. Use one sheet of paper as a quick template for your squares. Consistency matters more than perfection. If you’re short on pages, make the inner row with narrower cones so you need fewer pieces.
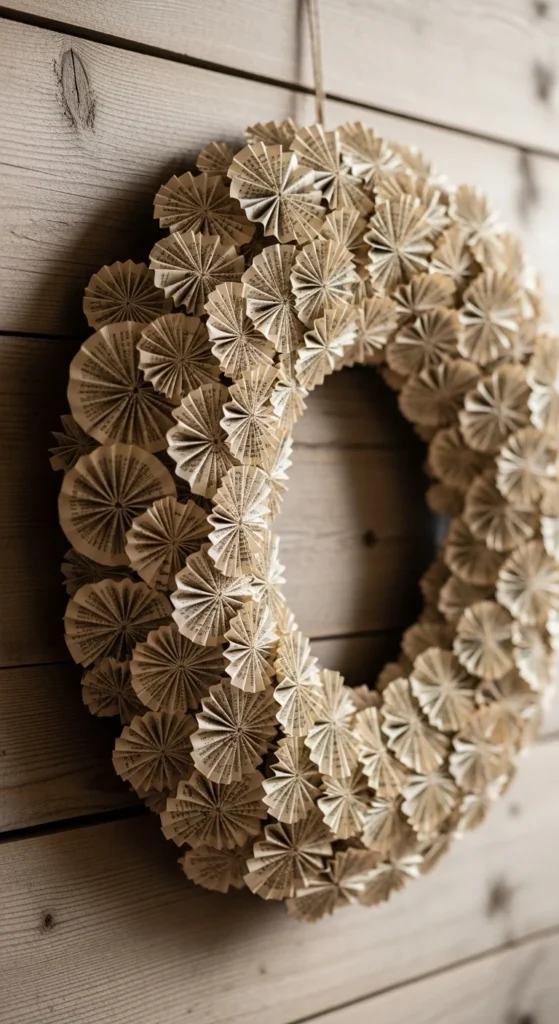
3. Dahlia-Style Book Page Flower Wreath

Dahlia wreaths look like big paper flowers. Cut 4×4-inch squares and roll them into cones. Glue cones in a circle like petals, starting from the outer edge and moving inward.
Each row overlaps the last, so it looks like layered petals. Keep the cones evenly spaced, then tighten spacing as you move inward to form a strong flower shape. A small circle in the center finishes it. You can add a bow or a small flower cluster there too.
Dahlias work well on a 10–12-inch base. If you go bigger, plan for more pages. A fuller look can take around 100 pages depending on cone size.
Budget tip: use a paper cutter for fast squares. If you don’t have one, fold pages into quarters and cut along the folds. Hang with a ribbon loop glued to the back.
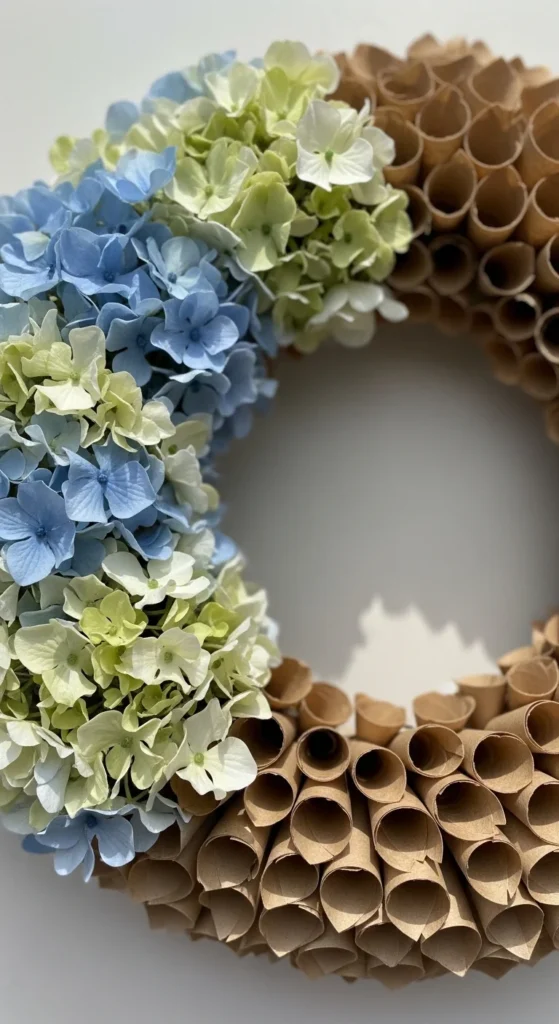
4. Hydrangea Cluster Book Page Wreath
Hydrangea wreaths look soft and clustered. Instead of perfect rows, you glue cones in small groups so it mimics flower heads. Use smaller cones for tighter clusters.
Start with three or four “clusters” around the ring, then fill in between them. Keep the layout slightly uneven. That organic spacing makes it feel like real hydrangeas.
To add depth, make some cones shorter and some longer. Glue longer cones in the back and shorter cones on top. You’ll get a layered look without adding extra rows everywhere.
Budget tip: this style hides gaps well, so it’s great if your cone sizes aren’t perfect. Use twine for the hanger and add a small ribbon bow only if you want a focal point.
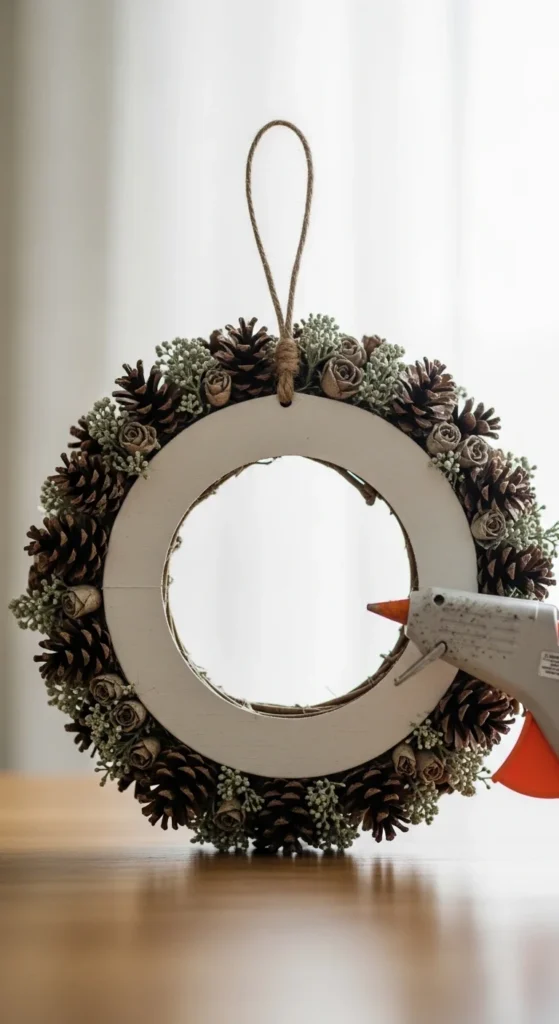
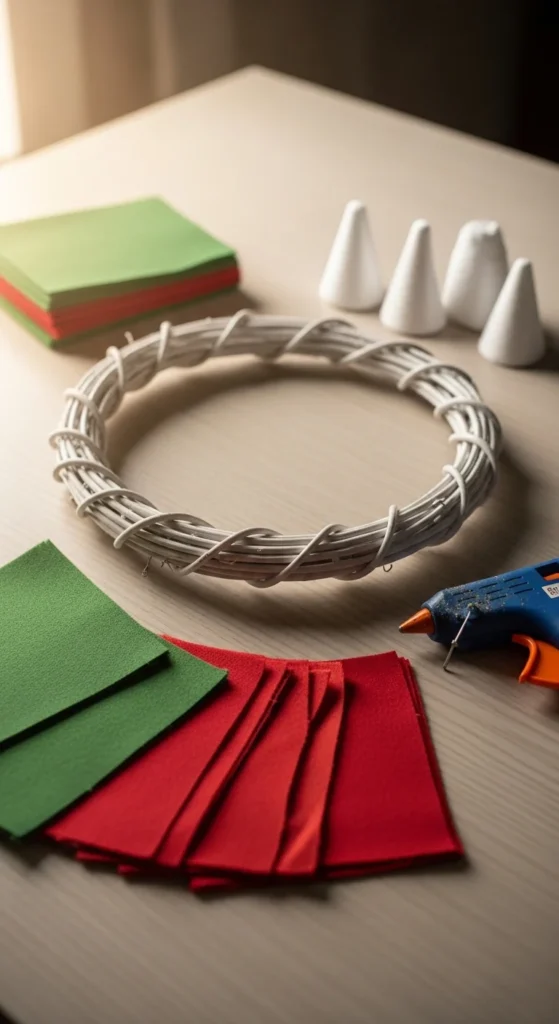
5. Lightweight Foam Board Base Wreath

Cardboard works fine, but foam board keeps the wreath lighter. Cut a ring shape and use hot glue to attach cones. Foam board also reduces warping if your glue runs warm.
This is a good choice if you plan to hang it on a delicate hook or removable strip. Keep cone size moderate so the wreath stays balanced.
If you want extra strength, glue two foam rings together. It stays light but doesn’t bend. Then attach cones in rows like the classic method.
Budget tip: use leftover foam board from packaging or old presentation boards. If you cut with a craft knife, do slow passes instead of one deep cut. It keeps edges cleaner.
6. Poster Board “Quick Weekend” Wreath
Poster board is the easiest base material. It cuts fast and works well for smaller wreaths. It’s also great if you’re testing the craft and don’t want to buy supplies.
Cut two rings and glue them together for thickness. Then start the cone rows. Keep the glue dots small so the board doesn’t warp.
If you notice bending, flip the wreath over and press it under heavy books for a few minutes. That helps flatten it before you hang it.
Budget tip: make a smaller wreath, around 8–10 inches. You’ll use fewer pages and still get a strong rustic look. Add a simple twine hanger on the back and it’s ready.
7. Tape-First Cones, Glue-Later Wreath
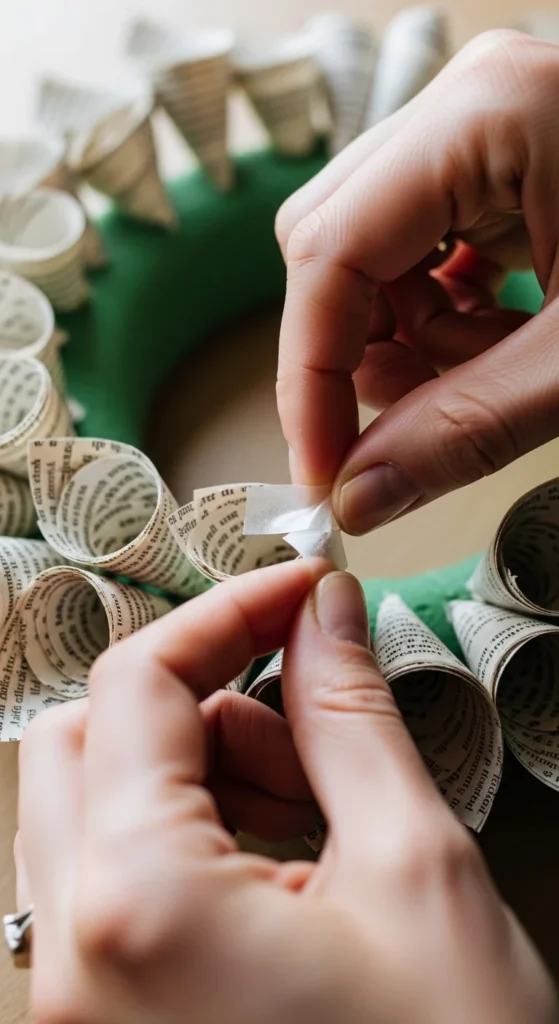
If cones keep popping open, tape them first. Place a tiny piece of tape on the seam to hold the roll. Then glue cones onto the wreath base when you’re ready.
This method reduces glue time and helps you batch prep. Make a pile of cones, then do assembly in one sitting.
It also helps beginners who want consistent cones. Tape gives you time to adjust the angle before anything sets.
Budget tip: use clear tape sparingly so it doesn’t show. Place it toward the cone tip, where it will be hidden when glued down. This method also reduces glue mess on fingers.
8. Stapled Cone “No Glue” Prep Wreath
Staples are fast for cone prep. Roll the page into a cone and add one staple near the tip. Then glue the cone onto the wreath base as usual.
Stapling saves time, especially if you’re making dozens of cones. It also helps cones keep their shape when you handle them.
If you want a cleaner finish, hide the staple by facing it toward the back when you glue it down.
Budget tip: use a basic stapler. If your pages are thick, place the staple closer to the wide end where the paper overlaps more easily.
9. Distressed “Shabby” Scrunch Wreath
For a shabby look, scrunch some pages before rolling them. You can also twist the paper lightly so the cones have texture. Mix distressed cones with smooth cones so it looks balanced.
Build the wreath like the classic style, but avoid perfect symmetry. A little unevenness reads rustic. If you want more depth, use three rows with varied cone lengths.
This is a great style for farmhouse rooms and vintage holiday decor. It looks cozy, not polished.
Budget tip: distressing hides mistakes. If your cones aren’t identical, this style makes it look intentional. Add a twine bow for a simple finish.
10. Sharpie-Edge Rustic Distress Wreath
A small edge-darkening trick makes a wreath look aged. Lightly run a brown marker along some cone edges. Don’t do every cone. Just enough to add depth.
Use it on the outer ring first, where you’ll see it most. Then add a few touches on inner cones. Keep it uneven for a natural look.
This works especially well with bright white pages that look too new. The edges soften the contrast and make the wreath feel older.
Budget tip: test your marker on a scrap cone first. Some papers absorb fast. If it goes too dark, rub the edge lightly with a tissue to soften it.
11. Twine Loop Hanger Farmhouse Finish
A good hanger makes the wreath easier to use. Glue a twine loop on the back. Anchor it with a strip of cardboard or extra paper over the glued ends so it doesn’t pull off.
Keep the loop long enough to hang on a hook but short enough that the wreath sits close to the door. If it sticks out too far, shorten the loop.
For extra rustic style, wrap twine around a small section of the wreath edge too. It ties the look together.
Budget tip: you can use jute string or any twine you already have. If you’re using a removable hook, keep the wreath lightweight by choosing foam board and smaller cones.
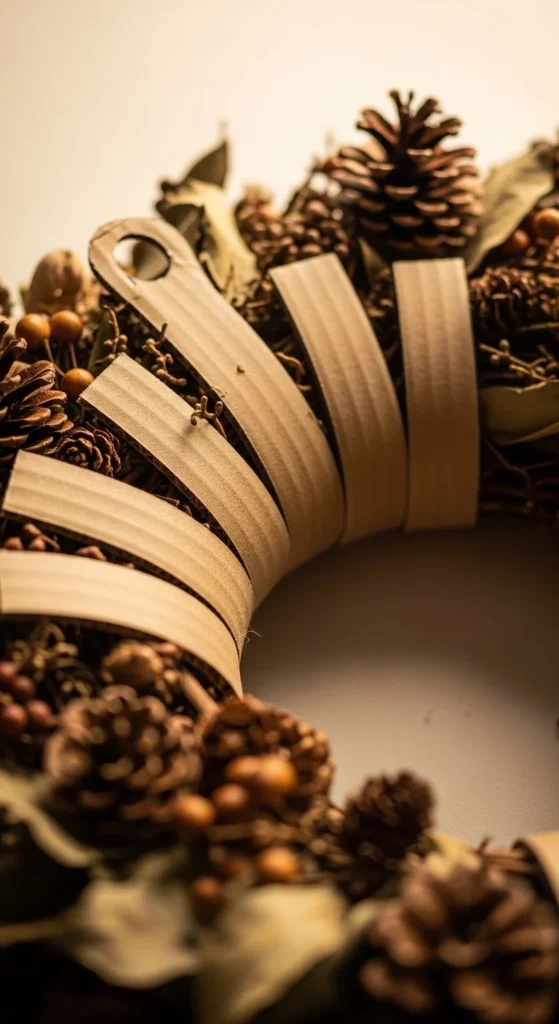
12. Ribbon Hanger With Hidden Back Patch

Ribbon hangers look soft and romantic, especially for holidays. Cut a ribbon strip, fold into a loop, and glue the ends to the back. Cover the ends with a cardboard patch so it’s strong.
Use burlap-style ribbon for rustic decor. Use satin-style ribbon for a cleaner look. Keep it neutral so it matches the book pages.
Budget tip: if you don’t have ribbon, use a strip of fabric from an old shirt. Fold it neatly and glue the same way.
13. Asymmetrical Cone Cluster Wreath
Instead of covering the whole ring evenly, cluster cones on one side and leave part of the ring showing. It feels modern while still rustic.
Start with a base ring wrapped in twine or painted neutral. Then glue cones in a dense cluster on one side. Let the cones spill slightly inward and outward for a natural shape.
Add a small bow or greenery accent where the cluster ends. Keep it simple so it doesn’t compete with the cone texture.
Budget tip: asymmetrical designs use fewer pages. It’s a good option if you’re short on book pages or want a faster project.
14. Double-Row Minimal Wreath for Small Spaces

If you want something lighter and less bulky, do only two rows of cones. Keep the center opening visible so it feels airy.
Use medium cones on the outside ring and slightly smaller cones on the inner ring. Overlap wide ends just enough to hide gaps.
This style looks great in hallways, small entryways, and apartment doors. It also hangs flatter.
Budget tip: choose smaller bases, around 8–10 inches. You’ll use fewer pages and finish faster while still getting a full look.
15. Full-Depth Three-Row “Statement” Wreath
For maximum texture, build three rows inward. Start with the outside ring, then a middle ring, then a tight inner ring. Use cone sizes that shrink slightly as you move inward so it doesn’t look crowded.
This style looks great on larger doors and big wall spaces. It photographs well because the shadows create depth.
If the wreath becomes heavy, switch to foam board and keep cone seams taped or stapled to reduce glue use.
Budget tip: use a “page count plan.” Make one full outer row first, then estimate how many cones it took. Multiply by three for a rough total so you don’t run out halfway.
16. Mixed Paper Wreath (Dictionary + Novel Pages)
Mixing paper types gives subtle contrast. Dictionary pages are dense and darker. Novel pages are lighter. Alternating them adds texture without adding color.
Use dictionary cones on the outer ring and novel cones inside, or mix randomly for a more natural look. Keep the mix balanced so it doesn’t look patchy.
Budget tip: if you only have a small dictionary, use it for accent clusters. The dense text reads as shading in the wreath.
17. Center Flower Accent With Bow
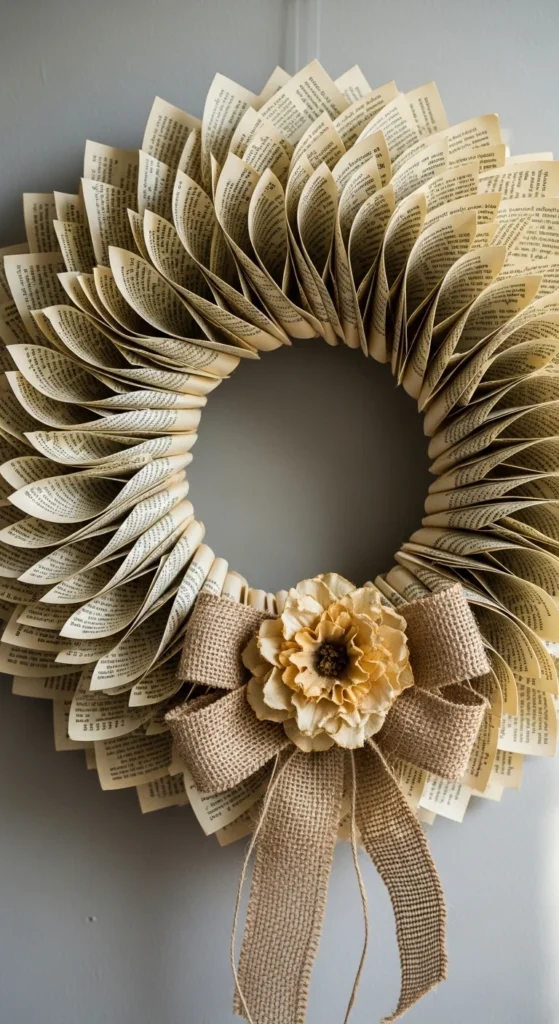
Add a focal point by placing a single flower in the center. You can make a dahlia, rose, or small hydrangea cluster and glue it in the middle.
Then add a bow under the flower. Burlap ribbon or twine works well for rustic decor. Keep it simple so the wreath texture stays dominant.
Budget tip: make the center flower from scraps left over after cone cutting. It keeps waste low and adds detail without extra pages.
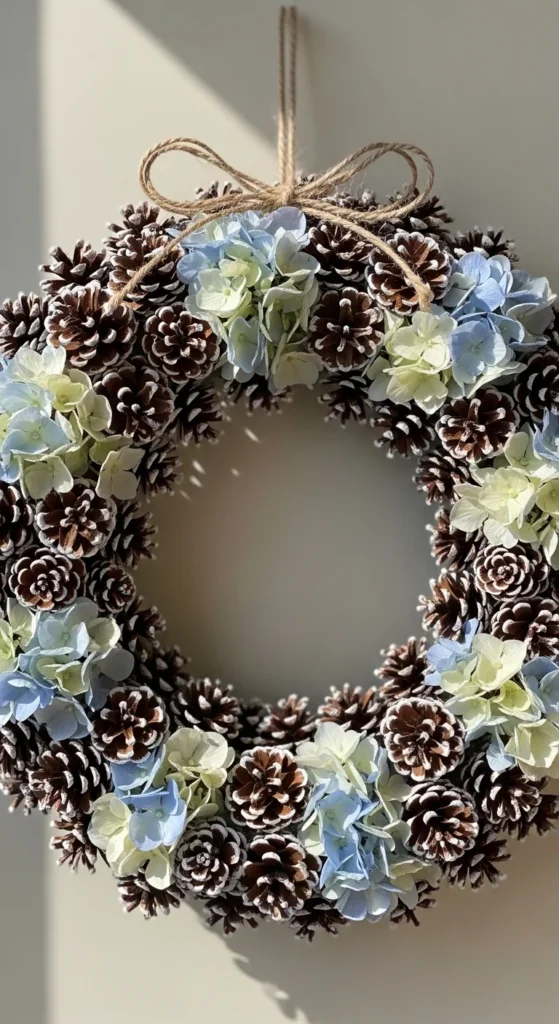
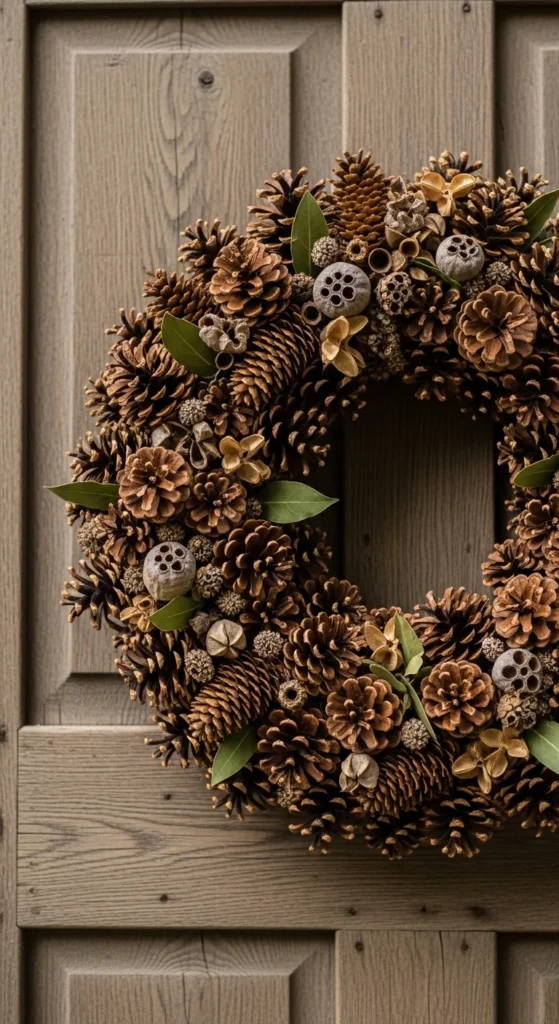
18. Holiday Pick Accent Wreath
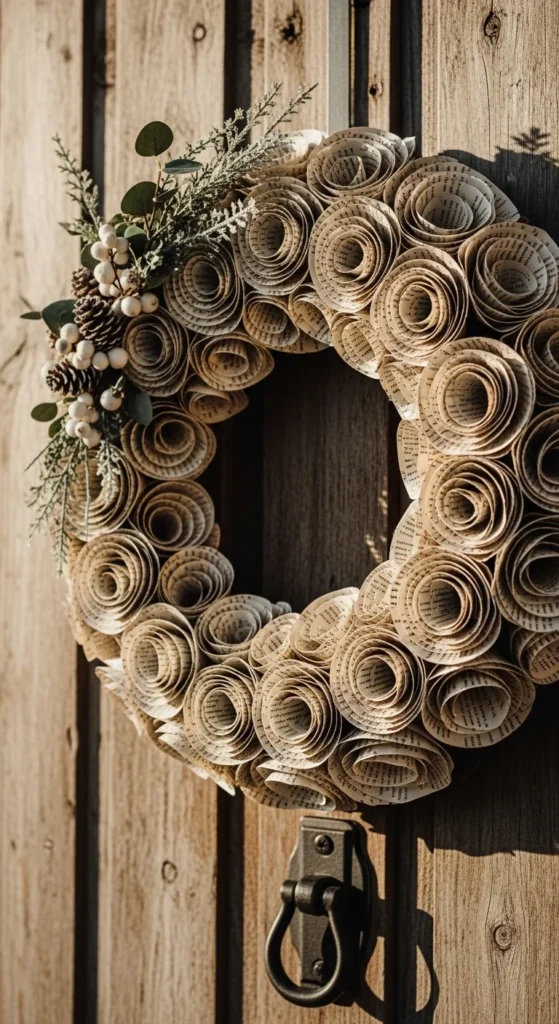
For holiday style, tuck small seasonal picks into the cones. Slide them between cone layers and add a tiny glue dot to secure.
Keep accents minimal. One cluster is often enough. Too many picks can hide the book pages, and the wreath loses its charm.
Budget tip: use natural elements like pinecones or dried seed pods. They pair well with book pages and cost little if you gather them.
19. Rustic Wreath With Paper Roses Cluster

Combine two crafts: cones for the base and roses for a focal cluster. Make 5–7 roses in mixed sizes. Add a few leaves. Glue the cluster on one side of the wreath.
This creates a romantic farmhouse look that works year-round. It also lets you use different paper textures.
Budget tip: use spiral roses because they’re faster. Save cone petals for just one or two “special” roses if you want variety.
20. “Library Kit” Beginner Wreath Layout
If you’re making this as a beginner project, keep it simple. Pre-cut squares, roll cones, glue outer row, glue inner row, then add a hanger. That’s it.
Beginner wreaths look best when cones are consistent. Use one page size and one cone angle. Focus on spacing and overlap.
Budget tip: set a goal like 60 cones first. Attach them and see how full it looks. Add more only if you want extra depth. This keeps the project from feeling endless.
21. Extra-Tight Inner Ring “Dahlia Center” Finish

The center can look unfinished if cones stop abruptly. Fix that by making a tight inner ring. Use smaller cones and place them closer together. It creates a dahlia center look.
You can also add a small paper rosette in the center to cover the final gap. Keep it slightly raised so it adds depth.
Budget tip: small cones can be made from page scraps. You don’t need full squares for the center row.
22. Overlap-Wide-Ends “No Gaps” Coverage
Gaps happen when cones sit too far apart. Solve it by overlapping the wide ends more. Think of it like roof shingles—each cone covers part of the next.
Work in small sections. Glue one cone, then tuck the next cone’s wide edge slightly under the previous cone edge. It hides the base and keeps coverage tight.
Budget tip: if you already have gaps, glue small mini cones into the spaces. They act like fillers and look like extra texture.
23. Rustic Door Hanger Wreath With Extra Back Support
If your wreath will hang on a door, add support so it doesn’t bend. Glue a strip of cardboard across the back like a brace. Then attach your twine or ribbon hanger to that brace.
This keeps the wreath from warping over time. It also helps if the wreath is larger or has three rows.
Budget tip: use cardboard from shipping boxes. It’s free and strong. Keep the brace narrow so it doesn’t show from the front.
24. Rustic Monochrome Wreath (All One Book)
Using one book creates a cohesive look. The paper tone stays consistent, and the wreath feels calm and intentional.
Choose a book with warm, aged pages. Make all cones from it and build a classic three-row wreath. Add only a twine hanger for a clean rustic finish.
Budget tip: find a thick book with lots of pages so you don’t run out. Dictionaries and old textbooks work well because they’re usually long.
25. Mixed Cone + Hydrangea Accent Hybrid
This hybrid wreath combines a full cone base with one hydrangea cluster accent. Make the base using classic cones, then build a clustered “flower head” on one side using smaller cones grouped tightly.
It creates a focal point without adding lots of extra materials. Add a small twine bow under the cluster if you want a finished look.
Budget tip: this is a great way to use leftover small scraps. The cluster doesn’t require perfect cones, and it adds dimension that looks custom.
Conclusion
Book page wreaths are a cozy, budget-friendly way to make rustic decor from books that would otherwise be tossed. Start with a simple cone wreath on a cardboard ring, then experiment with flower styles like dahlias and hydrangeas for more texture. Keep your hanger sturdy, overlap cone edges to hide gaps, and use yellowed pages for instant vintage charm. Once you make one, it’s easy to build a whole set for seasons, gifts, and farmhouse-style rooms.


