

Book page ornaments are a simple way to turn thrifted, worn books into holiday decor that feels cozy and handmade. You can fold pages into rosettes, build lightweight spheres from glued shapes, or decoupage torn pages onto inexpensive blanks. Most of these ideas take basic tools like scissors, glue, and twine, so you can make a whole set in an afternoon. If you want a neutral, vintage-style tree theme—or quick gifts that look thoughtful—these 23 ornament ideas are easy to copy and fun to mix.
1. Accordion Rosette Ornament (Classic Fan)

Cut a page into a long rectangle. Accordion fold it in even sections (about 1/2 inch is a good start). Press folds flat with your fingers or the side of a ruler.
Fold the accordion strip in half. Glue the two ends together to form a half-circle fan. Make a second fan and glue the two halves together into a full rosette. Add a small paper circle on the front and back to lock everything in place.
Attach a loop of twine on the back circle before it fully sets. For a finished look, glue a button, bead, or small paper circle in the center.
Budget tip: use pages with dense text for a richer look. If the folds feel fragile, brush a thin layer of white glue diluted with water across the rosette and let it dry flat.
2. “7 Fold Widths” Rosette Size Set
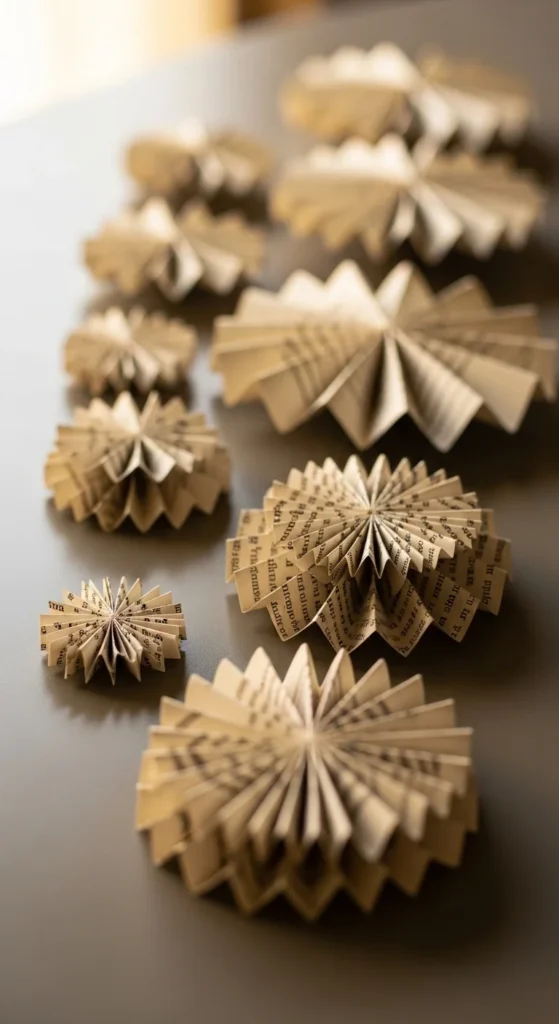
Make a matching set by changing fold width. Smaller folds create tighter rosettes. Wider folds create larger, looser rosettes.
Keep the page length the same, but vary the fold. Then stack two rosettes together—one slightly smaller on top—so the ornament looks layered and full.
Hang them as a group on the tree or use them as gift toppers. They also look nice on wreaths and garlands.
Budget tip: make “mini rosettes” from page scraps. Even short strips can form small fans that work as layered top pieces.
3. Glitter-Look Edge Rosette (Glue + Shine)

You can create a sparkly edge effect without messy extras. After forming your rosette, brush a thin line of white glue along the outer edge. Let it dry slightly.
Then add a light dusting of fine craft sparkle (or skip sparkle and just let the glue dry for a glossy edge). The goal is subtle shine, not heavy coverage.
This works best on tight-fold rosettes because the edges catch light beautifully.
Budget tip: if you don’t have sparkle, use clear glue only. The dried edge still reflects tree lights and looks festive.
4. Scissor-Rounded Rosette Edges

Before you assemble the rosette, trim the ends of your accordion strip. Round the corners, cut points, or add a gentle wave.
When the rosette opens, the cut shape repeats around the circle and gives a decorative edge. It looks detailed but takes seconds.
Budget tip: cut several folded stacks at once for speed. Just keep your grip steady so the cuts match.
5. Bow Ornament From 5 Graduated Strips

Cut five strips that gradually get shorter. Make each strip into a loop and glue the ends together. Stack the loops largest to smallest to form a bow shape.
Add a small strip wrapped around the center to hide glue points. Attach a twine loop behind the center wrap.
These look great on tree branches because they sit lightly and show off the printed text.
Budget tip: make mini bows from leftover strips. Use them as package decorations or tie them onto napkins for holiday tables.
6. Simple Paper Fan Ornament (Half-Rosette)

If full rosettes feel like too much work, make a half rosette. Accordion fold a strip and glue the ends into a semi-circle.
Add a paper circle on the back to keep it stable. Then glue a twine loop behind it.
Half fans look pretty tucked into the tree like layered paper feathers.
Budget tip: pair two half fans back-to-back for a thicker ornament without making a full circular rosette.
7. Half-Circle Sphere Ornament (16-Piece Stack)
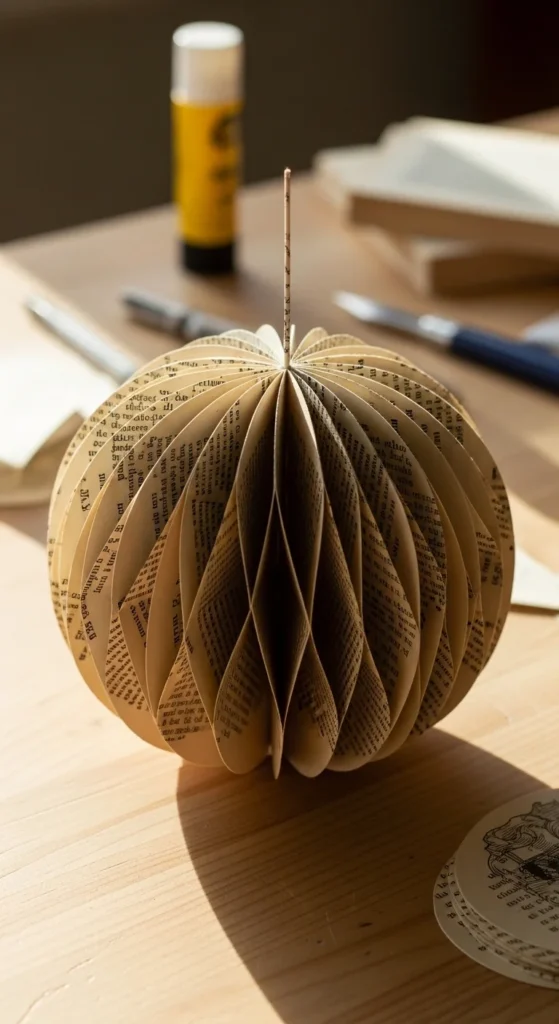
This creates a true 3D ball. Trace a circle and cut multiple circles from book pages. Fold each circle in half.
Glue the folded halves together, one by one, always gluing along the same side of the fold so the stack forms a sphere when opened. Many tutorials use 16 half-circles for a full ball.
When you’re almost done, insert a twine loop into the top seam and glue it securely. Close the final seam and let it dry.
Budget tip: use a small plate or jar lid as your circle template. Smaller circles dry faster and feel sturdier.
8. Mini Honeycomb “Crimp” Ornament

Honeycomb ornaments look vintage and store nicely. Fold strips into repeated pleats and glue in a pattern so they expand into a honeycomb shape.
Keep glue lines thin. Too much glue makes the paper stiff and harder to open. Let each section set before adding the next.
Budget tip: start small. A compact honeycomb ornament looks fancy and uses fewer pages.
9. Decoupage Wood Ornament Blank
This is perfect for fast batches. Use inexpensive wooden shapes. Tear book pages into rough pieces. Brush decoupage glue onto the wood and smooth the paper down.
Work from the center outward. Use your finger or a plastic card to push out bubbles. Once covered, add a top coat and let it dry.
Punch a small hole if needed and thread twine through.
Budget tip: dollar-store blanks are great for this. If edges lift, sand lightly after drying and seal again.
10. Decoupage Foam Ornament Shapes (Ultra Light)

Foam shapes are even lighter than wood. Cover the foam with torn book page bits using decoupage glue. Smooth gently so the foam doesn’t dent.
Add a final coat and let it dry fully before hanging. These are great for small trees and garlands because they don’t weigh branches down.
Budget tip: use leftover foam packaging cut into circles, stars, or simple shapes.
11. Book Page Ornament With Clean Cutouts
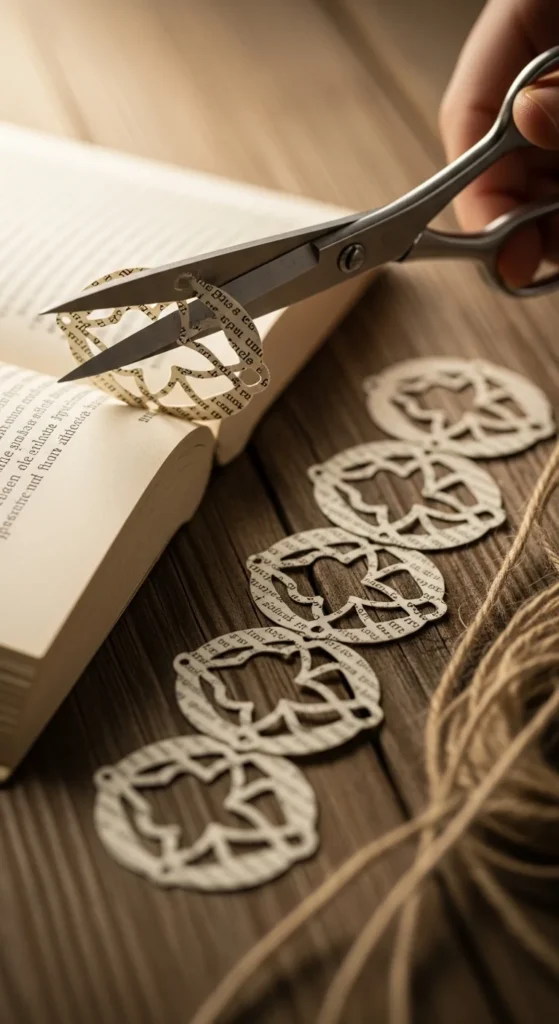
Cut simple silhouettes like circles, stars, bells, or trees from book pages. Layer two shapes with a small piece of cardboard between them to make them sturdier.
Punch a hole at the top and add a twine loop. For extra texture, lightly crumple the paper first and flatten it back out.
Budget tip: if you don’t want layers, just cut doubles and glue them back-to-back. It still feels thicker and hangs better.
12. Mini Book Stack Ornament (Tiny Library)

Mini books look adorable on a tree. Cut small rectangles, fold into little “books,” and stack 8–12 together. Wrap a thin twine loop around the stack and tie it.
You can add simple covers made from thicker paper or printed designs. Keep covers neutral so the book pages stay the star.
Budget tip: skip printed covers and use darker cardstock scraps. The contrast makes the mini stack pop.
13. Fillable Clear Ornament With Mini Books
Fillable ornaments are quick. Make mini books and drop them inside. Add a few tiny crumpled paper bits to fill space and keep books from shifting.
Close the ornament and add a twine loop. It looks like a tiny floating library.
Budget tip: if you don’t have fillables, use the mini book stack idea and tie the stack directly to the tree.
14. Foam “Pages” Mini Book Fill Hack

For ultra-light mini books, use thin foam for inside “pages” and wrap the outside with real book page paper. It keeps the look but reduces weight.
This is great if you’re filling clear ornaments and want more volume without adding heaviness.
Budget tip: reuse thin packing foam. Cut it into strips and fold.
15. Petal Flower Ornament From Page Strips
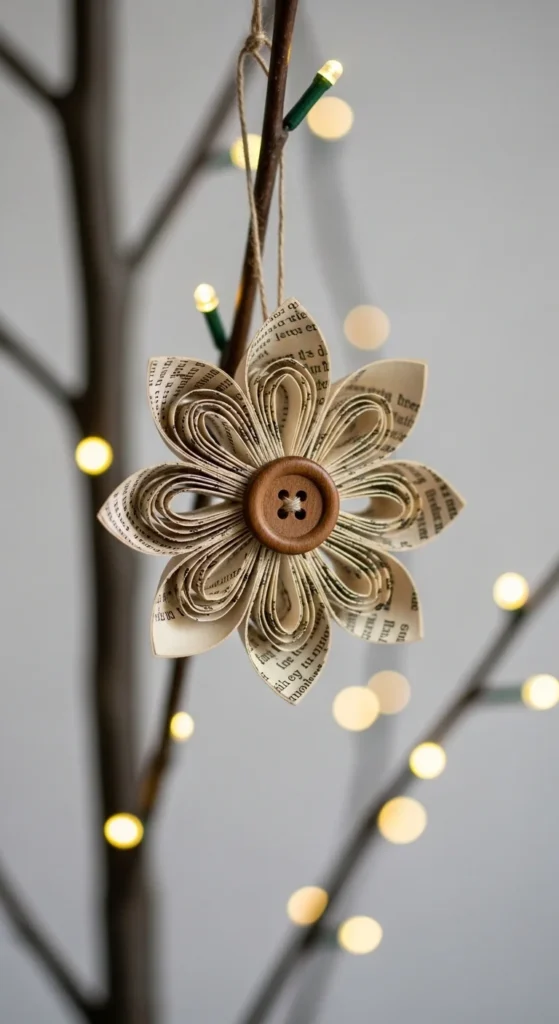
Cut strips and curl them into petal loops. Glue petals in a circle around a small center. Add a button or bead in the middle.
Attach a twine loop to the back. These look great mixed among rosettes because they add a different texture.
Budget tip: use smaller petals for a tighter flower. It uses fewer strips and dries faster.
16. Button Center Swap Rosettes
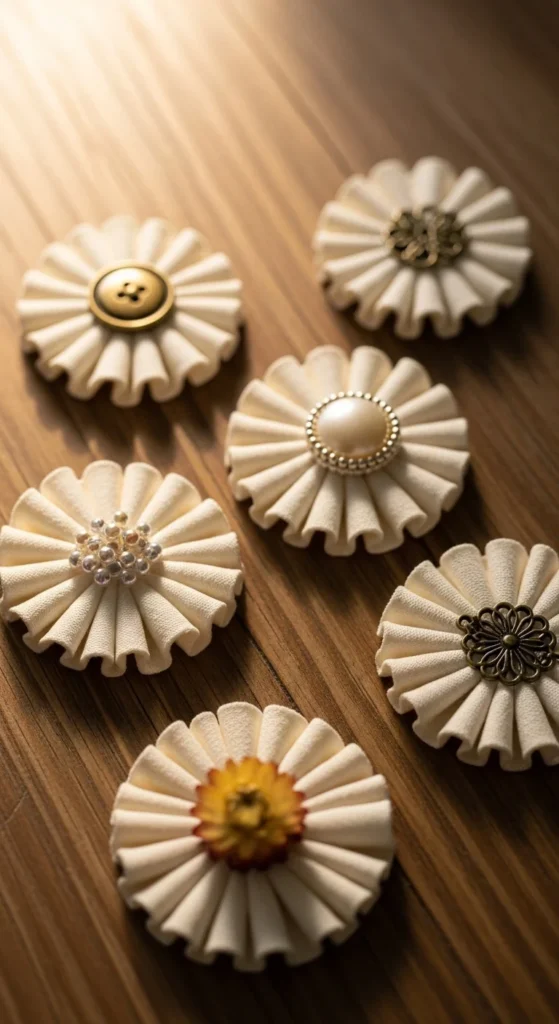
Make a batch of rosettes, then change the center accent for variety. Buttons, beads, small paper circles, or tiny wood disks all work.
Keep the center piece slightly raised so it casts a little shadow. That small detail makes the rosette look more finished.
Budget tip: raid your button jar. Mismatched centers still look charming because the paper stays consistent.
17. Twine Loop “No Hook” Ornament Hangers

If you don’t want metal hooks, use twine loops on every ornament. Cut twine, tie a loop, and glue it under a back circle or seam.
Keep loop size consistent so ornaments hang at similar heights on the tree.
Budget tip: jute or cotton string works. If your twine frays, dab the ends with glue and pinch them to dry.
18. Hole Punch Top “Quick Hang” Ornament

For flat ornaments and banners, hole punching is faster than gluing loops. Punch near the top center, then thread twine through and tie.
Reinforce the hole with a tiny tape square if the paper is thin.
Budget tip: punch two holes and thread like a stitch to keep the ornament from spinning.
19. Rounded Corner Fans for Soft Shape

Take the strip-fan method and round the ends before folding. The fan looks softer and more vintage.
Add a tiny center wrap band to hide glue points. Use twine as the hanger.
Budget tip: this is a great way to use narrow page strips you’d normally toss.
20. Vintage Paper Swap: Hymnal, Map, or Sheet Music

Mix in other old paper for texture. Sheet music looks beautiful in rosettes. Map paper makes fun sphere ornaments. Hymnal pages look classic.
Keep the ornament style the same, but vary the paper. Your tree will look cohesive, not chaotic.
Budget tip: thrift stores often have damaged music books and old atlases. You only need a few pages for accents.
21. Toothpick Edge Trim “Clean Corners” Trick

If glue squeezes out or edges look messy, use a toothpick. While the glue is still soft, scrape away tiny blobs and press seams flat.
It takes a few seconds per ornament and keeps your batch looking neat.
Budget tip: keep wax paper under your work. Glue won’t stick, and cleanup is easy.
22. Keepsake “Yearly Mini Photo Book” Ornament

Turn the mini book idea into a keepsake. Use a thicker cover and add a few small photo prints inside. Keep it simple—just a few pages.
Tie it closed with twine and hang it like a small charm. Over time, you can make one per year.
Budget tip: print photos small and use glue stick to avoid wrinkling. If you don’t want photos, add small patterned paper inside instead.
23. Assembly-Line Ornament Set (Fast Batch Day)
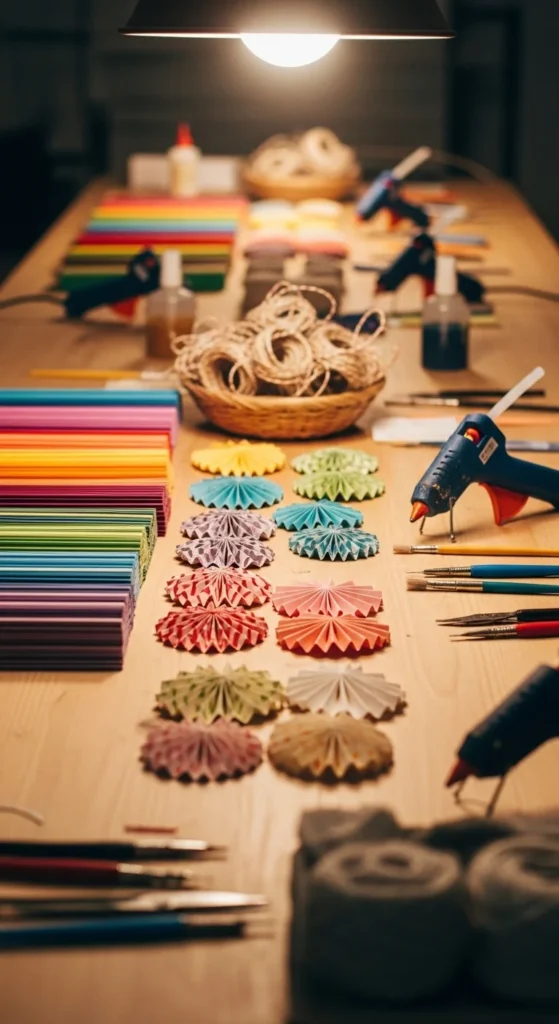
If you’re making a lot, work in batches. Cut all strips first. Fold all strips second. Glue rosettes third. Add centers and hangers last.
This keeps the process quick and avoids constant tool switching. Let ornaments dry flat before hanging so they keep their shape.
Budget tip: pick two ornament styles (like rosettes + strip bows) and mass-produce. Your tree will look cohesive, and you’ll finish faster.
Conclusion
Book page ornaments are perfect for holiday crafting because they’re light, inexpensive, and easy to mix into a matching set. Start with accordion rosettes for the quickest win, then add strip bows, half-circle spheres, and a few decoupage blanks for variety. Use twine loops for a rustic finish, keep glue lines thin, and make a small batch in one sitting so everything looks consistent. Once you see them on the tree, you’ll want a full collection for every season.


