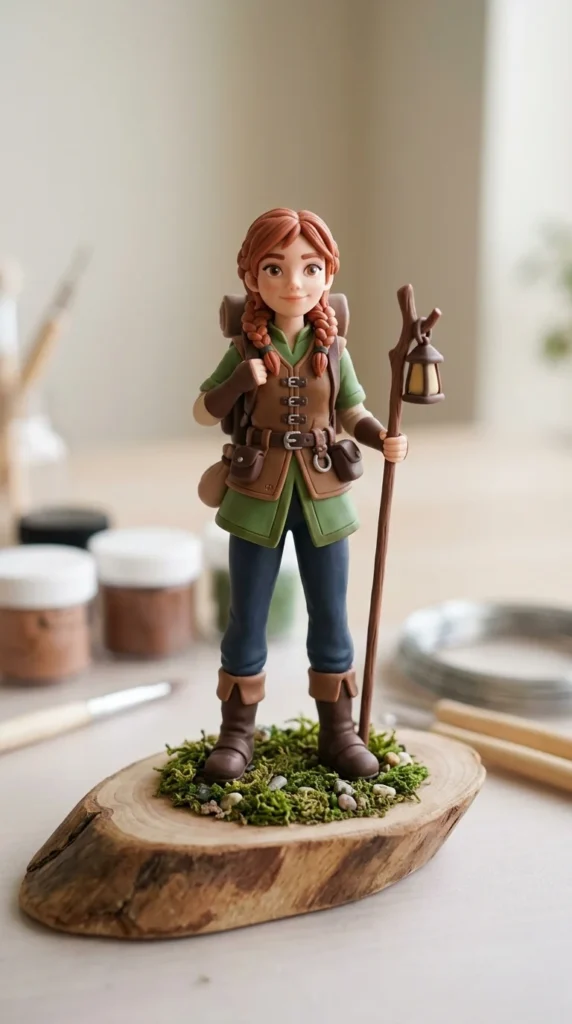
If your polymer clay creations keep bending, sagging, or snapping—there’s a simple fix that experienced artists swear by: armature wire.
Think of it as the hidden skeleton inside your sculpture. Once you learn how to use it, your pieces instantly become stronger, more stable, and way easier to shape.
Let’s walk through exactly how to use armature wire step by step—even if you’ve never tried it before.
What Is Armature Wire (And Why You Need It)
Armature wire is a flexible metal wire used to create a support structure inside polymer clay.
Why it’s so useful:
- Prevents sagging during sculpting
- Supports thin parts like arms, legs, and tails
- Reduces breakage after baking
- Helps you shape poses more easily
- Saves clay by filling space with wire and foil
👉 Most tutorials start by building a wire armature first, then adding bulk and clay on top.
What You’ll Need
Before you start, gather a few simple tools:
- Armature wire (aluminum or floral wire works great)
- Wire cutters
- Pliers
- Aluminum foil
- Polymer clay
- Optional: masking tape or liquid clay
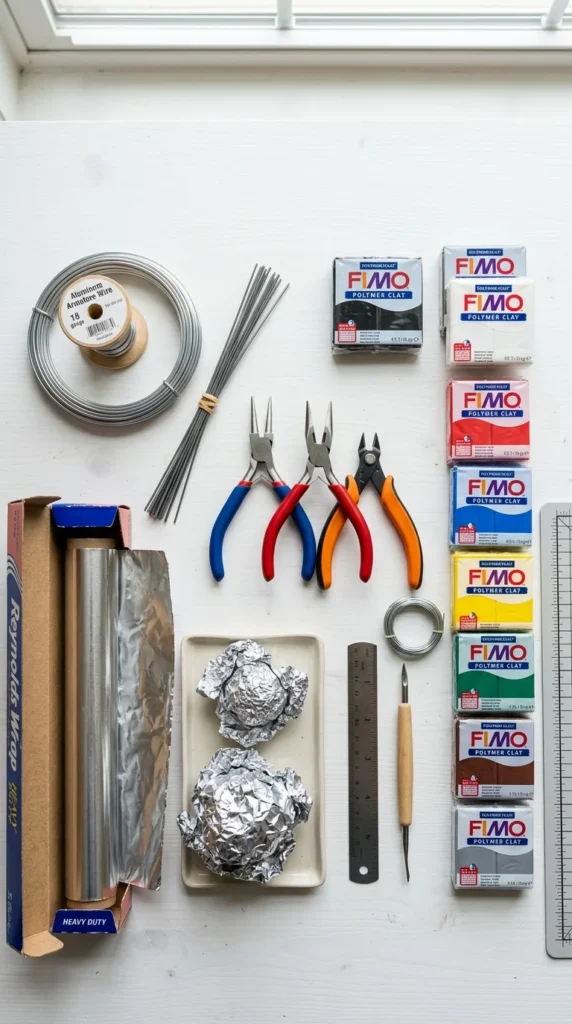
Beginner tip:
If you’re unsure about wire thickness, go slightly thicker—it’s easier to bend strong wire than fix a weak structure later.
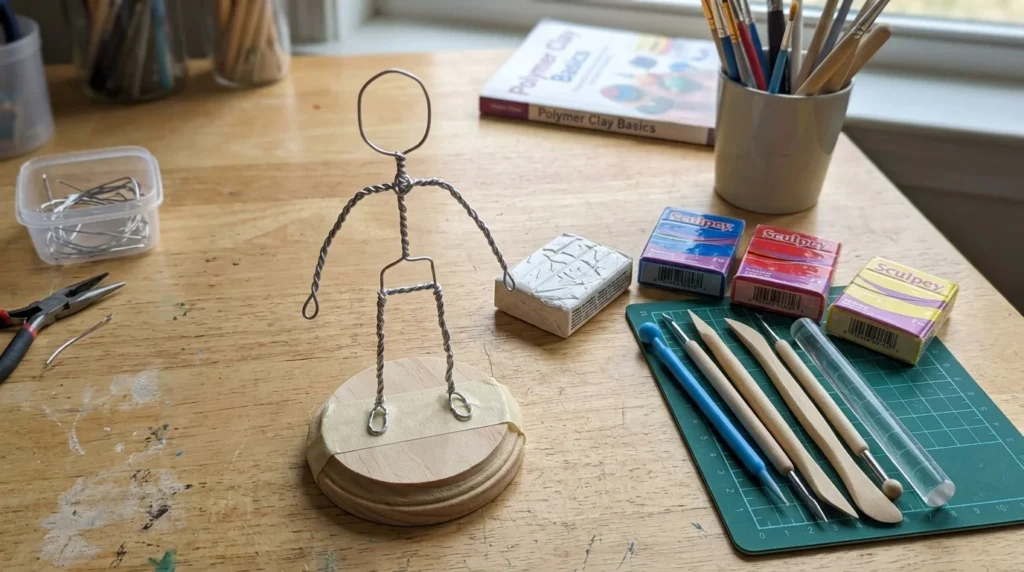
Step 1: Build Your Basic Wire Frame
Start by shaping the wire into the rough form of your project.
For example:
- A simple stick figure for a character
- A curved spine for an animal
- A loop or base for jewelry
How to do it:
- Cut wire to length
- Bend into shape using your hands or pliers
- Twist joints together for strength
👉 Twisting and looping wire helps stabilize the structure and prevents movement.
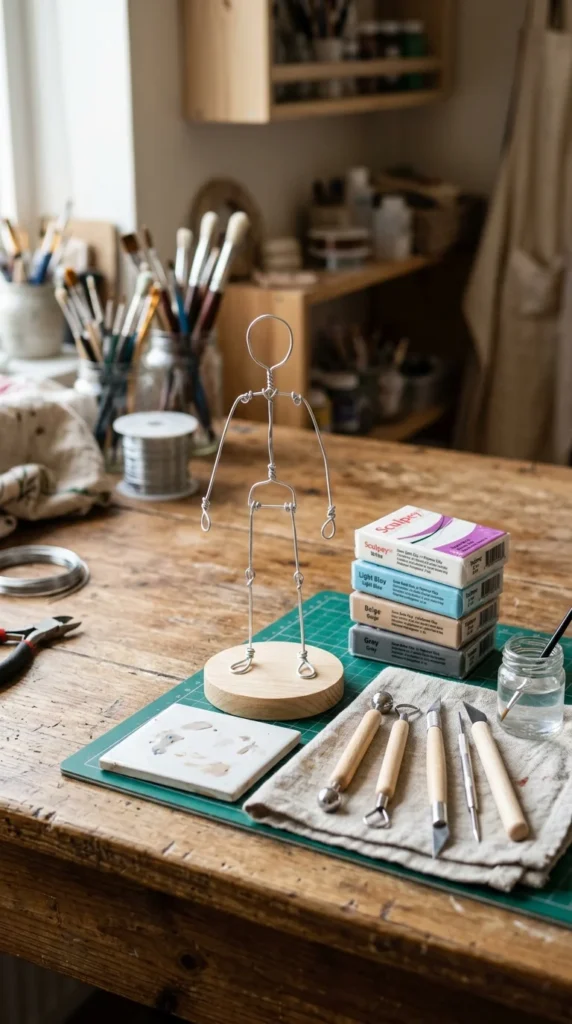
Step 2: Strengthen the Structure
Now that you have your base, make it stronger.
Try these techniques:
- Twist two wires together for extra strength
- Add loops at joints (like shoulders or hips)
- Double up wire in high-stress areas
Why this matters:
A weak armature can bend while you sculpt, causing uneven shapes or breakage later.
Step 3: Bulk It Out with Foil
Here’s where your sculpture starts to take shape.
What to do:
- Tear small pieces of aluminum foil
- Wrap them around the wire frame
- Press gently to shape the form
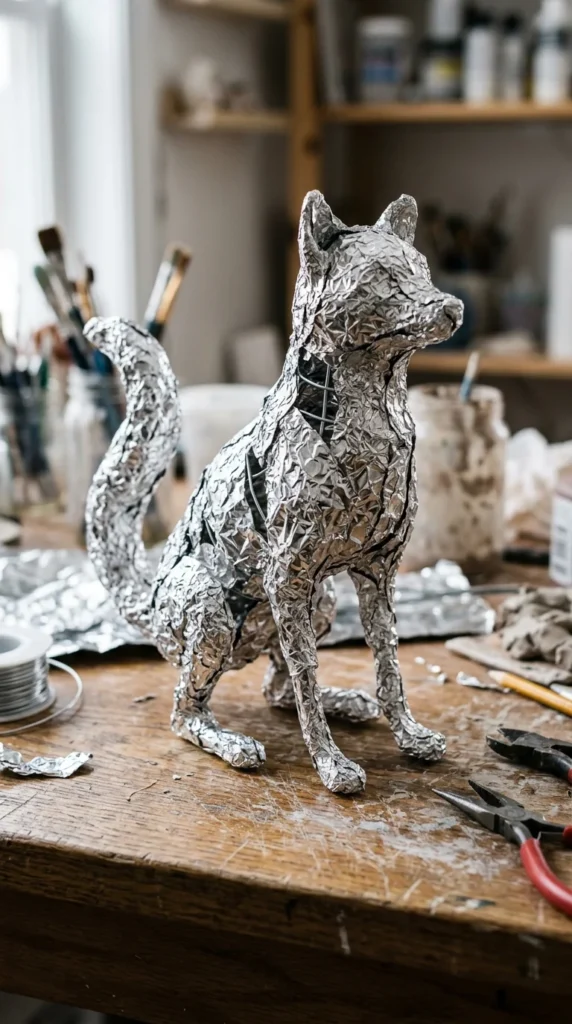
Benefits of foil:
- Reduces clay usage
- Makes your piece lighter
- Helps maintain structure
👉 “Bulking out” with foil is one of the most common and effective techniques.
Step 4: Give the Clay Something to Grip
One common beginner issue: clay sliding off smooth wire or foil.
Fix it with these tricks:
- Lightly roughen the wire surface
- Wrap foil tightly for texture
- Add a thin layer of masking tape
- Brush on a little liquid clay before adding clay
👉 Clay sticks better when the surface isn’t perfectly smooth.
Step 5: Add Your First Layer of Clay
Now it’s time to cover your armature.
Start simple:
- Apply a thin base layer
- Press gently to attach it
- Smooth it evenly
Then:
- Build up layers gradually
- Add details only after the base is stable
👉 Most artists follow a “bulk first, detail later” approach for better results.
Step 6: Shape and Refine Your Design
Once your base layer is set, you can start sculpting details.
Focus on:
- Proportions
- Balance
- Smooth transitions between parts
Tip:
Pause and check your shape before adding fine details—fixing structure early is much easier than later.
Common Mistakes to Avoid
Let’s save you some frustration:
- ❌ Using wire that’s too thin
- ❌ Skipping foil (wastes clay and weakens structure)
- ❌ Not securing joints properly
- ❌ Adding too much clay too fast
- ❌ Ignoring balance and proportions
Troubleshooting: Clay Won’t Stick to Wire?
This is a super common issue.
Easy fixes:
- Roughen the wire with sandpaper
- Wrap with foil or tape
- Use liquid clay as a bonding layer
👉 The key idea: always give your clay a surface it can “grab onto.”
When to Use Armature Wire
Armature wire is perfect for:
- Figurines and characters
- Animals and creatures
- Sculptures with limbs or thin parts
- Any project that needs extra strength
You might not need it for:
- Flat earrings
- Small solid beads
- Simple shapes
Final Result: Strong, Balanced Creations
When done right, your armature should:
- Hold its shape easily
- Support your clay without bending
- Make sculpting smoother and more controlled
Final Thoughts: Build First, Sculpt Second
Using armature wire might feel like an extra step—but it actually makes everything easier.
Your simple formula:
- Build a strong wire frame
- Bulk it out with foil
- Add clay in layers
- Refine and detail
Once you get comfortable with this process, your polymer clay creations will feel stronger, look more polished, and last much longer.
Save This for Later!
If you’re planning to sculpt figures or detailed pieces, this guide will make a huge difference. Bookmark it, pin it, and keep it handy for your next project!

DiyVisual is a DIY ideas resource for makers of every level. Our small editorial team researches and curates easy, budget-friendly craft, home decor, and handmade gift projects — explained step by step so anyone can recreate them at home with simple materials.


