
If you’ve ever tried baking polymer clay in a toaster oven and ended up with scorched edges or undercooked pieces, you’re not alone. These small ovens can feel unpredictable—but once you understand how to control them, they become one of the easiest ways to bake clay at home.
The secret? It’s not about fancy tools—it’s about temperature control, smart placement, and a simple heat-shielding setup. Let’s break it down step by step.
Why Use a Toaster Oven for Polymer Clay?
Toaster ovens are super popular among crafters—and for good reason.
Benefits:
- Perfect for small batches (earrings, charms, beads)
- Heats up quickly
- Easy to dedicate just for crafting
- Compact and space-saving
But here’s the catch:
👉 Toaster ovens often have hot spots and temperature swings, which can lead to burning or uneven curing.
That’s why setup matters more than the oven itself.
What You’ll Need for a Safe Setup
Before you start, gather these essentials:
- Toaster oven
- Oven thermometer (non-negotiable!)
- Baking tray or tile
- Parchment paper or cardstock
- Aluminum foil (for tenting)
- Timer
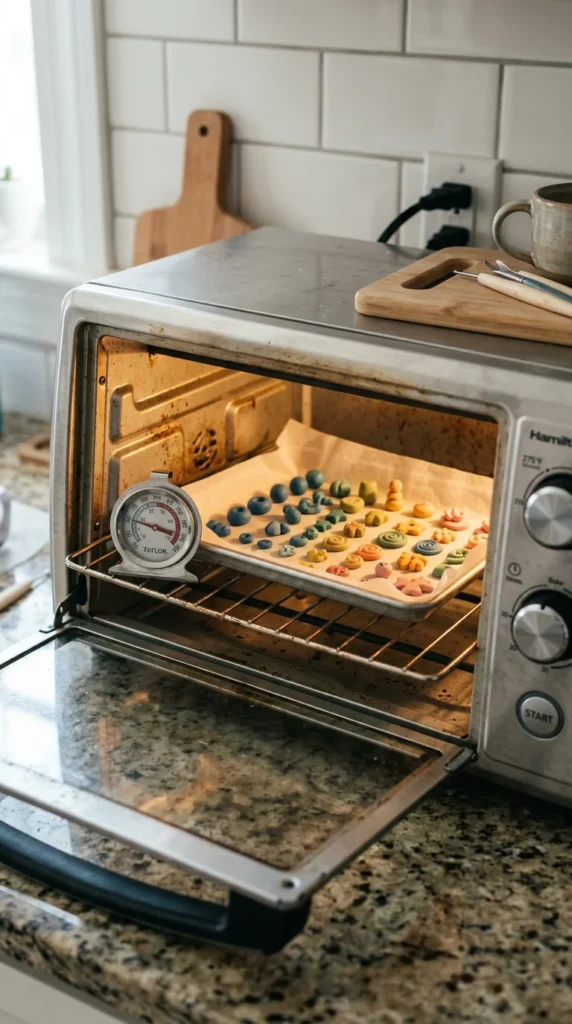
Why the thermometer matters:
Most toaster ovens don’t match their dial settings—so you need a real reading inside the oven.
Step 1: Preheat and Stabilize the Temperature
This is where most mistakes happen.
Do this first:
- Set your oven to 275°F / 135°C (or your clay’s package instructions)
- Let it preheat for at least 10–15 minutes
- Check the thermometer reading
👉 Temperature spikes during preheating can scorch clay fast, so never skip this step.
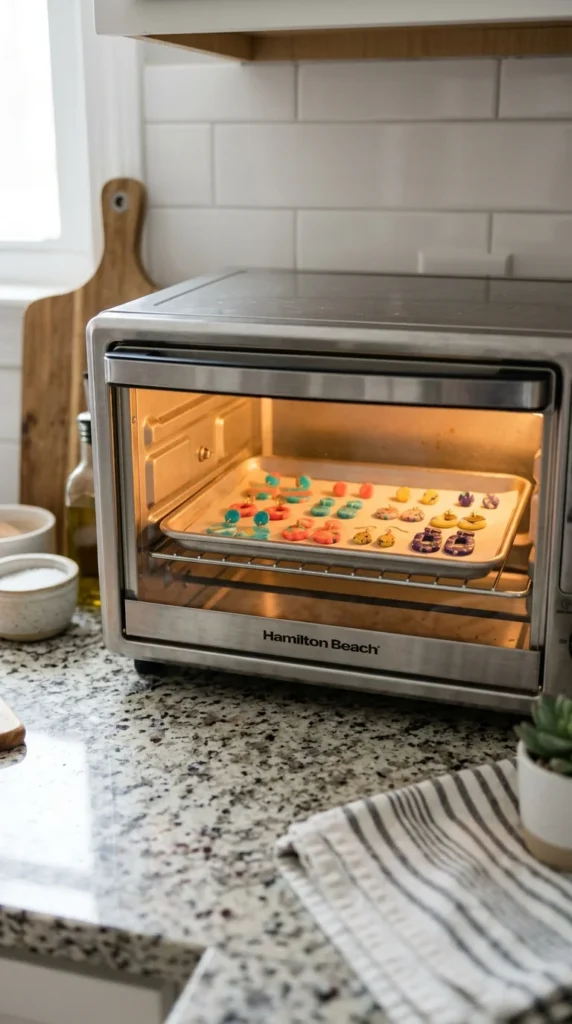
Step 2: Set Up Your Baking Surface
Your clay should never sit directly on a metal tray.
Best surface options:
- Parchment paper
- Cardstock (for matte finish)
- Ceramic tile
Place your clay on top and keep pieces slightly spaced apart.
Extra tip:
Put the thermometer right next to your clay, not in a corner—heat varies inside small ovens.
Step 3: Position Everything in the Center
Toaster ovens heat from top and bottom elements, which can cause uneven baking.
Best placement:
- Center of the rack
- Away from heating elements
- Not touching oven walls
This helps prevent:
- Browning
- Scorching
- Uneven curing
Step 4: Use a Foil Tent (Highly Recommended)
This is one of the easiest ways to avoid burning.
How to do it:
- Fold aluminum foil into a loose “tent”
- Place it over your clay
- Leave space so it doesn’t touch the surface
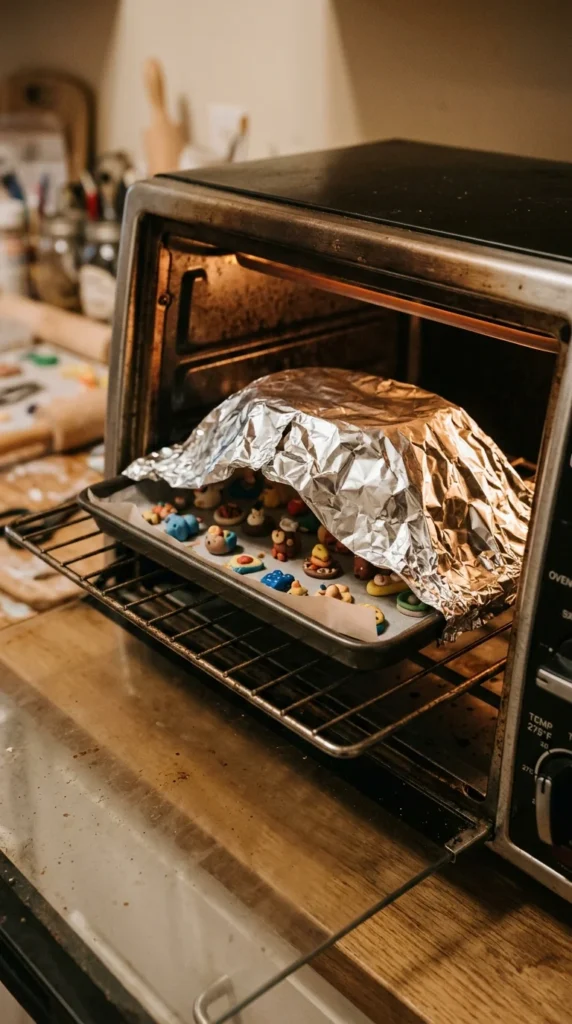
Why it works:
- Blocks direct radiant heat
- Reduces hot spots
- Keeps colors from darkening
Step 5: Bake Based on Thickness
Forget guessing—use this rule:
- 15–30 minutes per ¼ inch (6 mm) thickness
Some brands (like Premo) often need closer to the 30-minute range.
Important:
- Longer baking = stronger clay
- Short baking = weak, brittle results
👉 Underbaking is actually more common (and worse) than overbaking.
Step 6: Keep an Eye on Temperature Fluctuations
Toaster ovens can shift temperature quickly.
Watch for:
- Sudden spikes
- Browning edges
- Burning smell
If needed:
- Slightly lower the setting
- Adjust rack position
- Improve your foil tent
How to Tell When It’s Done
After baking:
- Let the clay cool completely
- Gently press with your fingernail
What you want:
- Firm, not brittle
- Slight flexibility (depending on brand)
If it feels weak → it likely needs more baking time.
Common Toaster Oven Mistakes
Avoid these beginner pitfalls:
- ❌ Trusting the dial instead of a thermometer
- ❌ Baking too close to heating elements
- ❌ Skipping preheating
- ❌ Not using a heat shield
- ❌ Trying to bake faster at higher temps
Pro Tips for Even, Safe Results
- Use a dedicated toaster oven if possible
- Always bake on the center rack
- Double-layer your protection (paper + foil tent)
- Bake longer at correct temperature for durability
- Rotate the tray halfway through if your oven runs uneven
Cooling and Finishing
Once your timer ends:
- Turn off the oven
- Let pieces cool slowly inside or on a tray
- Avoid handling while hot

Cooling properly helps:
- Prevent warping
- Improve strength
- Lock in shape and color
Final Thoughts: Small Oven, Big Results
A toaster oven can absolutely give you safe, even, professional-looking polymer clay results—as long as you control the heat.
Your simple formula:
- Accurate temperature
- Center placement
- Foil tent protection
- Enough baking time
Once you get this routine down, baking becomes easy—and way less stressful.
Save This for Later!
If you’re making earrings, charms, or mini projects, this guide will save you from so much trial and error. Bookmark it, pin it, and keep it nearby for your next clay session!

DiyVisual is a DIY ideas resource for makers of every level. Our small editorial team researches and curates easy, budget-friendly craft, home decor, and handmade gift projects — explained step by step so anyone can recreate them at home with simple materials.


