Rangoli is one of the easiest ways to make your home entrance feel warm and welcoming. The best part is you don’t need expensive materials or advanced skills to begin. With simple powders, rice flour, or flower petals, beginners can create stunning designs in minutes. This curated list focuses on easy rangoli designs for beginners that look neat, festive, and achievable at home. Start small, follow simple shapes, and enjoy the calm, creative rhythm of rangoli making.
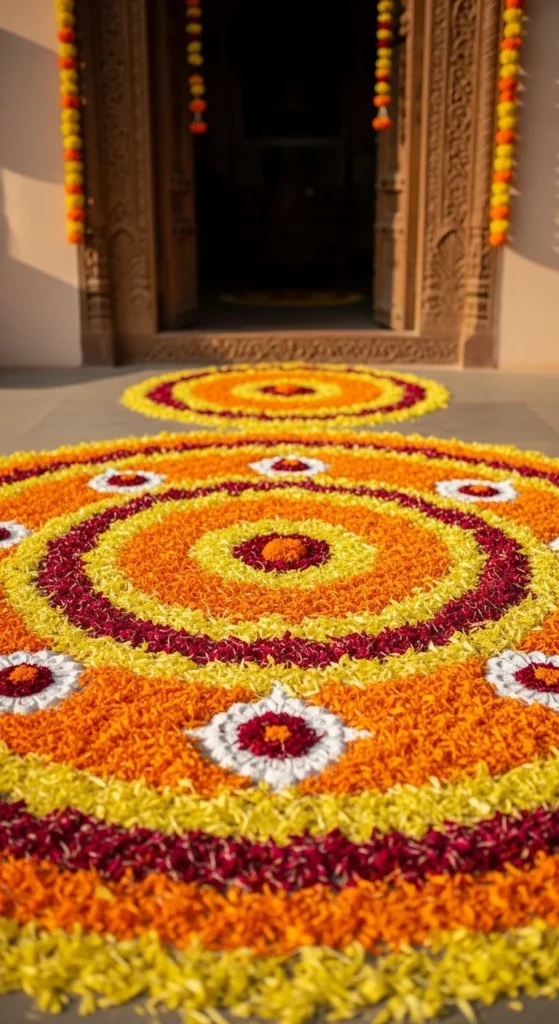
1. Simple Concentric Circle Rangoli
Concentric circles are the easiest starting point for beginners. The symmetry naturally looks clean even if your lines are not perfect.
Begin by drawing a small circle with chalk. Add larger circles around it, keeping spacing even. Fill each ring with a different color powder or flower petals.
Use three-color minimalism for the best results. White, yellow, and red work beautifully together.
Work slowly while filling the circles. Use your fingers to spread powder evenly.
Budget tip: rice flour works well for the white base.
Place a small diya in the center during festivals for extra charm.
This design is quick, forgiving, and perfect for daily entrances.
2. 8×2 Dot Kolam Starter Pattern
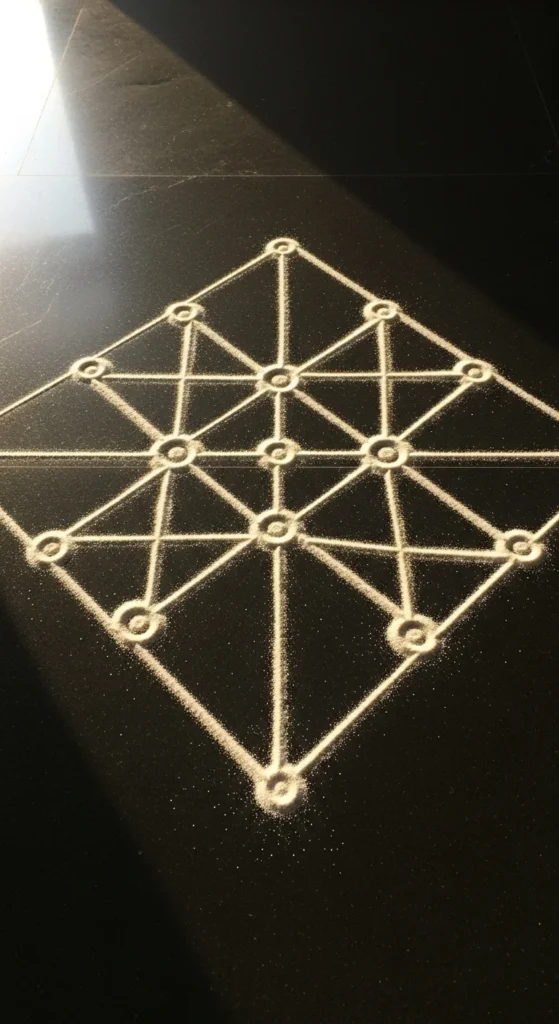
Dot kolams help beginners maintain symmetry with ease. The grid guides your lines step by step.
Start by placing an 8×2 dot grid using rice flour or chalk. Keep dots evenly spaced.
Connect the dots using smooth curved lines. Move slowly and keep your hand relaxed.
Once the outline is complete, you can leave it white or add soft colors.
Budget tip: use rice flour for eco-friendly daily designs.
Practice the same grid a few times. Your muscle memory improves quickly.
This pattern is ideal for daily kolam practice at home entrances.
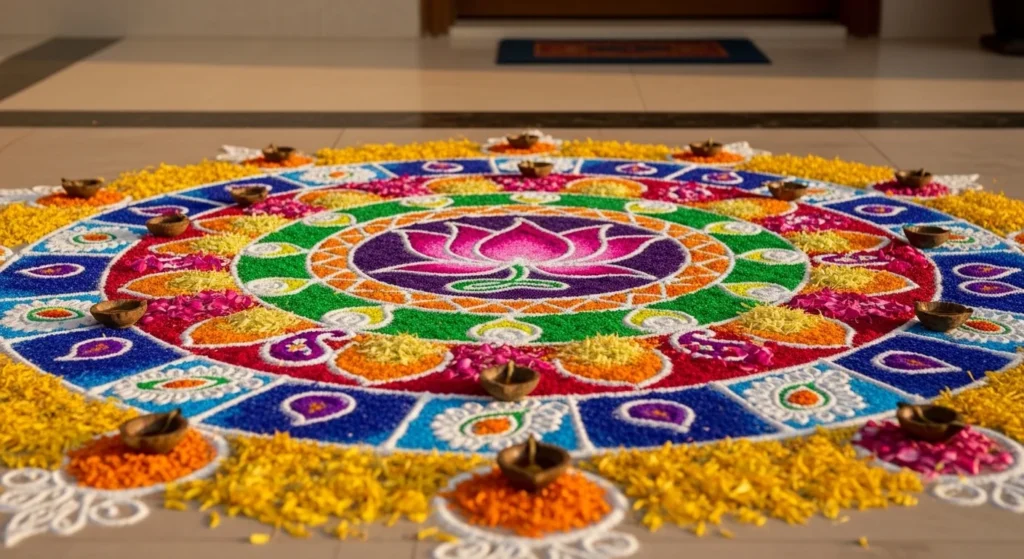
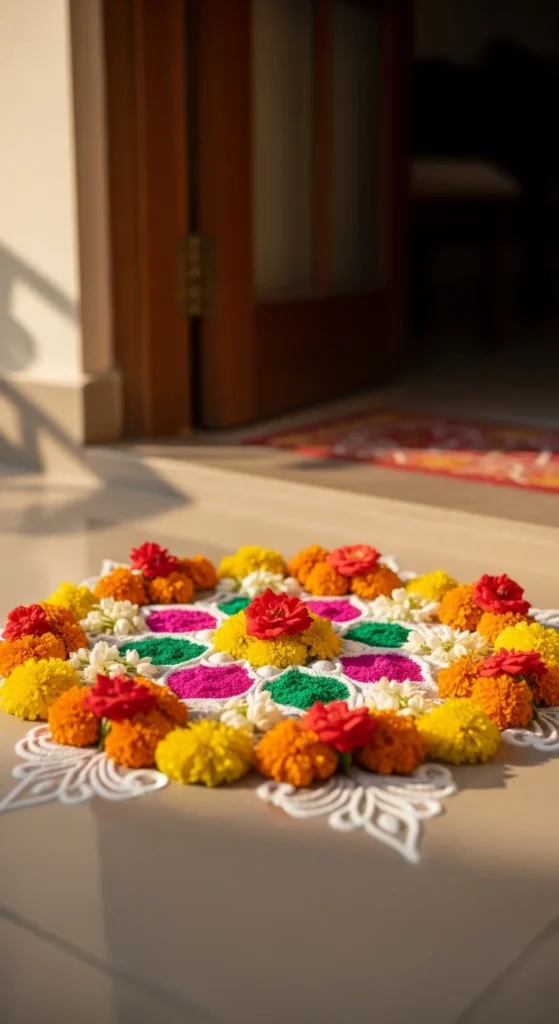
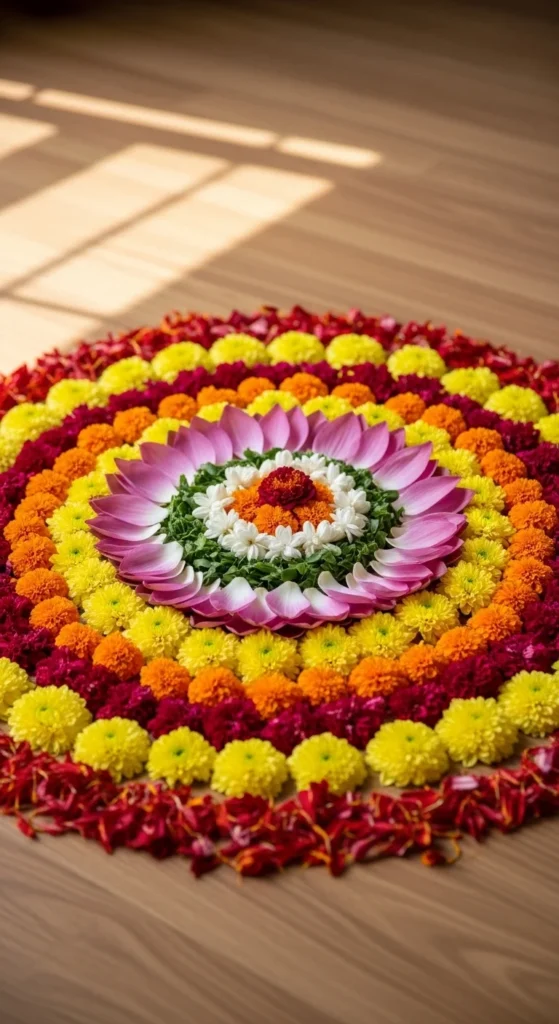
3. Marigold Petal Circle Design
Flower rangoli is very forgiving, which makes it perfect for beginners.
Start by outlining a circle with chalk. Fill the outer ring with marigold petals. Add a contrasting inner ring using rose petals.
Press petals gently so they sit close together.
Keep the design compact for daily use. Larger versions work well for festivals.
Budget tip: buy loose marigold petals instead of full garlands.
Lightly spritz water to help petals stay in place longer.
This design looks festive with very little effort.
4. Freehand Diya Rangoli
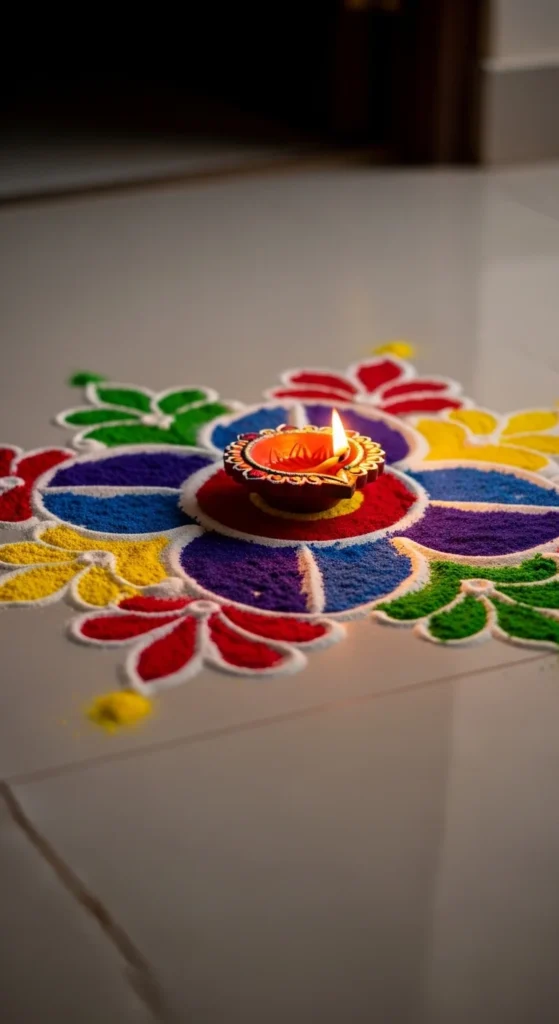
A diya motif is a festival favorite and surprisingly easy to draw.
Sketch the diya outline lightly with chalk first. This prevents uneven shapes.
Fill the flame with yellow or orange powder. Use red or blue for the base.
Keep the edges smooth by gently tapping excess powder inward.
For beginners, one single diya looks clean and elegant.
Budget tip: use leftover rangoli powder from previous designs.
Place a real diya beside the design during celebrations.
This freehand style builds confidence quickly.
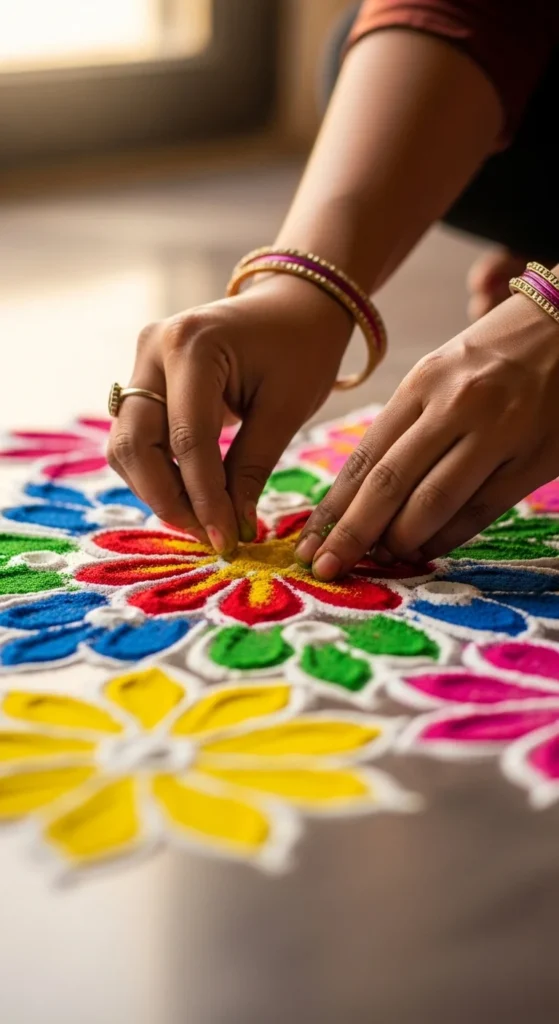
5. Three-Color Minimal Rangoli
Minimal rangoli designs are trending because they look neat and modern.
Choose just three colors. Too many shades can look messy for beginners.
Create a simple floral or circular base. Fill each section slowly.
Focus on clean borders rather than complex shapes.
Use chalk first if you feel unsure about spacing.
Budget tip: small powder packets are enough for minimal designs.
This style works well for apartments and small entryways.
6. Rice Flour Daily Kolam

Rice flour kolam is perfect for everyday practice. It is eco-friendly and easy to clean.
Pinch the flour between your fingers and let it flow slowly while drawing.
Start with straight lines and loops before trying complex shapes.
Keep the design small for daily use.
Budget tip: regular kitchen rice flour works perfectly.
Practice improves line control quickly.
This design is calm, simple, and traditional.
7. Square Four-Corner Rangoli

Square layouts work well when you have limited space.
Draw a square border using chalk. Add small floral or leaf motifs in each corner.
Fill the center with a simple circle or star.
Keep spacing even between borders.
Budget tip: use white outline first before adding color.
This layout fits perfectly in front of doors or small foyers.
8. Easy Leaf Border Rangoli
Borders instantly make rangoli look more finished.
Start with a plain circular or square center. Then add repeating leaf shapes around the edge.
Use green powder or actual leaves for variation.
Keep each leaf the same size for a clean look.
Budget tip: practice the leaf shape on paper first.
Borders are great for upgrading very simple designs.
9. Small Entrance Floral Rangoli
A small entrance rangoli is perfect when you want something quick but still festive. This design works well for apartments and narrow doorways.
Start by marking a small circle with chalk. Add simple petal shapes around the edge to form a flower.
Fill each petal slowly using two or three colors only. Too many shades can make the design look busy.
Keep the center plain or add a tiny dot pattern.
Budget tip: use leftover powder from previous rangoli sessions.
If using petals, press them gently so they stay in place.
This design takes very little time and is great for daily decoration.
10. Easy Swastik Freehand Rangoli
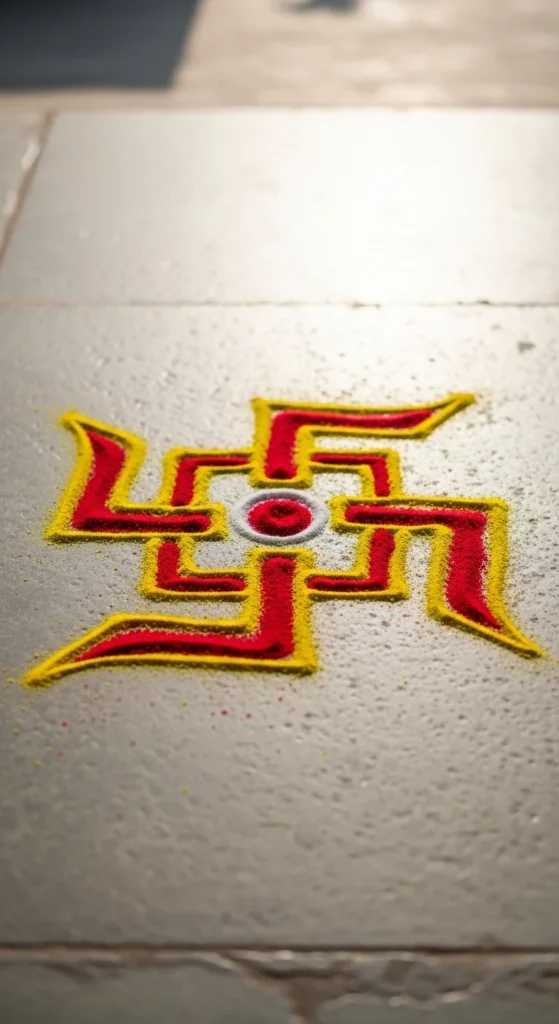
The swastik is a traditional auspicious symbol often used during festivals. The key to a neat result is starting with a light outline.
Use chalk to sketch the basic shape first. Keep the arms evenly spaced.
Fill the symbol with yellow powder and outline with red or white.
Work slowly along the edges and gently tap excess powder inward.
Keep the design medium-sized for better control.
Budget tip: rice flour works well for the white outline.
You can add small dots or petals around the symbol for extra decoration.
This freehand design builds confidence with basic shapes.
11. Simple Bird Muggulu Pattern

Bird muggulu patterns are popular for festive and New Year decorations. They look detailed but follow a clear dot structure.
Start with a small dot grid. Keep spacing equal in all directions.
Connect the dots gradually to form the bird outline. Move slowly and keep curves smooth.
Once complete, you can leave the design white or add soft color fills.
Budget tip: practice the dot placement using chalk before rice flour.
This design improves hand control while still being beginner friendly.
12. Quick Diya Corner Rangoli

Corner rangoli designs are ideal when you have limited floor space.
Draw a small diya shape angled toward the room. Outline lightly with chalk first.
Fill the flame with yellow or orange. Use contrasting color for the base.
Add tiny dots or mini petals around the diya for extra charm.
Keep the design compact so it fits neatly in the corner.
Budget tip: use a spoon edge to guide straight lines.
This quick design works well during festivals when time is short.
13. Concentric Petal Gradient Rangoli

Gradient rangoli looks impressive but is surprisingly simple.
Start with a circular chalk outline. Fill the outer ring with one petal color.
Add inner rings using slightly darker shades to create a soft transition.
Press petals gently so the rings look dense and even.
Stick to three shades for the cleanest gradient effect.
Budget tip: mix marigold and rose petals for natural color variation.
Place a diya in the center during celebrations.
This design gives a rich look with minimal effort.
14. Easy Chalk Outline Rangoli
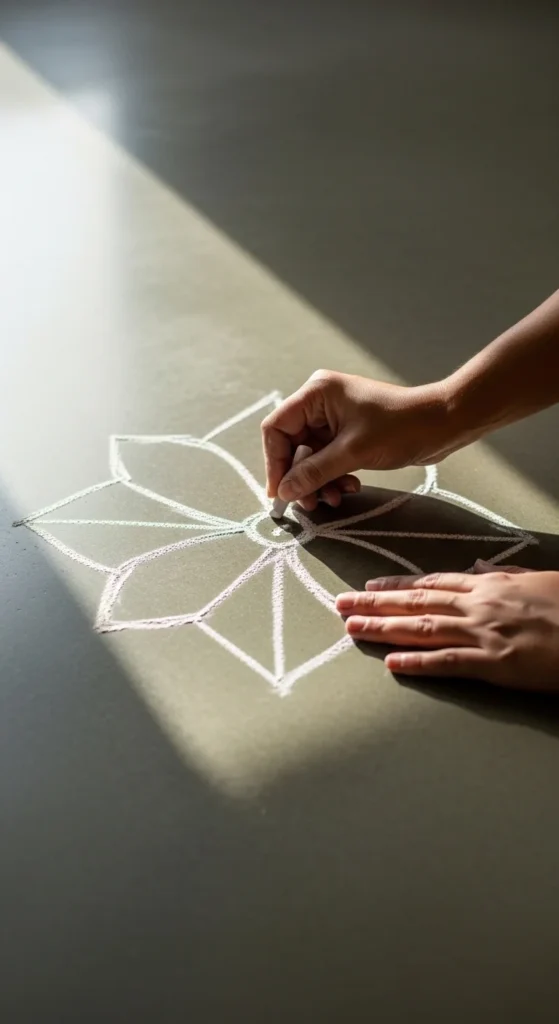
Chalk rangoli is perfect practice before using colored powders.
Start by sketching simple shapes like flowers, stars, or circles.
Keep lines light and smooth. If mistakes happen, wipe gently and redraw.
Once confident, you can fill the outline with powder or petals.
This method greatly reduces beginner mistakes.
Budget tip: regular white chalk works perfectly.
Practice daily to improve hand control.
This is one of the best ways to build rangoli confidence.
15. Minimal Dot Flower Rangoli
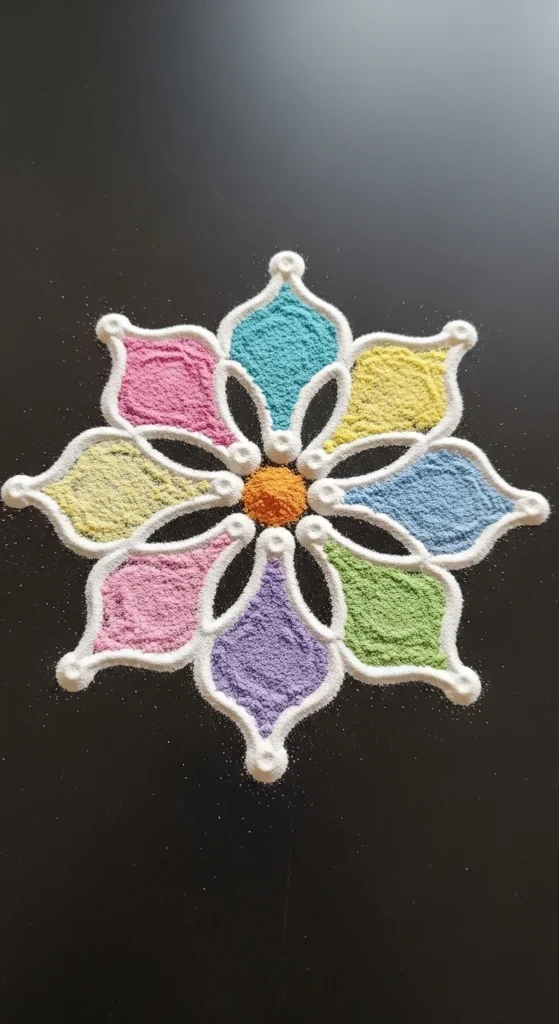
Dot flowers are neat and structured, which makes them beginner friendly.
Place a small dot grid in a circular layout.
Connect the dots to form petal loops around the center.
Keep each loop similar in size for symmetry.
Fill lightly with one or two colors.
Budget tip: rice flour dots are easy to place and adjust.
This design is quick and perfect for daily entrances.
16. Easy Pookalam Style Ring
Pookalam-style rangoli uses only flower petals, which makes it very forgiving.
Draw a medium circle outline first.
Fill the outer ring with marigold petals and the inner ring with contrasting flowers.
Keep the layers tight so the design looks full.
Stick to two or three rings for beginners.
Budget tip: buy loose petals in small quantities.
This style works beautifully for festive mornings.
17. No-Tool Finger Rangoli
Finger rangoli proves you don’t need special tools.
Pinch powder between your fingers and let it flow slowly while drawing.
Start with straight lines and simple curves.
Keep movements slow and steady.
Practice small designs before attempting larger ones.
Budget tip: use a tray to hold powder for easy pinching.
This method builds strong control over time.
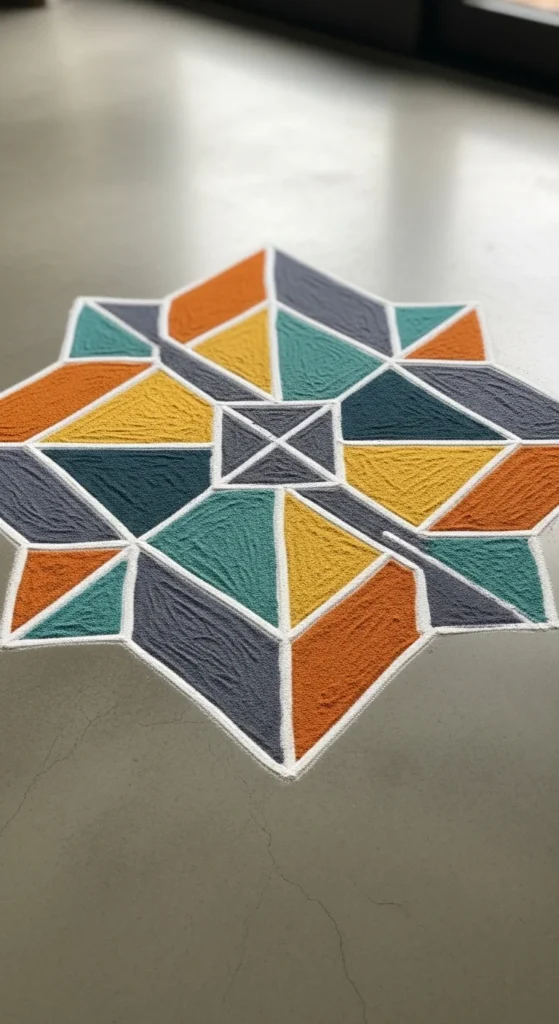
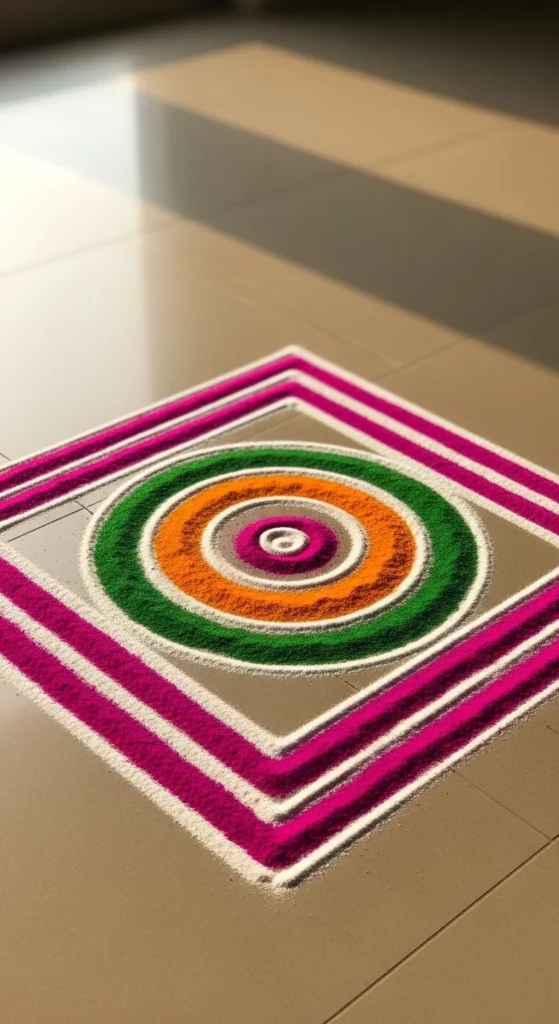
18. Simple Geometric Rangoli

Geometric rangoli looks modern and tidy.
Start with a square or diamond base.
Add straight lines and triangles inside the shape.
Fill each section carefully using two or three colors.
Use chalk first to keep lines straight.
Budget tip: a ruler edge can guide clean borders.
This design suits modern home entrances.
19. Tiny Balcony Rangoli
A tiny balcony rangoli is perfect when space is limited. You do not need a large area to create something attractive.
Start with a small circle or square drawn lightly in chalk. Keep the size under one foot wide so it fits comfortably.
Use two or three colors only. Fewer colors help the design look tidy in small spaces.
Fill slowly using your fingers. Smooth the edges by gently tapping inward.
Add tiny white dots around the border for a finished look.
Budget tip: use leftover powder from previous designs.
This style works well for apartments and daily decor.
With practice, you can complete it in under 10 minutes.
20. Easy Star Rangoli Pattern

Star shapes are beginner friendly and naturally eye-catching.
Begin by drawing a basic five-point star with chalk. Keep lines light so you can adjust if needed.
Outline the star using white powder first. This creates a clean boundary.
Fill alternating sections with bright colors. Two-tone combinations work best.
Add small dots at each star tip for extra detail.
Budget tip: practice the star on paper before drawing on the floor.
Keep the star medium-sized for better control.
This design is quick and looks festive without much effort.
21. Semi-Circle Doorstep Rangoli
Semi-circle rangoli fits perfectly against door thresholds.
Draw a half-circle using chalk along the doorstep edge. This keeps the layout neat and space-efficient.
Add simple petal loops around the curve.
Fill each section slowly with powder or petals.
Keep the center plain or add a tiny floral dot.
Budget tip: use rice flour for the white base to save money.
This design is great for quick festive decoration.
It also reduces cleanup since it stays close to the door line.
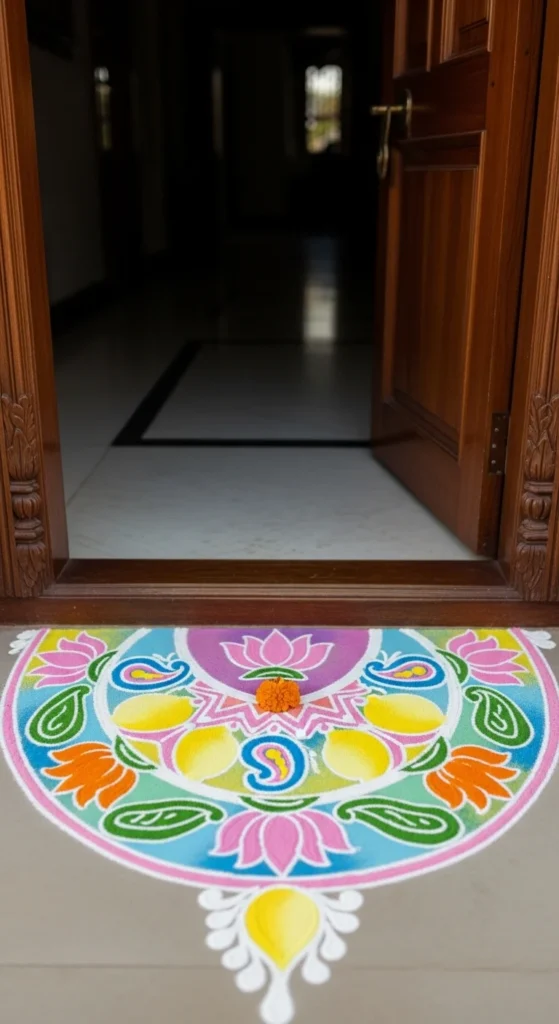
22. Easy Lotus Rangoli
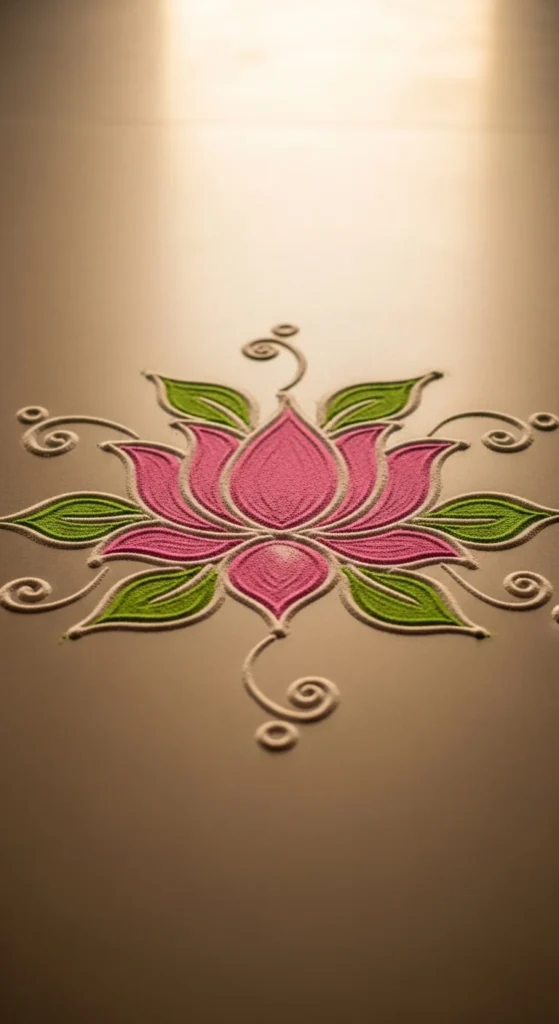
The lotus is a classic rangoli motif that beginners can draw with practice.
Start with a small circle center. Sketch large rounded petals around it using chalk.
Keep petal shapes wide and simple rather than narrow.
Fill petals with pink or red powder and outline with white.
Add two green leaves at the base for balance.
Budget tip: start with a four-petal lotus before trying larger versions.
Work slowly along the petal edges for neatness.
This design looks traditional and elegant.
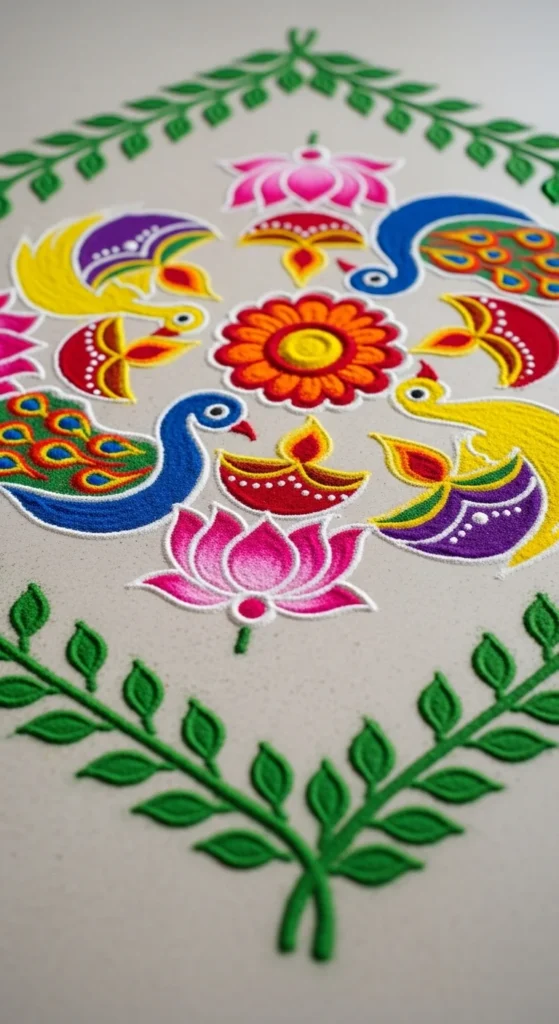
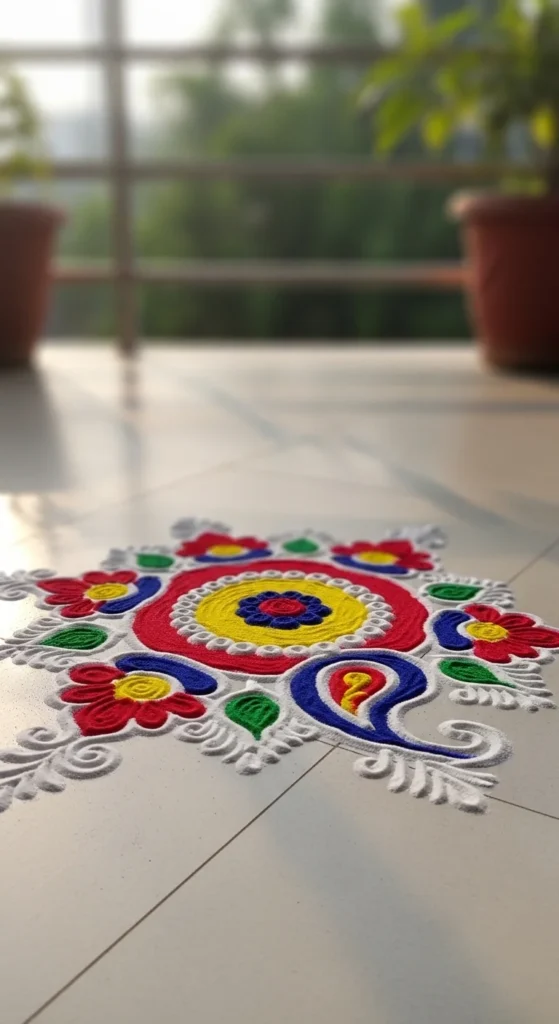
23. Easy Peacock Feather Rangoli
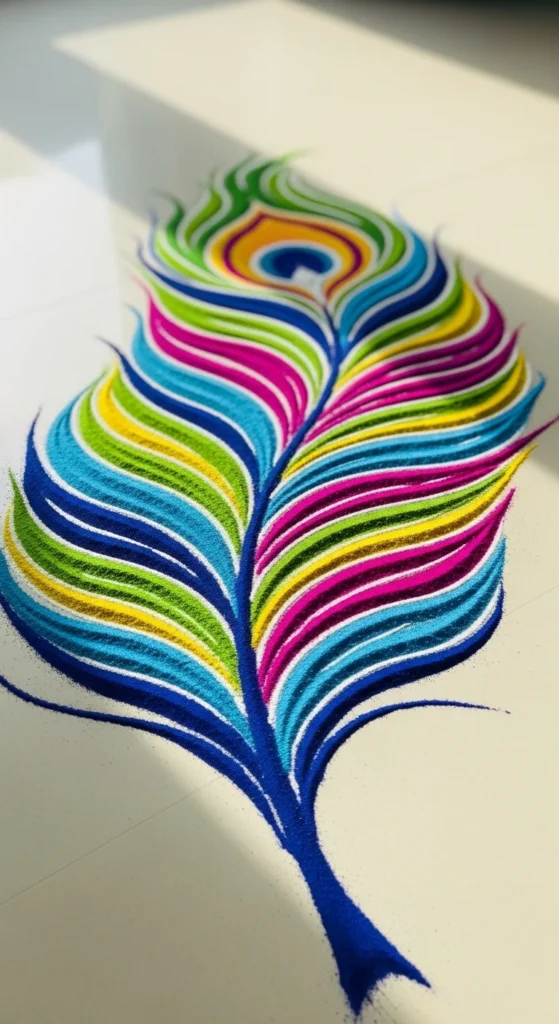
Peacock feather rangoli looks detailed but can be simplified for beginners.
Draw one large curved line first. This becomes the feather spine.
Add small oval loops along one side to form the feather pattern.
Fill with blue, green, and yellow powder.
Keep the layout slim rather than wide.
Budget tip: use just three colors to keep it manageable.
Place a few white dots around the feather for a finished look.
This design adds graceful movement to your entrance.
24. Quick Festival Diya Circle

This diya circle works beautifully during festive evenings.
Start with a medium chalk circle.
Draw small diya shapes evenly around the ring.
Fill flames with yellow and bases with red or blue.
Keep spacing equal between each diya.
Add a real lamp in the center if desired.
Budget tip: make fewer diyas if you are short on time.
This design creates strong visual impact quickly.
25. Rice Flour Spiral Rangoli
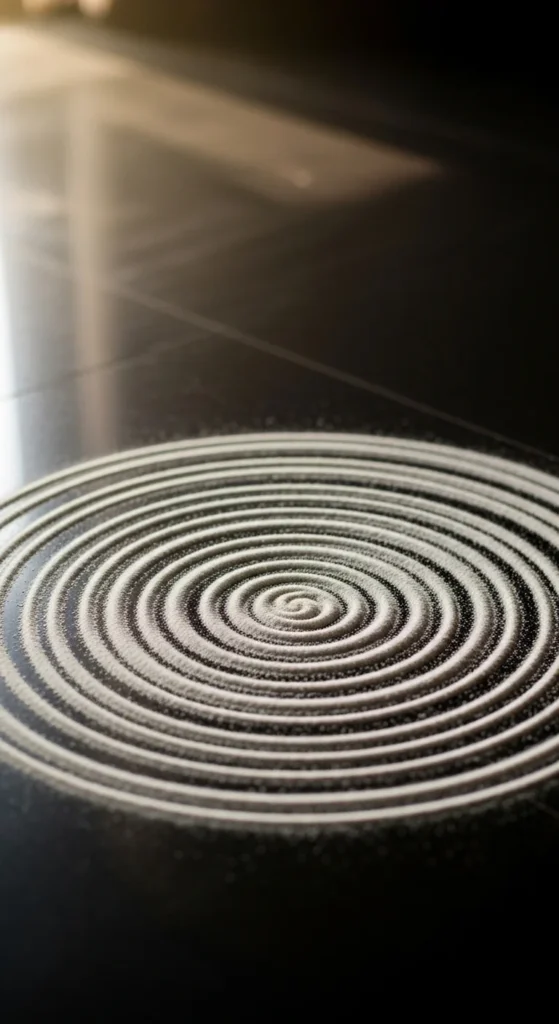
Spiral kolam designs are calming to draw and very beginner friendly.
Pinch rice flour between your fingers and start from the center.
Move outward slowly in one continuous spiral motion.
Keep your hand relaxed for smoother curves.
You can add small dots along the spiral edge if desired.
Budget tip: kitchen rice flour works perfectly.
Practice slowly to build control.
This design is excellent for daily morning rangoli.
26. Easy Double Border Rangoli
Double borders instantly make simple rangoli look more polished.
Draw your main shape first. Then add two parallel outline lines around it.
Keep the gap between borders even.
Fill the center lightly with color or leave it white.
Use contrasting powder for the outer border.
Budget tip: practice straight borders using chalk first.
This technique upgrades even the simplest designs.
27. Mini Flower Grid Rangoli
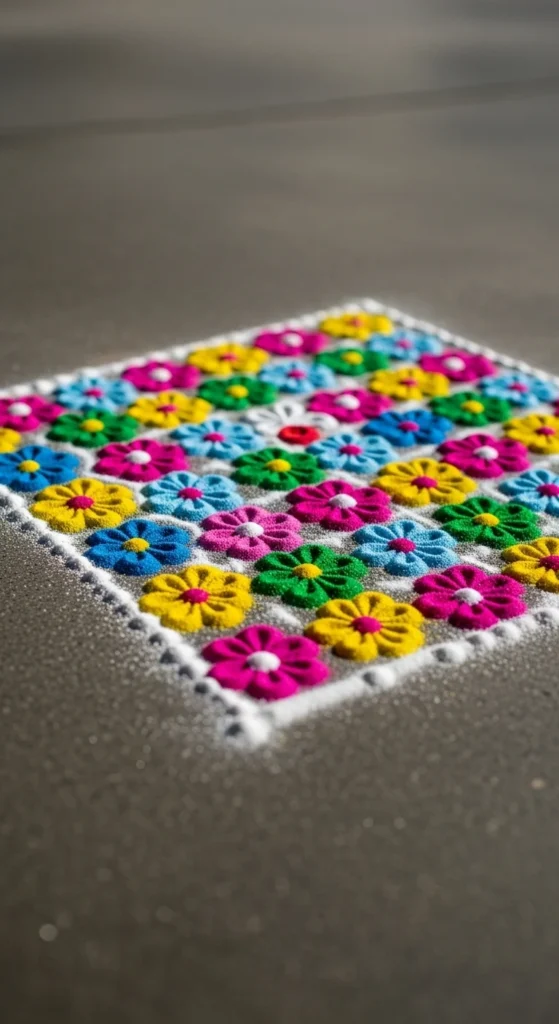
Mini flower grids are perfect for neat daily decoration.
Create a small square dot grid.
Around each dot, draw a tiny four-petal flower.
Keep spacing consistent across the grid.
Fill lightly with two soft colors.
Budget tip: keep the grid small for faster completion.
This pattern improves precision while staying simple.
28. Classic Entrance Welcome Rangoli

A classic welcome rangoli combines simple elements into one balanced layout.
Start with a medium central circle.
Add four small floral motifs around it at equal spacing.
Fill using three coordinated colors.
Finish with a dotted outer border.
Keep the overall size appropriate for your doorway.
Budget tip: reuse leftover powders creatively.
This design works for both daily decor and festive days.
It is simple, balanced, and beginner friendly.
Conclusion
Easy rangoli becomes enjoyable when you focus on simple shapes, steady hand movement, and limited colors. You do not need complex tools or large spaces to create beautiful entrance designs. Start with small patterns, practice regularly, and your confidence will grow quickly. Pick one design from this list today and enjoy the calm, creative process of rangoli making at home.

DiyVisual is a DIY ideas resource for makers of every level. Our small editorial team researches and curates easy, budget-friendly craft, home decor, and handmade gift projects — explained step by step so anyone can recreate them at home with simple materials.


