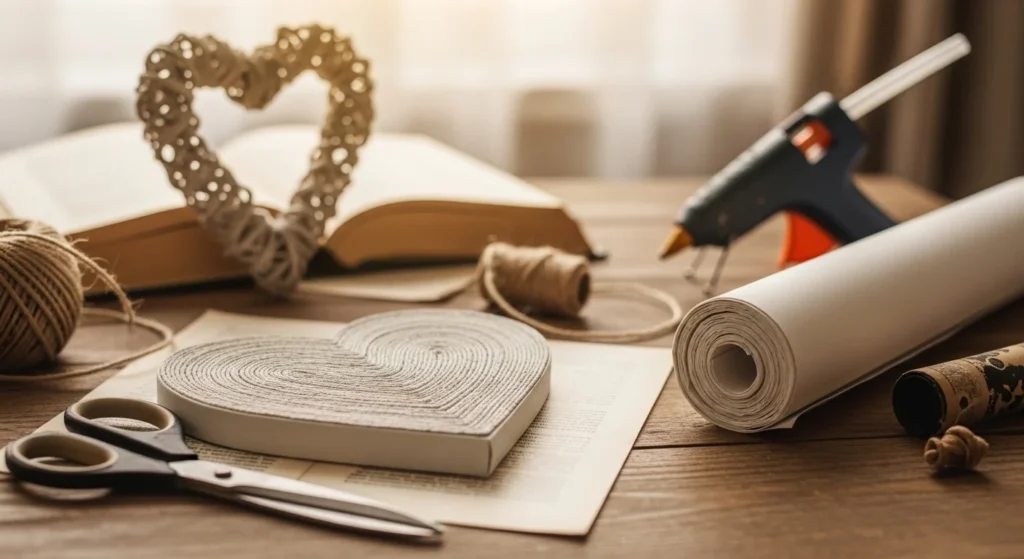

Book page heart art is one of the prettiest ways to turn worn-out books into decor that feels warm and personal. You can roll pages into little tubes, fold entire books into heart sculptures, or layer torn corners for a soft 3D texture. Most projects use simple supplies—cardboard, foam, canvas, glue, and twine—so it’s easy to make something giftable without spending much. Below are heart art ideas that work for Valentine’s Day, weddings, anniversaries, or anytime you want a handmade touch.
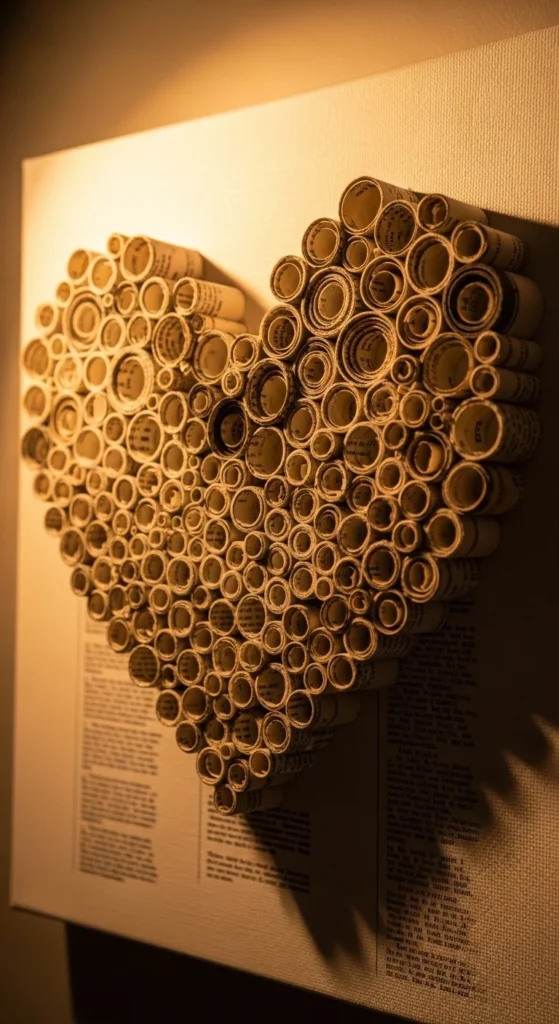
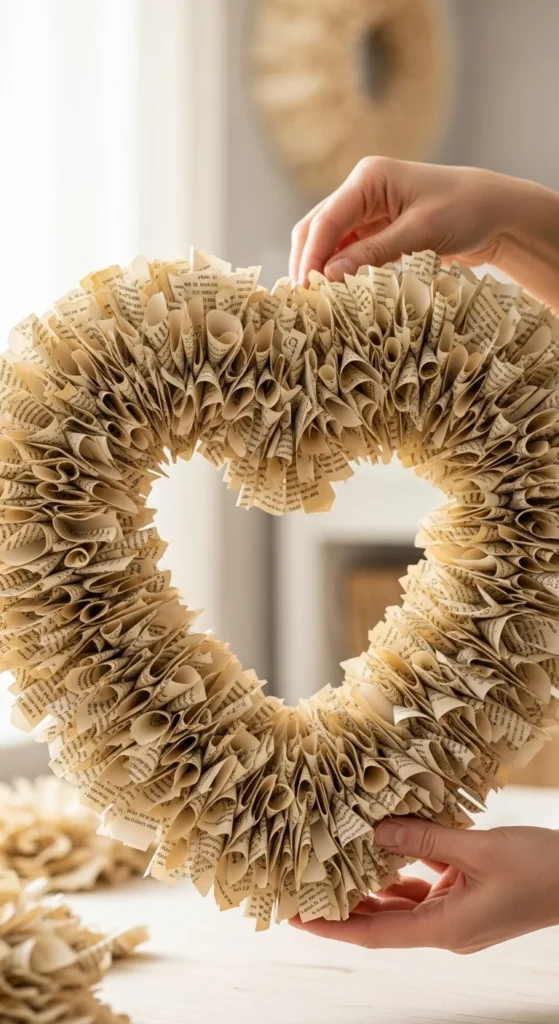
1. Rolled Tube Heart Canvas (Classic 3D Wall Art)

Trace a heart on an 11×14 canvas (or any size you have). Roll book pages into tight tubes. Keep the ends tucked so they don’t pop open. Glue each tube along the heart outline first. Then fill the inside.
For a tidy look, cut tubes to two lengths. Use longer tubes on the outer curve. Use shorter tubes near the point and center dip. That helps the shape read clearly from far away.
Paint the canvas first if you want contrast. A soft blue, blush, or warm neutral works well. Let paint dry fully so glue grabs.
Budget tip: use a thrift-store canvas or cardboard covered with leftover wrapping paper. If you hate hot glue strings, use tacky glue and clothespins to hold sections while drying.
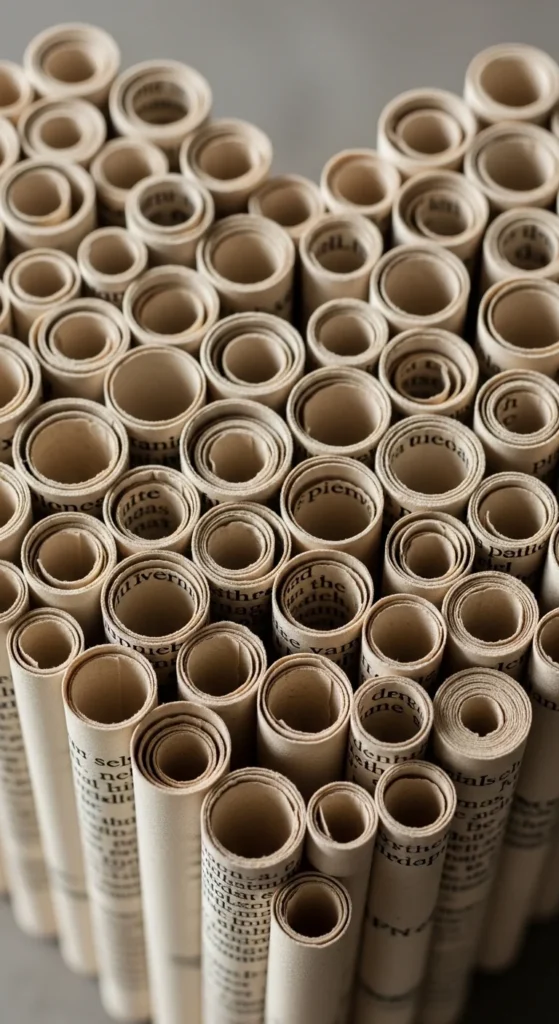
2. Two-Tone Rolled Tube Heart (Light + Dark Pages)
Mix two paper styles for depth. Use regular novel pages for most tubes. Add dictionary pages or slightly darker paper for a border.
Start by outlining the heart with the darker tubes. Then fill the center with lighter tubes. Keep your spacing tight. Small gaps can look messy once it hangs on the wall.
If your pages are thin, roll them around a skewer first, then slide off. That keeps tube size consistent. Add a pencil guideline down the center of the heart so both sides stay even.
Budget tip: no dictionary? Tea-dye a few pages to create a darker set. You only need enough for the outline.
3. Rolled Tube Heart With Chalk-Painted Background

Paint the canvas background first to make the heart pop. Chalk-style paint looks soft and romantic, especially with vintage paper. Let it dry, then lightly sand edges for a worn look.
Build your rolled tube heart on top. Keep glue dots small so they don’t squeeze out. Work in sections so you don’t rush. If you want a crisp outline, place tubes along the traced line, then fill inward.
Add a small twine bow at the bottom point for a simple finish. Or add a lace strip across the bottom edge of the canvas.
Budget tip: mix craft paint with a tiny bit of baking soda to get a chalky look. Test on scrap cardboard first.
4. Rolled Tube Heart With Staggered Heights
This version looks extra sculptural. Roll tubes the same width, but cut them to different heights. Think short, medium, and tall. Place taller tubes toward the center and shorter ones near the edge.
The height variation creates shadow and texture without extra supplies. Use a ruler to mark cut lengths in batches. It saves time and keeps the look consistent.
If the tubes collapse, roll tighter or add a dot of glue inside the end. You can also wrap one edge of the tube with a thin strip of page scrap to stiffen it.
Budget tip: use cereal-box cardboard as a base instead of canvas. Paint it, trace the heart, then glue tubes on top.
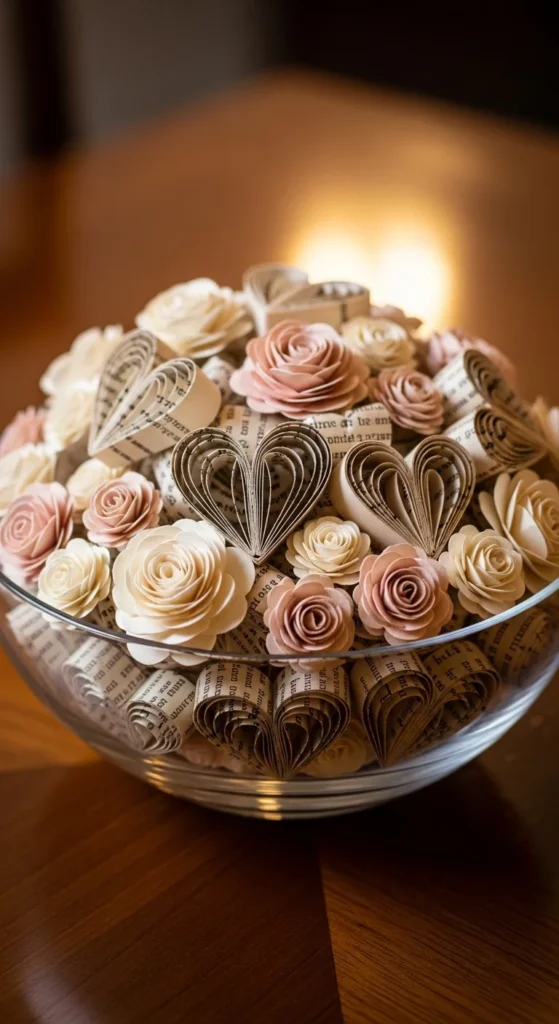
5. Mini Rolled Tube Heart (Gift-Tag Size)

Make a small version for gifts. Cut a tag shape from cardboard. Trace a mini heart. Roll very thin tubes from narrow page strips.
Outline the heart first. Then fill the center. Add a punched hole at the top and thread twine through. These look great on wrapped gifts, flower bundles, or treat bags.
Keep glue minimal. Tiny pieces get messy fast. If hot glue feels too intense, use tacky glue and let it dry flat under a book.
Budget tip: one book page can make several tags. Use the most “text-heavy” pages so white gaps don’t show.
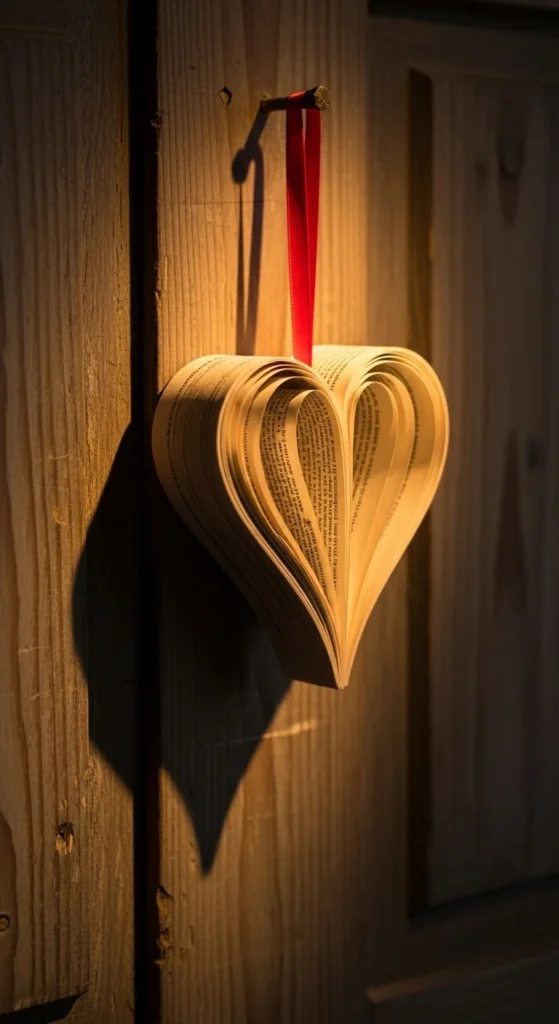
6. Folded Book Heart Sculpture (Whole-Book Art)

This is the showstopper. Use a hardback with lots of pages so the heart looks full. Mark a simple fold pattern on the page edges, then fold each page to create the heart silhouette when the book is closed.
Go slow for the first 10 pages to set your rhythm. Keep your folds crisp. A bone folder helps, but a spoon edge works too.
If your heart looks uneven, check your markings. A center line guide helps both sides match. Once finished, stand the book upright on a shelf or mantel.
Budget tip: choose a damaged hardback from a thrift shop. The cover won’t matter once the folds steal the show.
7. Fast Folded Book Heart (No-Measuring Feel)

If you want a quicker version, use repeated corner folds at the same angle for every page. It won’t be a perfect silhouette, but it still reads as a heart when displayed.
Fold each page corner toward the spine. Press firmly. Repeat down the book. After a few minutes, the shape starts to form.
This works best with paperbacks that fold easily. Add a ribbon wrap around the middle to “train” the shape while it rests overnight.
Budget tip: this is great for practice books. Once you like the look, upgrade to a thicker hardback.
8. Foam Heart Base With Torn Page Corners (Soft 3D Texture)
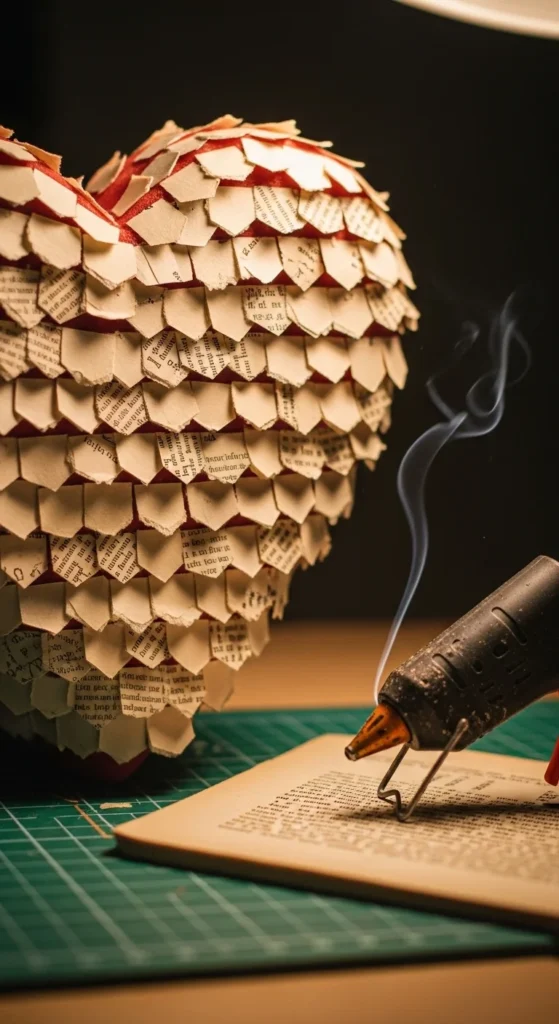
Buy a foam heart (or cut one from foam board). Tear pages into corner pieces. Glue them point-up so the torn edges create a fluffy texture.
Work from the outer edge inward. Overlap pieces like shingles. Rotate direction slightly so it looks organic, not striped. If the foam shows through, add smaller scraps in gaps.
This looks amazing hung on a door or propped on a shelf. Add a lace bow, twine loop, or small faux greenery cluster at one corner.
Budget tip: foam board works too. Cut a heart, then add a second heart behind it for thickness.
9. Foam Heart With Ombre Paper (Light to Dark)

Create a gentle gradient by using lighter pages at the top and darker pages at the bottom. Tea-dye a few pages for the darker section, or use dictionary pages.
Tear corner pieces and glue as usual. Keep your gradient subtle. You want it to feel soft, not harsh.
Add a twine bow at the bottom point to finish. If you want extra detail, lightly dry-brush the raised edges with metallic paint so the texture catches the light.
Budget tip: dye only the pages you need for the bottom third. That saves time and keeps paper from getting too wrinkly.
10. Cardboard Heart Wreath With Ruffled Pages
Cut a heart ring from cardboard. Tear pages into strips. Scrunch each strip into a loose ruffle and glue onto the ring.
Pack ruffles close together for a full look. Start on the inner curve first since it’s harder to fill later. Then cover the outer curve.
Add a ribbon loop on the back for hanging. If you want a farmhouse feel, use twine and a simple bow.
Budget tip: glue sticks can work for lighter ruffles, but hot glue holds faster. Keep a small bowl of cool water nearby to dip fingers if glue gets too hot.
11. Heart Wreath With Layered Rosette Flowers
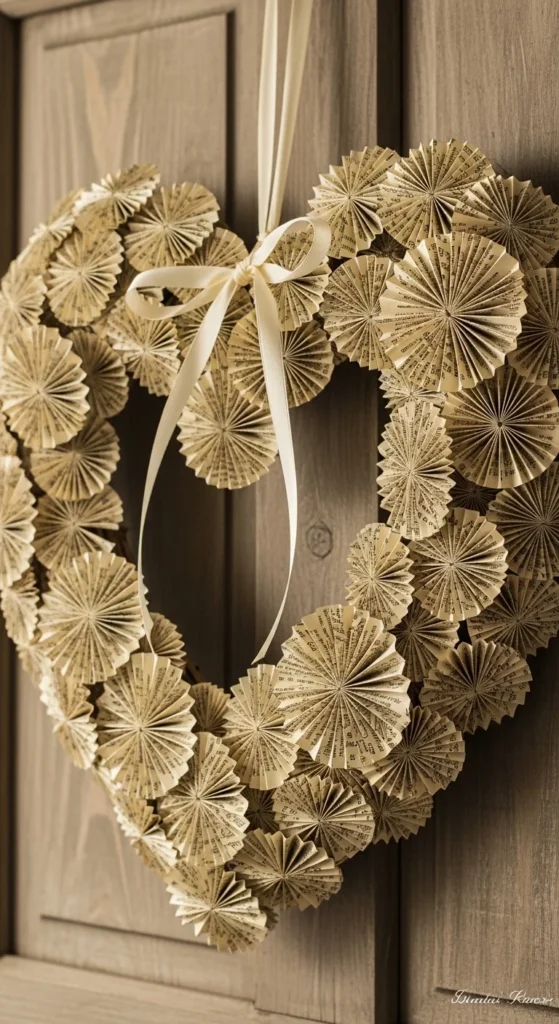
Make several paper rosettes by accordion-folding strips, then glue ends to form circles. Attach rosettes around a heart-shaped wreath base.
Mix sizes for interest. Place larger rosettes at the bottom point or one side, then fill gaps with smaller ones. Add a bow where the rosettes cluster.
This looks great on a front door or above a bed. Keep the palette calm by using one type of paper.
Budget tip: rosettes use less paper than full ruffles. It’s a good option if you only have a few pages to spare.
12. Heart Wreath With Twine-Wrapped Edge
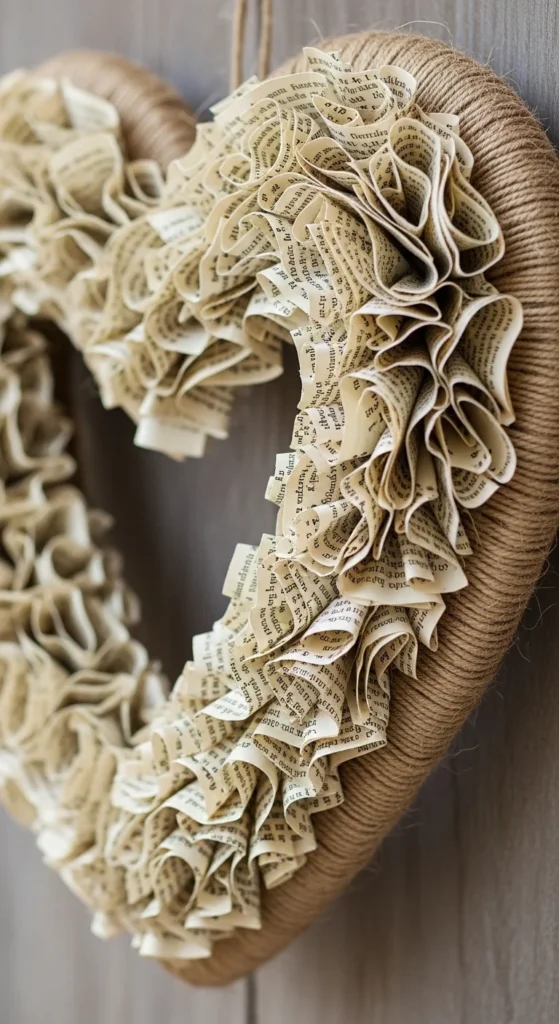
Wrap the outer edge of your cardboard heart with twine first. Then add book page ruffles on the front surface.
The twine edge hides cardboard and makes the wreath look finished from every angle. It also protects the edge if the wreath bumps a door.
Add a small cluster detail like a lace bow, a button, or a tiny paper rose. Keep it off-center for a relaxed look.
Budget tip: use yarn if you don’t have twine. Even a thin strip of torn fabric works.
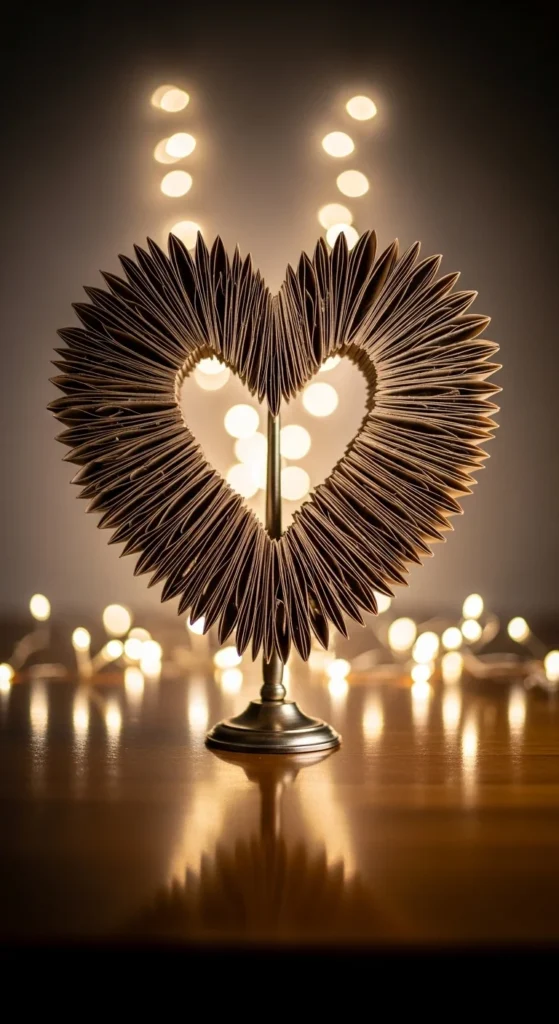
13. Book Page Heart Shadow Box (Deep Frame Look)

Use a deep frame or shadow box. Create a small 3D heart inside using rolled tubes or folded page strips.
Glue the heart to a backing board first, then slide it into the frame. Add small paper roses or mini folded hearts around it for extra detail.
This is a great gift because it’s already ready to hang. Keep it simple so it doesn’t look crowded behind glass.
Budget tip: thrift stores often have shadow boxes cheaply. Paint the inside backing if you want contrast.
14. Heart Initial + Book Pages (Monogram Wall Art)
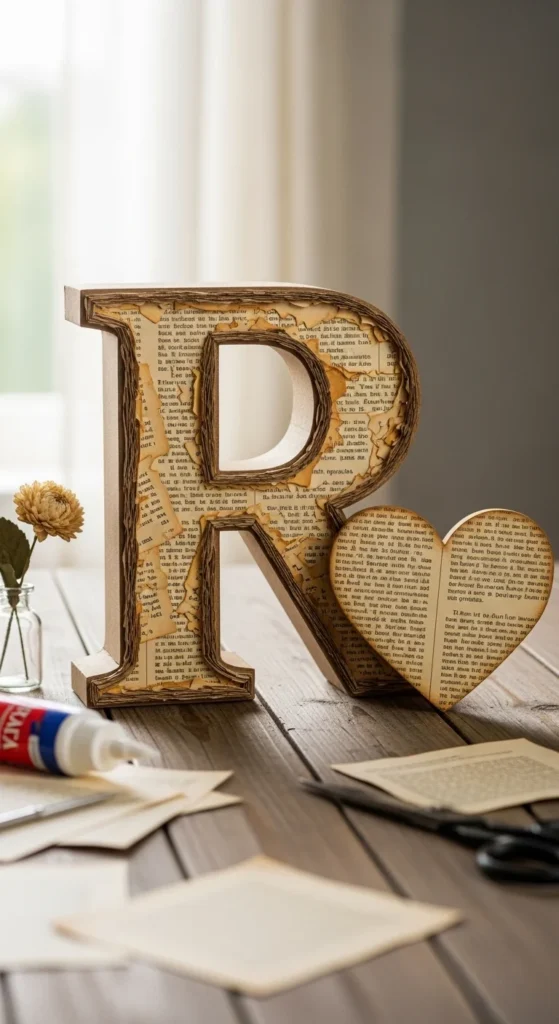
Cut a cardboard initial and a matching heart. Cover both with book pages using glue. For the heart, add extra texture with rolled tubes or torn corners.
Hang them as a pair. It looks personal for weddings, anniversaries, or nursery decor.
Keep the paper direction consistent so the set looks intentional. Add twine hangers or place them on a shelf.
Budget tip: make initials from cereal boxes layered together. Glue three layers to create thickness.
15. Flat “Decal” Heart Using One Page (Minimal Wall Look)
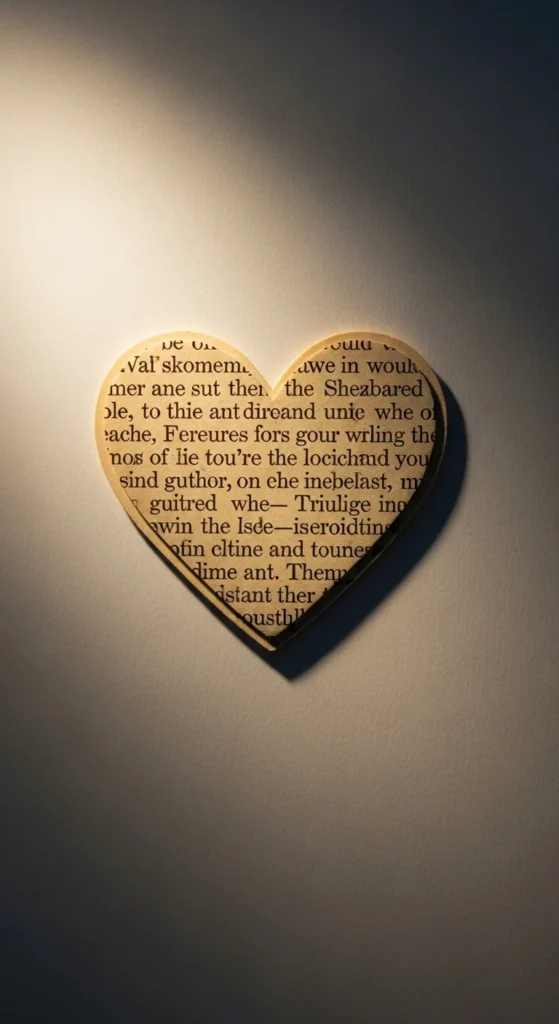
Cut a clean heart shape from a single page. Mount it on a neutral board with a thin border around it.
This is fast and looks calm, especially in small spaces. Add a second tiny heart near it for balance. Or mount three in a row as a set.
Use a page with dense print so the heart reads clearly from far away. If the page is too light, back it with kraft paper.
Budget tip: use a cheap photo frame. Swap the photo for your heart art and hang it the same day.
16. Origami Heart Pocket (Journaling Insert)

Fold a single page into an origami heart pocket. Tuck a small note, pressed flower, or tiny tag inside.
These are great for journaling, scrapbooks, or place settings. Make a batch in different page tones for variety.
If the folds don’t stay crisp, press with a spoon edge. Add one dot of glue inside the pocket if you want it extra secure.
Budget tip: use smaller paper by cutting pages into squares first. Smaller hearts are easier for beginners and use less paper.
17. Banner Hearts (String of Folded Hearts)
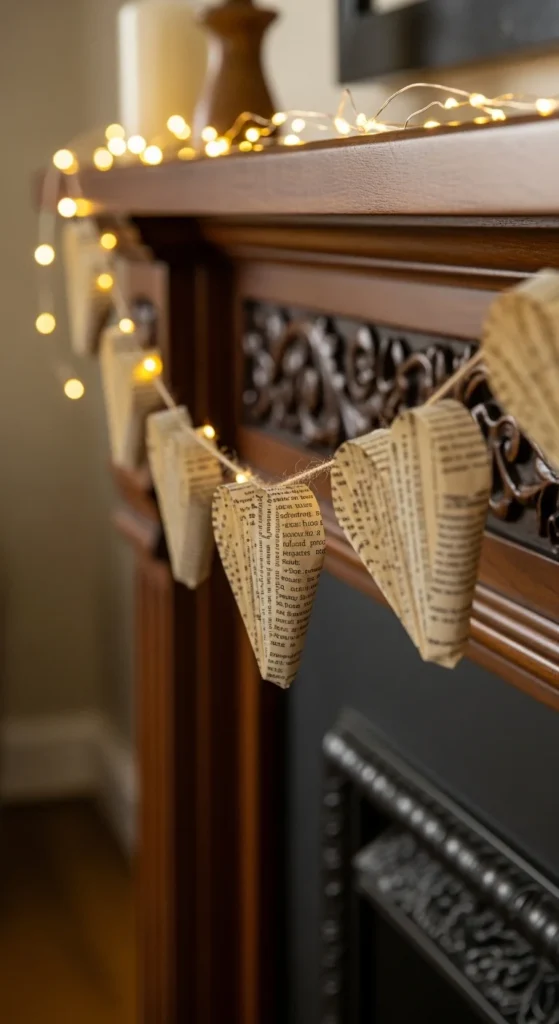
Make many small folded hearts and string them on twine. Space them evenly or cluster them in groups of three.
Add a few rosettes or small paper flowers between hearts for extra charm. Hang over a mantel, shelf, or photo wall.
If you want the hearts to sit flat on the string, punch tiny holes near the top corners. If you want them to dangle, tie each heart on with a short twine loop.
Budget tip: this is a great way to use leftover scraps. Even torn pages work if the fold lines are clean.
18. Heart “Quilled” Outline (Thin Strips, Big Impact)

Cut long thin strips of book pages. Coil them into tight spirals. Glue the coils along a heart outline, then fill the center with more coils.
Mix coil sizes for texture. Keep the outline coils slightly larger so the heart edge is clear.
Use a toothpick to start coils if you don’t have quilling tools. Work in small batches so glue doesn’t dry too fast.
Budget tip: use a cardboard backing and frame it. The coils look detailed even with basic supplies.
19. Heart With Button Center Cluster
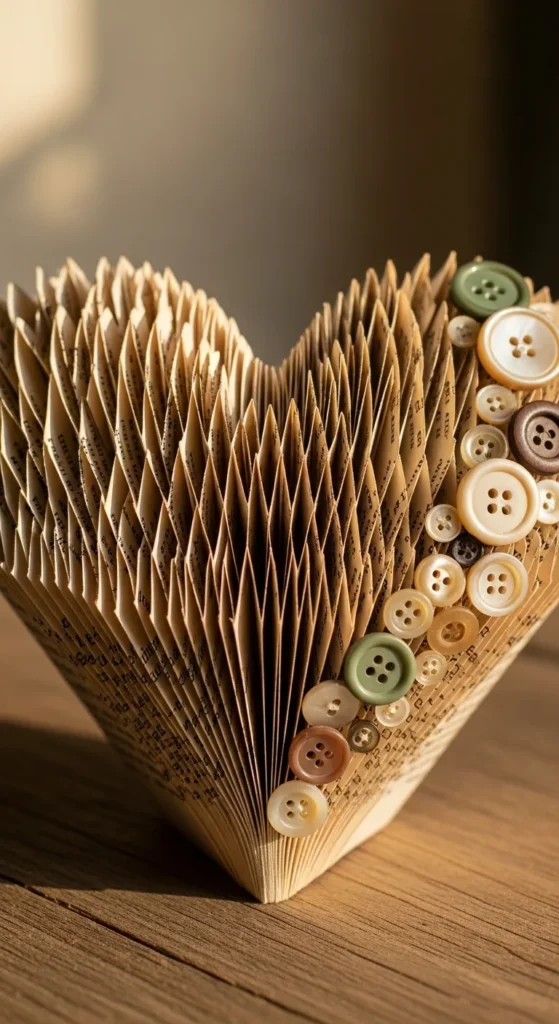
Add a button cluster to one corner of your heart art. It breaks up the paper texture and looks sweet.
Pick 3–7 buttons in similar tones. Glue them near the heart’s side curve. Add a small twine bow below the buttons.
This works on rolled tube hearts, torn-corner hearts, or wreaths. Keep the cluster small so it doesn’t steal the show.
Budget tip: raid old sewing kits. Mixed buttons still look good if you keep them within one color family.
20. Lace + Paper Heart (Soft Romantic Layering)

Add a strip of lace behind your heart on the canvas. Place it diagonally or along the bottom edge.
Then build your heart on top with rolled tubes or folded pieces. The lace peeking out adds softness and looks great in photos.
If you don’t have lace, use a torn strip of fabric or ribbon. Keep it neutral so the book pages still look vintage.
Budget tip: thrifted lace trim is often cheap. Even a small piece goes a long way when used as an accent.
21. Hanging Heart Door Decor (Ribbon Loop + Lightweight Base)
Make a foam board heart and cover it with torn page corners or ruffles. Keep it light so it hangs easily.
Attach a ribbon or twine loop on the back with strong glue. Let it dry flat before hanging.
Add one simple bow at the top. Or add a small paper flower cluster on one side.
Budget tip: for rental-friendly hanging, use removable hooks and keep the piece lightweight. Foam board is easier than heavy wood for this.
22. Mini Heart Bowl Fillers (Table Scatter Decor)
Make many small hearts from folded pages. Add a few mini paper roses. Scatter them on a table or place them in a bowl.
This is perfect for dinner tables, photo setups, or party decor. Use hearts in different sizes so it looks natural.
If you want them to stand up slightly, pinch the center crease so they “puff” a bit.
Budget tip: this uses scraps well. Even half-pages can become small folded hearts.
23. Heart Wall Trio (Three Sizes, One Palette)

Make three hearts: small, medium, large. Use the same paper type across all three so the set looks cohesive.
Try three different techniques: rolled tubes, torn corners, and flat cutout. Hang them as a vertical stack or a triangle layout.
Keep spacing even. A simple rule is two fingers of space between frames.
Budget tip: use matching thrift frames. Paint them the same color so the set looks intentional even if frames are different shapes.
24. Folded-Edge “Crisp Corner” Book Heart (Sharp Silhouette)

For a sharper heart shape, focus on crisp corner folds. Mark pages carefully, then fold consistently.
Press every fold firmly. If you want extra sharp edges, run a spoon edge along each crease. Keep checking the silhouette as you go so it doesn’t drift.
Once complete, wrap a thin ribbon around the book’s middle to keep pages in place when displayed upright.
Budget tip: practice your fold pattern on a smaller book first. Once you’re happy, move to a thicker hardback.
25. Romantic Heart Centerpiece (Wreath + Stand)
Turn a heart wreath into a centerpiece by setting it on a small plate stand or easel. This makes it table-ready without wall hooks.
Use ruffles or rosettes for the front. Add a small bow at the top dip of the heart. Keep details minimal so it still feels vintage.
Place it on a tray with candles (unlit for photos) or small decor accents. The paper texture will carry the look.
Budget tip: make a stand from cardboard folded into a triangle support and taped behind the wreath.
Conclusion
Book page heart art is simple, budget-friendly, and full of texture. Pick one main style—rolled tubes, folded book sculpture, or layered corners—then repeat it in a few sizes for matching decor. Use thrifted books for that warm patina, keep glue lines small, and add one or two accents like twine, lace, or buttons. When you’re done, you’ll have romantic pieces that work for Valentine’s Day, gifts, weddings, or everyday wall decor.

DiyVisual is a DIY ideas resource for makers of every level. Our small editorial team researches and curates easy, budget-friendly craft, home decor, and handmade gift projects — explained step by step so anyone can recreate them at home with simple materials.


