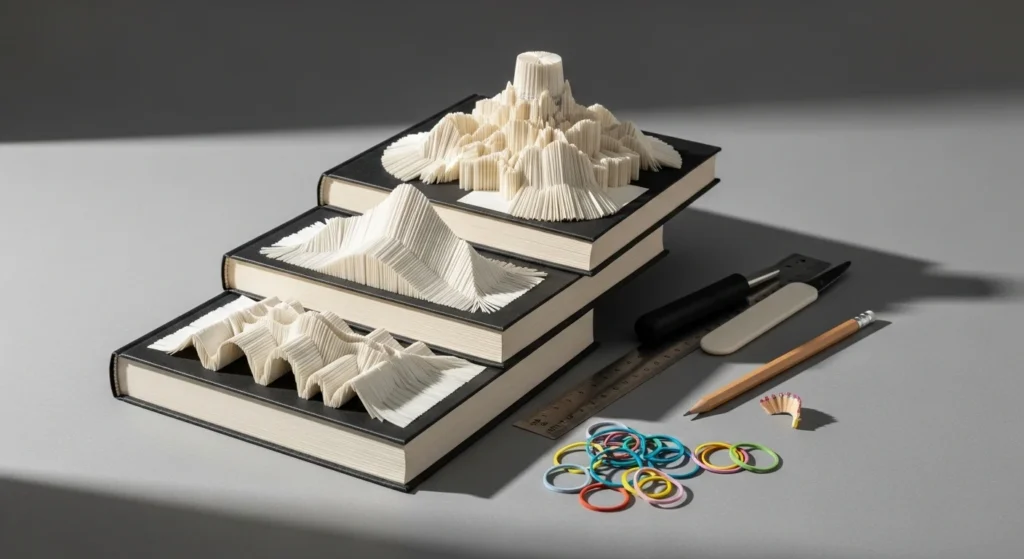

Book sculpture turns an ordinary hardcover into a display piece that feels curated and artful. The best part is how approachable it can be. Some designs take under an hour with simple folds. Others use printed patterns and careful marks for sharper shapes. Pick a sturdy hardcover with a glued binding and enough pages to hold the form. Then start with triangle folds and repeatable steps. Below are 25 ideas you can make at home with basic tools and a small budget.
1. Classic Triangle Fold Fan
Triangle folds are the foundation for many book sculptures. This fan-style design is the easiest place to start because you repeat one move across the book. Choose a hardcover with 200+ pages so the pattern reads clearly when displayed.
Use a pencil to mark a consistent fold point near the outer edge. Then fold each page into a clean triangle toward the spine. Press the crease with a bone folder or the back of a spoon. Crisp folds make the sculpture look intentional.
Work in short sessions. Add a small hash mark on the page edge every 10 pages so you always know where you left off. An elastic band around the finished section keeps earlier folds from popping open while you continue.
Display it spine-down on a shelf for a sculptural arc. Or stand it upright like a wave. If you want a softer look, use an older book with warm-toned paper.
2. No-Measure 30-Min Zigzag

If measuring slows you down, try a quick zigzag fold pattern. It uses instinct more than precision, so it’s great for a first try. Pick a medium-thick hardcover and fold each page into alternating directions.
Start by folding the top corner down on one page. On the next page, fold the top corner the opposite way. Keep the fold depth similar by using your thumb width as a guide. You’ll see the zigzag pattern appear fast.
Press each fold firmly. A bone folder helps, but your fingernail works if that’s what you have. Keep an elastic band on the far end of the book to prevent shifting while you fold.
This style looks striking on a coffee table. It also works as a base for embellishments like a simple paper flower or a ribbon wrap around the spine.
Budget tip: practice on a thrifted book first. Save your “pretty spine” book for the final version.
3. Heart Fold Centerpiece
Hearts are a classic starter pattern because the silhouette reads well even with small marking errors. Choose a hardcover with enough pages to form a smooth curve. Many heart patterns use 50–100 folds, depending on book thickness.
If you want precision, print a heart pattern and mark each page with a ruler and pencil. If you want a simpler route, use a beginner heart template and repeat the same measurement for a block of pages, then mirror it on the other side.
Press each fold hard and consistent. Small inconsistencies add up, so check your shape every 10–15 pages. Use a weighted object on the closed side of the book so it stays stable as you work.
This makes a thoughtful gift. Wrap twine around the base for a finished look. Add pearl pins or a small paper rose cluster near the center if you like gentle detail without extra work.
4. “READ” Word Sculpture
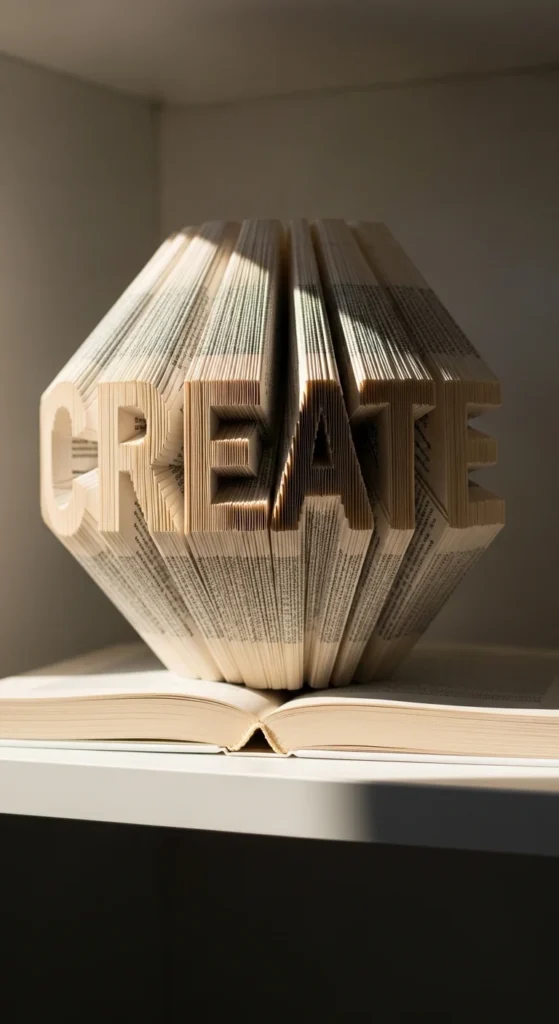
Word sculptures look like gallery pieces when the letters are clean and evenly spaced. “READ” is popular because it fits well across a typical book width. Use a printed pattern for the best results.
Start with a hardcover that has a glued binding and a sturdy spine. Mark the first 10 pages carefully to set your rhythm. After that, the steps repeat. A mechanical pencil makes small dots cleaner than a standard pencil.
Use hash marks on the page edges to track progress. This helps a lot when you pause mid-project. Keep an elastic band around the finished pages so they don’t relax.
When the word appears, tighten your creases with a bone folder. Then gently “fluff” the pages so the letters open evenly. Display it front-facing so the silhouette is obvious from across the room.
Budget tip: free word patterns exist online, but many makers also sell low-cost PDFs. If you fold often, a paid pattern can save time.
5. Butterfly Wings Pattern
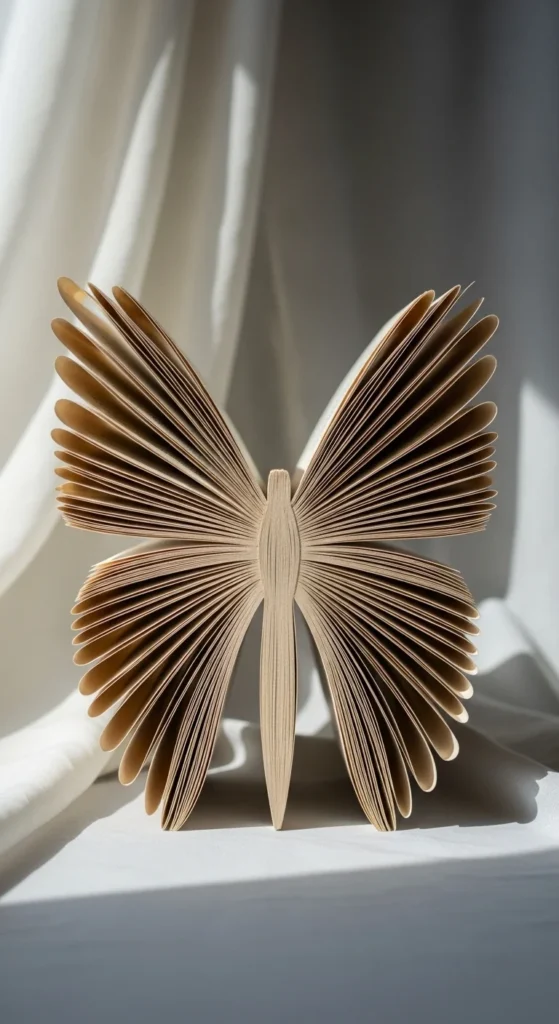
Butterflies are beginner-friendly because the wing shape is forgiving and looks good even with a slightly imperfect curve. Choose a hardcover that opens smoothly without cracking.
Use a printed butterfly pattern or a simple mirrored measurement plan. Mark each page with two points, then fold the page to meet the marks. Keep your ruler aligned to the same reference edge every time so your folds stay consistent.
Press each crease firmly. If your hands get tired, take short breaks and return. Repetition is the whole game here. Keep your place with a page clip or a tiny sticky note on the spine side.
For display, place the sculpture near a window where side light catches the folds. Add a small cluster of paper flowers at the “body” area if you want extra detail without changing the structure.
Budget tip: thrift stores often have damaged books with intact pages. Those are perfect for learning.
6. Geometric Chevron Ridge
Chevron folds create strong shadow lines, which makes the piece look more like modern art. This design works best with a book that has thicker pages, because the ridge holds shape.
Mark a repeating set of measurements: one point higher on the page, one lower, alternating every page or every two pages. Fold along the marks so each page forms a crisp angled line. Repeat across the book and the chevrons appear like a carved surface.
A bone folder helps a lot here. The cleaner the creases, the sharper the shadows. Use a weighted book or a small dumbbell on the closed side to keep your workspace steady.
Display the sculpture with a light source coming from the side, not straight on. The chevrons will cast bold shadow stripes. If you want an even stronger look, lightly sand the page edges so they look uniform.
Budget tip: if you don’t have a bone folder, a plastic gift card works well.
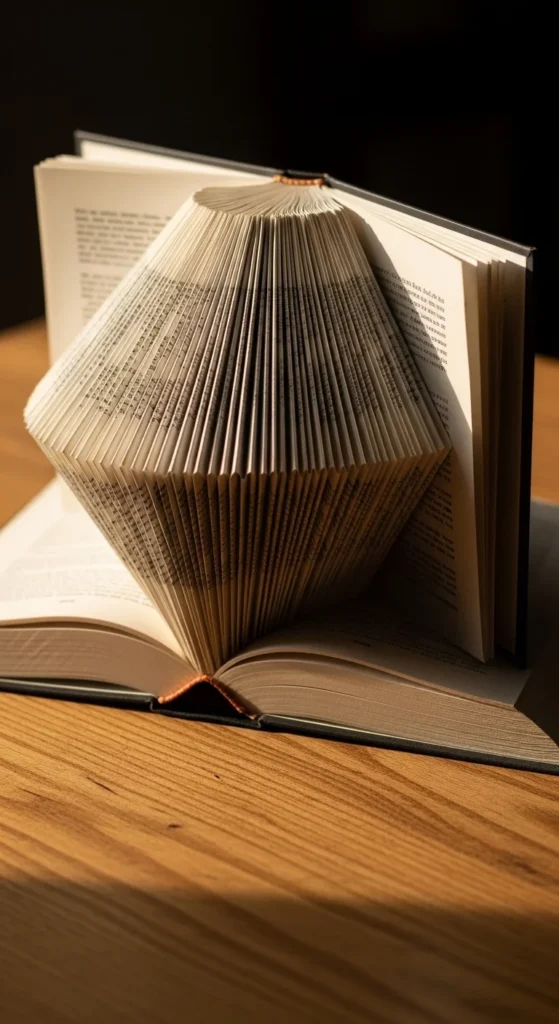
7. Spiral “Wave” Fold

Wave folds look calm and sculptural. They are also a nice break from strict geometry. You can do this with light measuring or by using a gradual change in fold depth over many pages.
Start with a shallow triangle fold near the top corner. Every 5–10 pages, fold slightly deeper. This creates a curve that slowly grows and then relaxes. Keep your fold angle consistent so the wave looks smooth.
Press the creases firmly. The wave shape appears when you fan the pages open. If the wave looks uneven, adjust by tightening a few creases where the curve feels flat.
This design looks great spine-up on a shelf. You can also place it on a mantel. The shape catches light beautifully.
Budget tip: this is a good “practice sculpture” because it teaches control without demanding perfect marks.
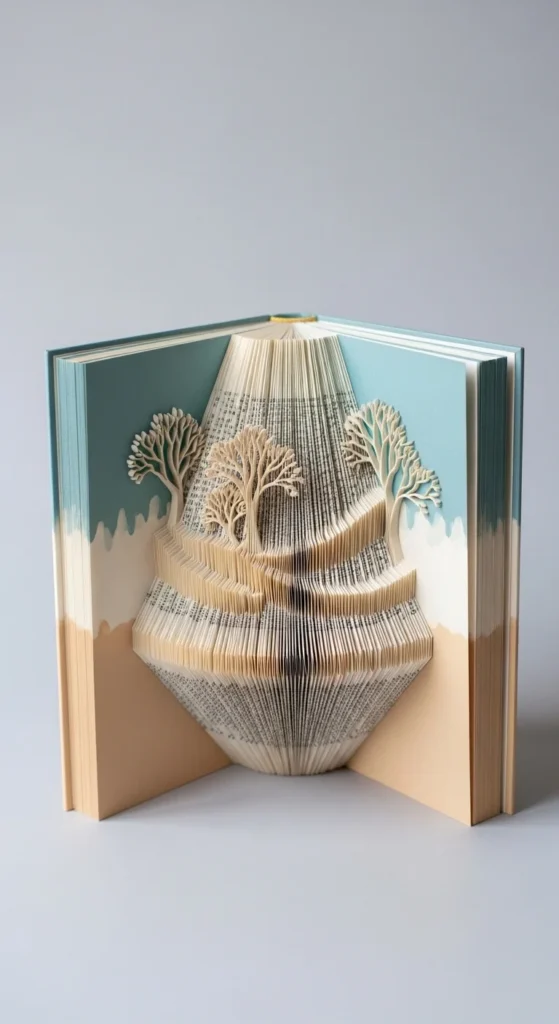
8. Book-to-Shape Theme Match
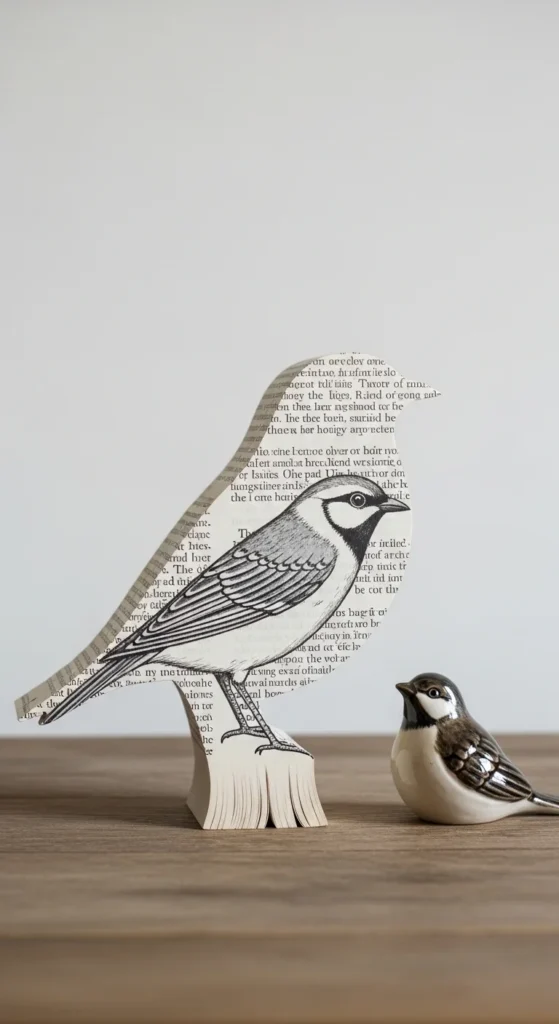
A themed sculpture feels extra thoughtful when the book subject matches the shape. For example, fold a bird silhouette from a bird book, or a leaf from a garden guide. It’s a simple idea that makes the finished piece feel curated.
Pick a book with a spine you like showing on a shelf. Then choose a pattern that fits the page count and width. Print the pattern and mark carefully. Consistent ruler placement is what keeps the silhouette clean.
Work slowly through the first 20 pages to lock in your method. After that, it becomes a rhythm. Use an elastic band to hold finished pages. Add a progress tracker on paper so you don’t lose your place.
Display it with the spine visible. That “content match” detail becomes part of the story when someone asks about it. It turns a craft into a conversation piece.
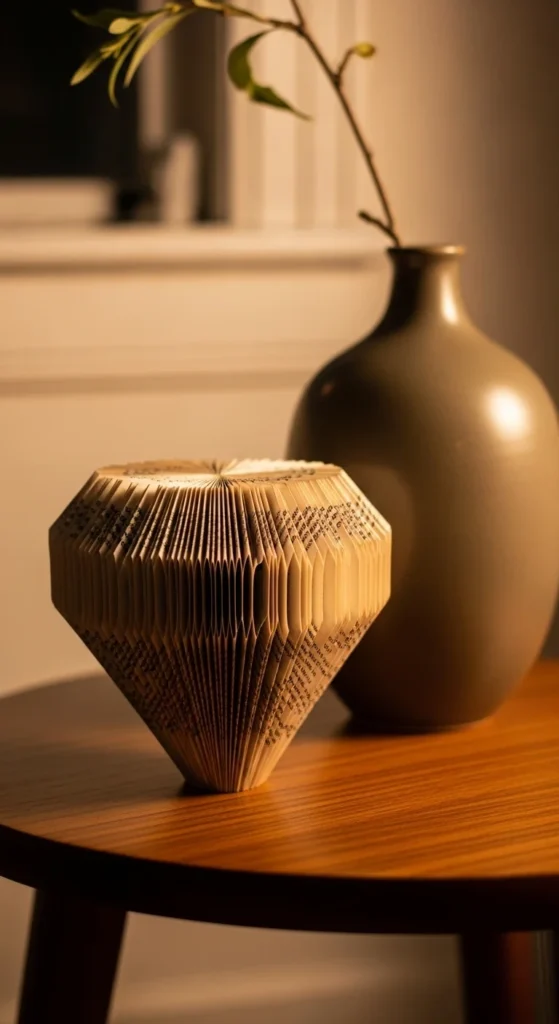
9. Minimalist Half-Moon Fold

This shape looks like modern sculpture and takes fewer steps than letter patterns. The goal is a clean, even curve across the open pages.
You can do it with light marks. Choose a center point and fold pages to create a gradual arc. Keep the fold depth consistent across small groups of pages, then slowly change the depth to build the curve.
Press each fold with a bone folder. Curves look best when the creases are tight. If the curve starts to kink, adjust by slightly loosening a few pages and re-creasing them.
Display it on a shelf with empty space around it so the silhouette stands out. It pairs nicely with ceramics and neutral decor.
Budget tip: use scrap paper to test your fold depths before you start on the real book.
10. Starburst Page Fan

Starburst fans look like sculptural paper art. This design uses repeated folds that flare outward in a consistent radius.
Fold each page into a triangle, then add a second fold to tuck the tip inward. This creates a structured “spoke.” Repeat across the book until the pages form a full burst shape when opened.
Use a weighted object to keep the spine steady. Add hash marks every 10 pages so you track progress. When finished, open the book and shape the burst with your hands, spacing the folds evenly.
This makes a striking centerpiece on a table. It also looks great inside a shallow bowl or tray, where the flare feels intentional.
Budget tip: if you want a larger burst, choose a thicker book and fold more pages.
11. Cut-and-Fold Shadow Ridge
Cut-and-fold hybrids add depth that looks like carved paper. This is more advanced, but the result can look like a gallery piece because shadows create a 3D effect.
Start with a simple pattern that includes small cut sections. Use a sharp craft knife and a cutting mat. Cut only a few pages at a time to avoid shifting. Then fold along the marked lines.
Stability matters. Use an elastic band around the book and a weight on the closed side. Check alignment often. If your cuts drift, the shadow line will wobble.
Keep the design simple for your first try. A geometric ridge or simple icon works better than a complex scene. When finished, place the sculpture under a lamp so the shadows show clearly.
Budget tip: you can borrow a cutting mat from another craft or use thick cardboard as a temporary surface.
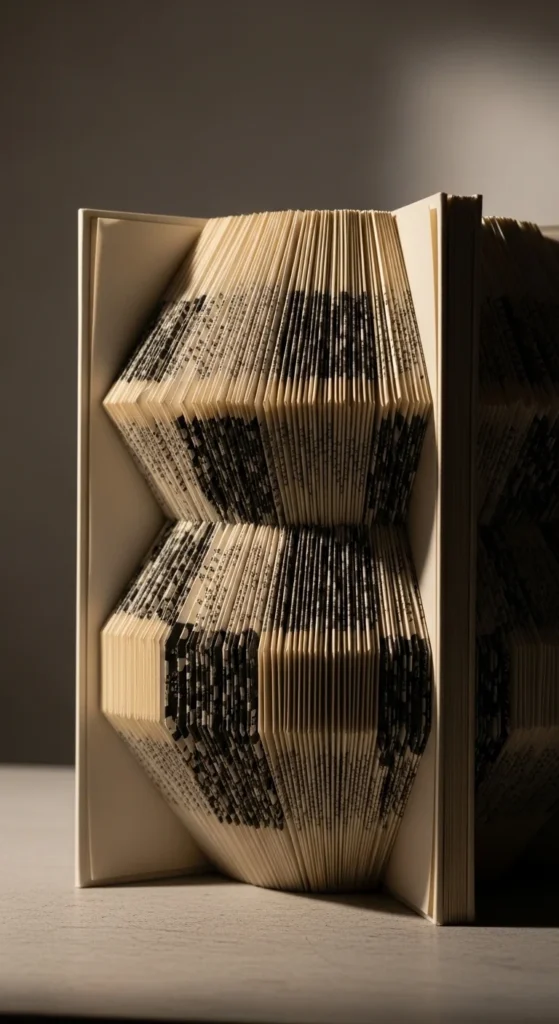
12. Diamond Grid Sculpture
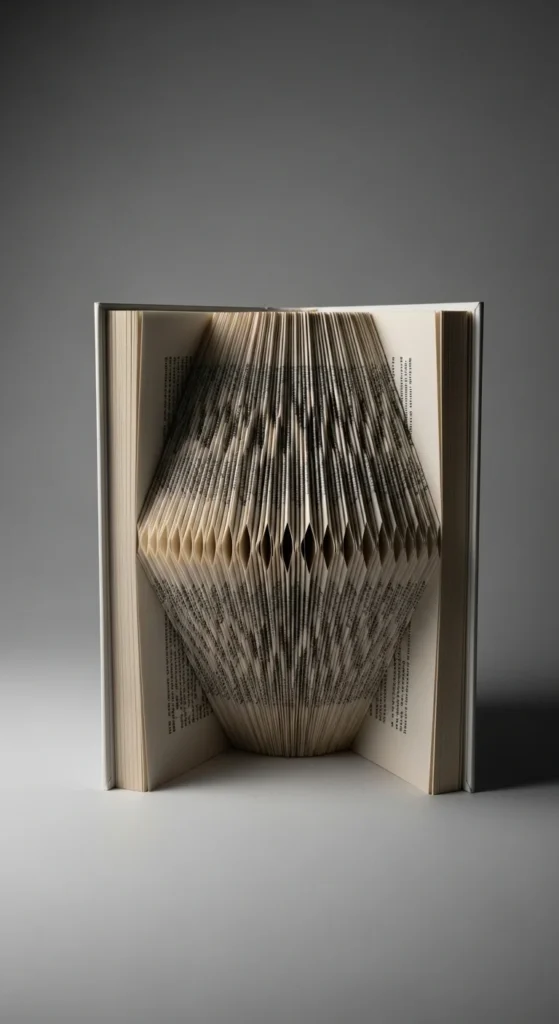
Diamond grids look crisp and modern. The texture reads well even from a distance, which makes it feel like decorative sculpture.
Use a ruler and mark two points on each page. Fold to connect the points, creating a diagonal crease. Alternate the diagonal direction every page so the diamonds form across the open book.
Press each crease strongly. A bone folder helps keep the grid tight. If a few diamonds look uneven, you can adjust by re-folding just those pages. That’s normal.
Display the book open at a consistent angle. Too wide and the diamonds flatten. Too closed and the grid hides. A small book stand works well.
Budget tip: make a quick paper guide with your measurements, so you don’t re-measure each page from scratch.
13. Angel Fold for Seasonal Decor
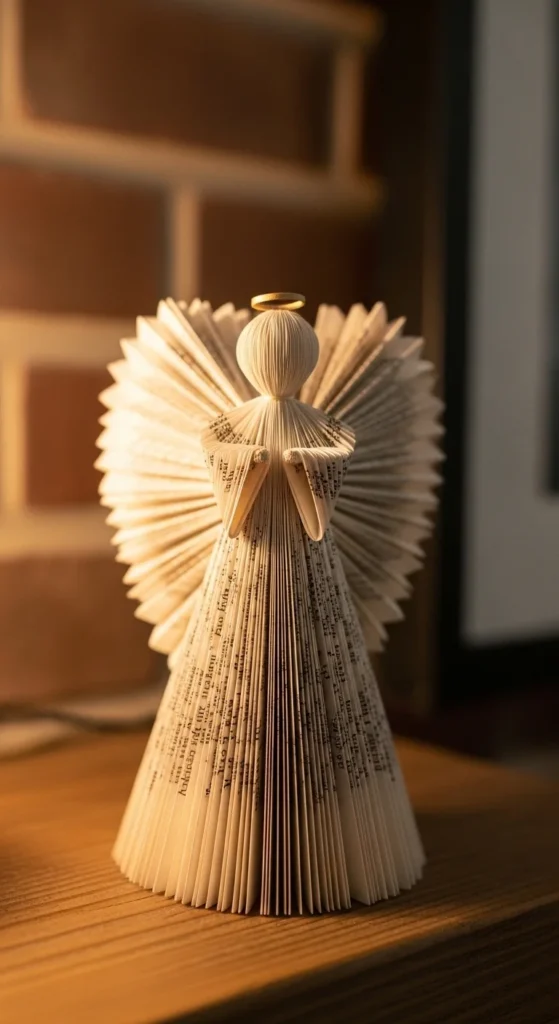
An angel fold is a beautiful seasonal piece and a popular free pattern style. The shape is recognizable, and the folded “wings” create natural shadow lines.
Choose a hardcover with a stable spine. Print your pattern and mark each page carefully. This is a project where consistent marking matters, so take your time early on.
Use an elastic band to hold completed pages. Add a progress tracker sheet next to you so you always know where you are. When finished, press the folds again with a bone folder to tighten the silhouette.
Display it as a mantel accent or shelf centerpiece. Pair it with greenery or small candles (unlit) nearby for a calm display.
Budget tip: thrift shops often have holiday-themed hardcovers that look great as part of the story.
14. Simple “V” Valley Fold Sculpture
This is the cleanest beginner sculpture. It looks modern and tidy, and it builds skill fast.
Fold each page into a shallow “V” valley by bringing the top corner down and the bottom corner up, meeting near the center edge. Keep the meeting point consistent. Use a ruler for the first few pages, then continue by eye.
Press creases firmly. A bone folder makes the edges crisp, but firm finger pressure works too. Check the side profile as you go. If the “V” leans, adjust the next few pages slightly to correct the drift.
Display it open with the V shape facing forward. It looks great paired with neutral decor, ceramics, and framed art.
Budget tip: use a damaged hardcover as your practice book so you feel free to experiment.
15. Book Sculpture with Pearl Accents
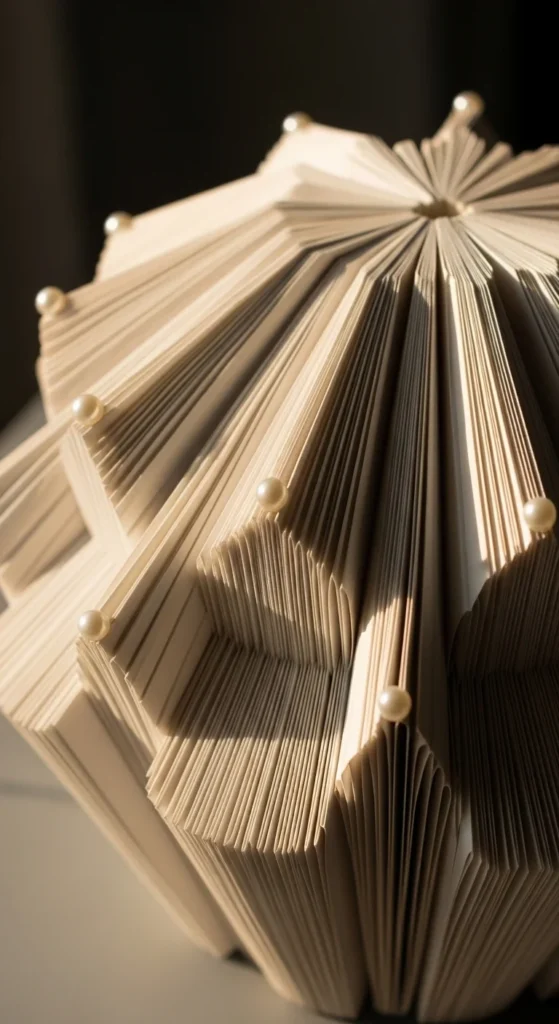
Small embellishments can make a simple fold look like a display piece. Pearl accents work well because they catch light without requiring complex steps.
Start with a basic geometric fold like chevrons or diamonds. Complete the folding first. Then add tiny pearl beads using a small dot of glue at repeating points, such as fold peaks.
Keep the spacing consistent. Too many beads can feel busy, so pick a pattern like “every third peak.” Let glue dry fully before moving the book.
This is a great way to reuse leftover craft pearls. It also turns a plain thrifted book into decor that looks curated.
Budget tip: if you don’t have pearls, use small buttons or seed beads for a similar effect.
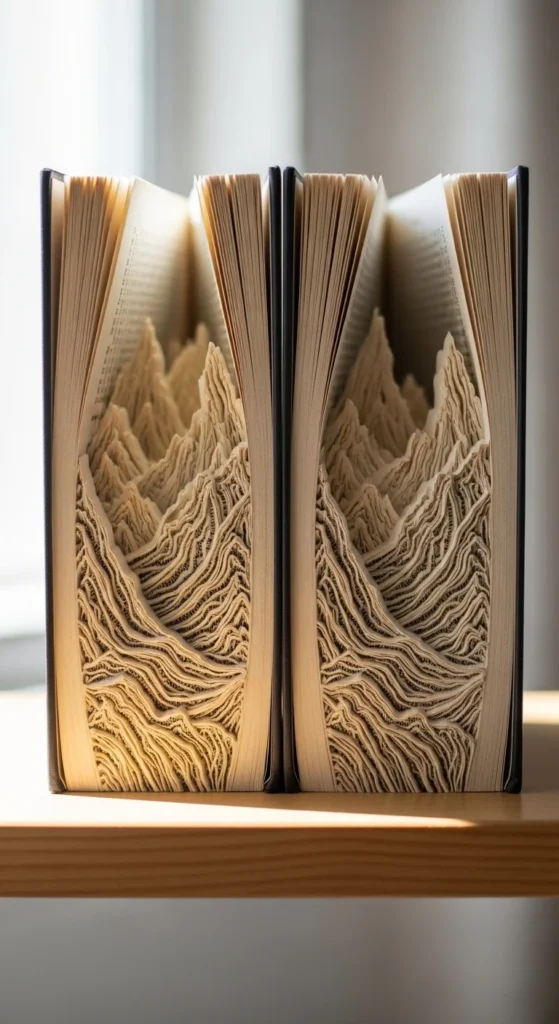
16. Sculptural “Mountain Range” Profile
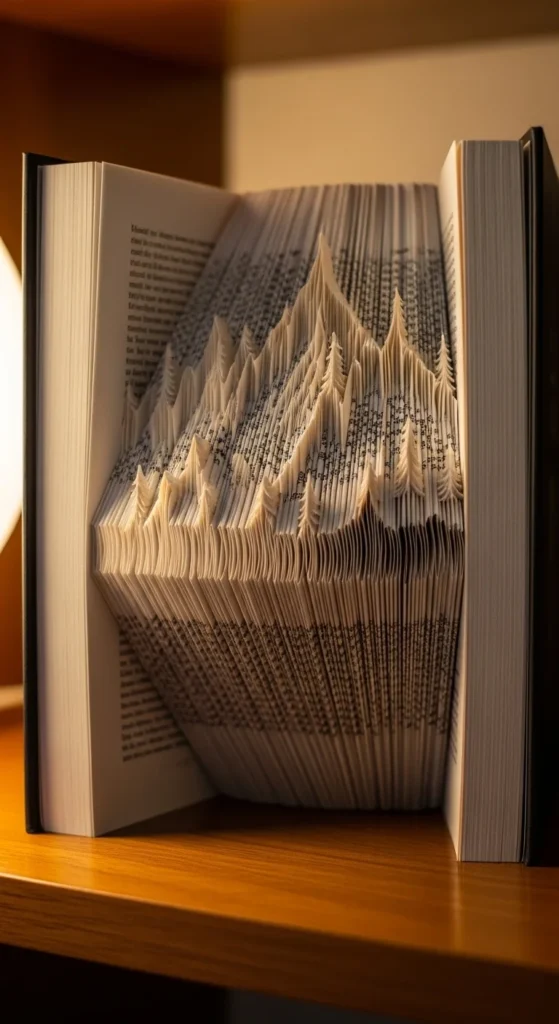
This fold creates a skyline-style profile with peaks and valleys. It looks artistic, but the method is simple: change fold depth in planned steps.
Decide your “peak heights” first. For example, fold 20 pages shallow, then 10 pages deeper, then 20 pages shallow again. Repeat with a few variations. The side profile will look like a range.
Press each crease strongly so the peaks hold shape. Use hash marks to track where each section begins and ends. That keeps the silhouette intentional rather than random.
Display it sideways so the profile reads clearly. Add side lighting so peaks cast shadows. It looks great near framed prints or ceramic vases.
Budget tip: this pattern works well even in books with fewer pages, so you can use smaller hardcovers.
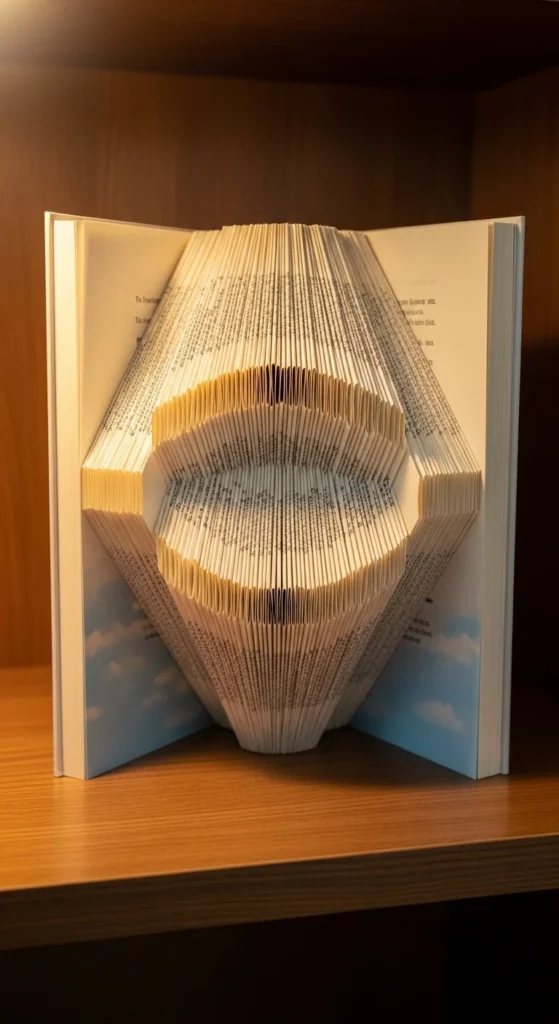
17. Hollow Center “Portal” Fold
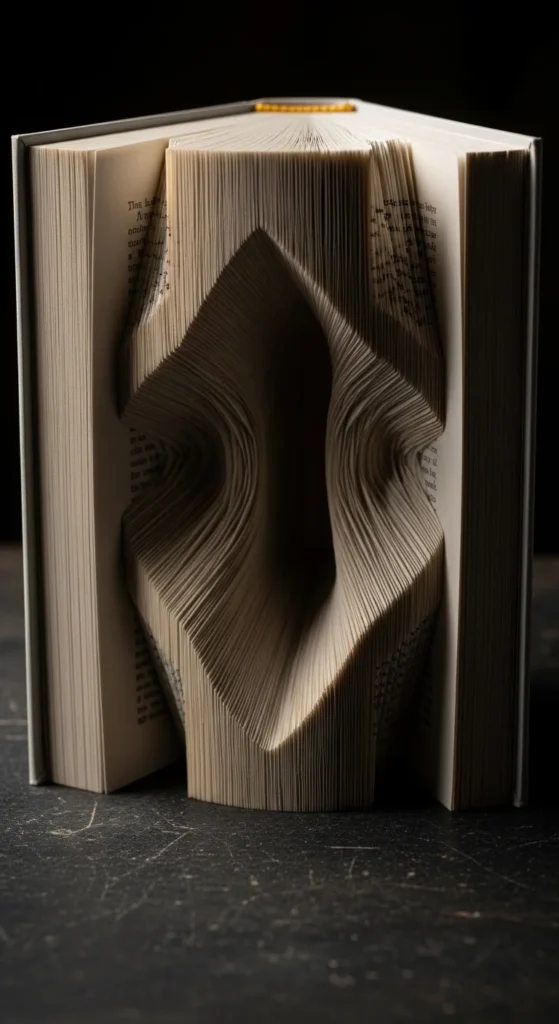
A portal-style sculpture creates a shape that feels carved into the pages. You can do this with measured folds that leave a consistent open “window” in the center.
Mark the same two points on each page, leaving a gap where the window will be. Fold the top and bottom toward those marks so the center stays open.
Stability is key. Use an elastic band and keep a weight on the book’s closed side. Check the window alignment every 15 pages. Small drift is normal, but catching it early saves time.
This looks striking on a shelf because the center void adds drama. Place it where light can pass through the opening.
Budget tip: start with a simple oval window. Save complex shapes for later.
18. Checkerboard Texture Fold
Checkerboard texture comes from alternating fold direction and spacing. It reads like a designed surface, which is why it feels “gallery” even though it’s simple.
Fold one page into a shallow triangle. Fold the next page deeper. Repeat the alternating depth across the book. For the checker effect, also alternate which corner you fold from every few pages.
Press creases firmly. Use a bone folder if possible. The texture becomes clearer when you open the book to a consistent angle, so shape it after folding.
Display it in a spot where side light hits the folded ridges. The alternating texture will show clearly. If the pattern looks messy, reduce variations and stick to just “shallow vs deep.”
Budget tip: use a ruler for the first 10 pages to train your eye, then continue without measuring.
19. Minimal Initial Letter Monogram

A single letter monogram is simpler than a full word and still looks polished. Choose your initial, download a pattern, and match it to your book’s page count and height.
Mark each page carefully with ruler and pencil. Mechanical pencils help with small dots. Then fold each page to the marks. Work steadily, checking the letter shape as it appears.
Use hash marks to track progress. Keep the finished pages under an elastic band. When done, open the book and gently adjust page spacing so the letter reads cleanly.
This is a great gift idea for weddings, housewarmings, or a home office shelf. Pair it with neutral decor for a clean look.
Budget tip: thrifted hardcovers with simple spines look best when displayed with the spine facing outward.
20. Two-Tone Edge Dip Finish
This idea is about finishing. Even a basic fold can look more like art with a clean edge treatment.
After folding your sculpture, close the book tightly with rubber bands. Lightly paint just the outer page edges with diluted acrylic, creating a soft dip effect. Keep paint thin so pages don’t stick together.
Let it dry fully. Then remove the bands and fan the pages. The color appears as a subtle accent line across the sculpture.
Choose muted tones for a vintage feel. Test on scrap paper first. This works well with hearts, chevrons, and wave folds.
Budget tip: use a cheap foam brush and leftover paint. Small amounts go far.
21. Page-Edge “Ombre” Gradient (Light Touch)
A gradient edge can make the sculpture feel curated without changing the fold pattern. The key is using very little paint.
Band the closed book tightly. Apply a light coat of diluted paint to the page edges, starting darker at one end and lighter as you move across. Keep strokes consistent. Let it dry fully before opening.
Once dry, open the sculpture. The gradient will show as a soft tone shift across the folded surface.
This technique pairs well with geometric folds because the color follows the texture. It also works on word patterns to add subtle depth.
Budget tip: use makeup sponges if you don’t have a brush. They give soft coverage.
22. Sculptural “Steps” Stair Fold

Step folds create a staircase profile that looks architectural. It’s a great option if you like clean lines.
Divide the book into sections. Fold the first section shallow. Fold the next section slightly deeper. Continue increasing depth section by section, then reverse to come back down.
Mark section boundaries with small sticky notes. Add hash marks so you don’t lose your place. Press folds with a bone folder for crisp steps.
Display the book sideways so the staircase profile is visible. Strong side light makes the steps look dramatic.
Budget tip: fewer sections mean less measuring. Start with just four step levels for your first one.
23. Double-Book Mirror Pair
Two smaller sculptures displayed as a pair can look like a curated installation. Choose two similar hardcovers, ideally the same size and paper tone.
Fold the same pattern in both books, but mirror the direction. For example, if book one folds toward the spine from the top-right corner, book two folds from the top-left corner. The result looks intentional when placed side by side.
This is perfect for chevrons, waves, and diamond grids. Keep your measurements consistent. Work on both books in parallel so you don’t forget your fold depth.
Display the pair with a small gap between them. Add a simple ceramic piece in the center for a gallery-style arrangement.
Budget tip: buy matching books from a thrift set or series so spines look coordinated.
24. Wrapped Spine Ribbon Sculpture Finish
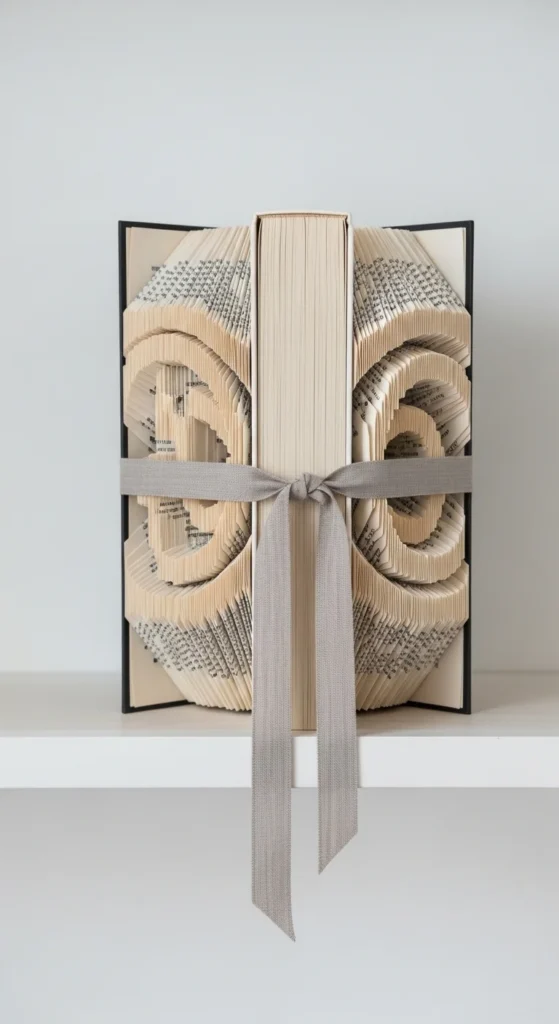
A clean spine wrap can make a book sculpture feel finished fast. This is helpful if the original spine is damaged or visually busy.
Use a neutral fabric ribbon or twine. Wrap it around the closed spine area and tie a simple knot or bow. Keep it minimal so the folds remain the focus.
You can also add a small tag made from leftover book paper. Keep it blank. The goal is a tidy, curated finish without extra clutter.
This works especially well for gifts. It also helps hold pages in place during display, which can keep the silhouette cleaner.
Budget tip: cotton ribbon scraps, jute twine, or even torn fabric strips work well.
25. Gallery Plinth Display Setup
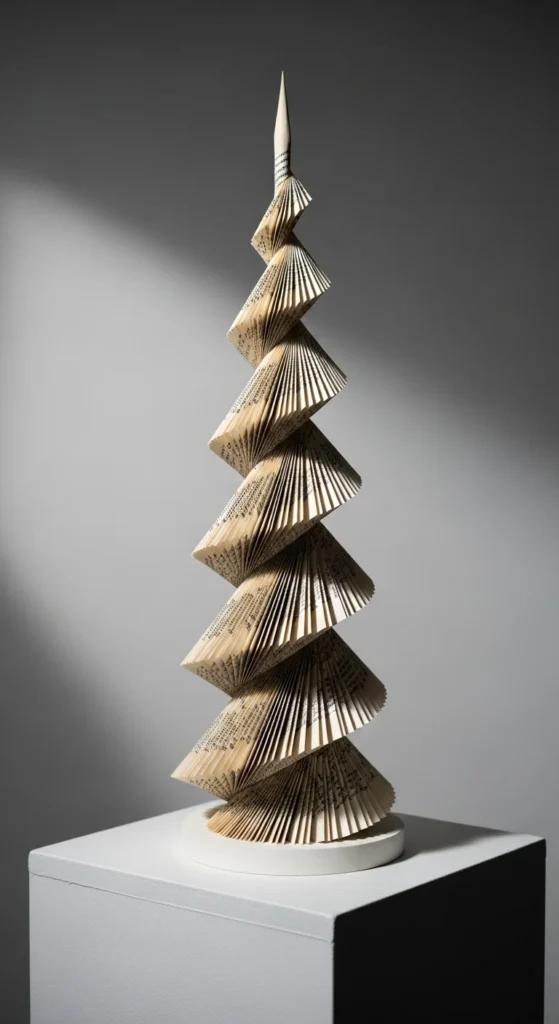
Sometimes the “gallery” look comes from how you display the piece, not only how you fold it. A simple plinth-style setup makes almost any sculpture look intentional.
Use a small box covered in white paper, a wooden riser, or a thrifted candle stand. Place the sculpture on top and leave space around it. Add one supporting object nearby, like a small ceramic vase or a stone.
Light matters. Aim for side lighting from a lamp or window so the folds cast shadows. Rotate the sculpture until the silhouette reads clearly.
If you’re taking photos for a blog post or Pinterest, this setup gives clean, consistent images. It also makes your shelf decor look curated at home.
Budget tip: DIY a riser from cardboard and craft paper. It still looks clean in photos.
Conclusion
Book sculpture is one of the easiest ways to turn a forgotten hardcover into decor that looks intentional and artful. Start with a no-measure zigzag or a triangle fan to build confidence. Then try a word, a themed silhouette, or a cut-and-fold shadow piece when you want sharper shapes. Keep your tools simple, work in short sessions, and use good light for display. One thrifted book can become a finished piece you’ll actually want to keep out year-round.

DiyVisual is a DIY ideas resource for makers of every level. Our small editorial team researches and curates easy, budget-friendly craft, home decor, and handmade gift projects — explained step by step so anyone can recreate them at home with simple materials.


