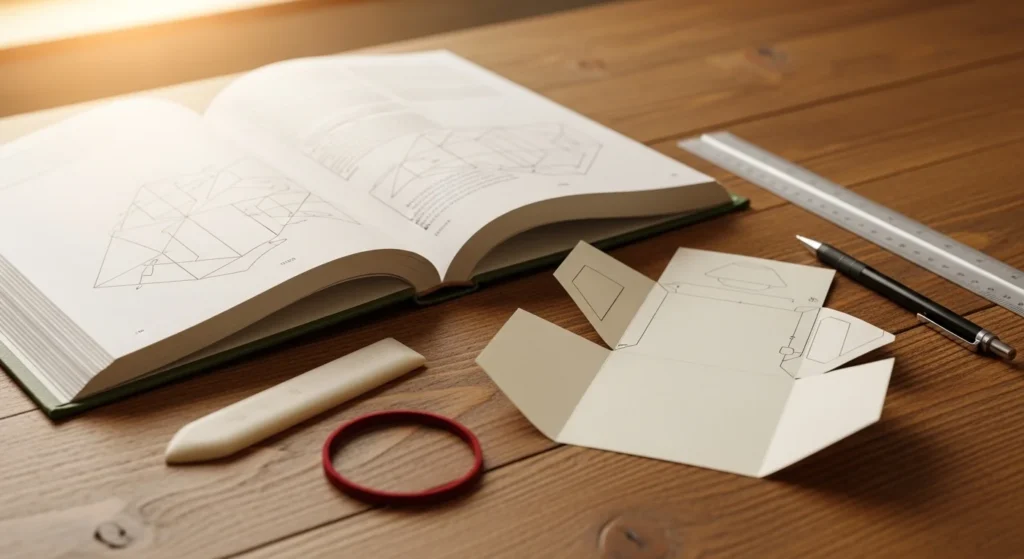

Folded book art is a satisfying way to turn an old hardcover into a 3D sculpture using measured marks and consistent page folds. You don’t need fancy supplies. A ruler, a mechanical pencil, and patience go a long way. Hearts, words, animals, and geometric patterns stay popular because they read clearly from a distance and look great on shelves. Below are 26 folded book art ideas you can try, each with a photo prompt to help you create matching visuals.
1. Classic Big Heart Fold
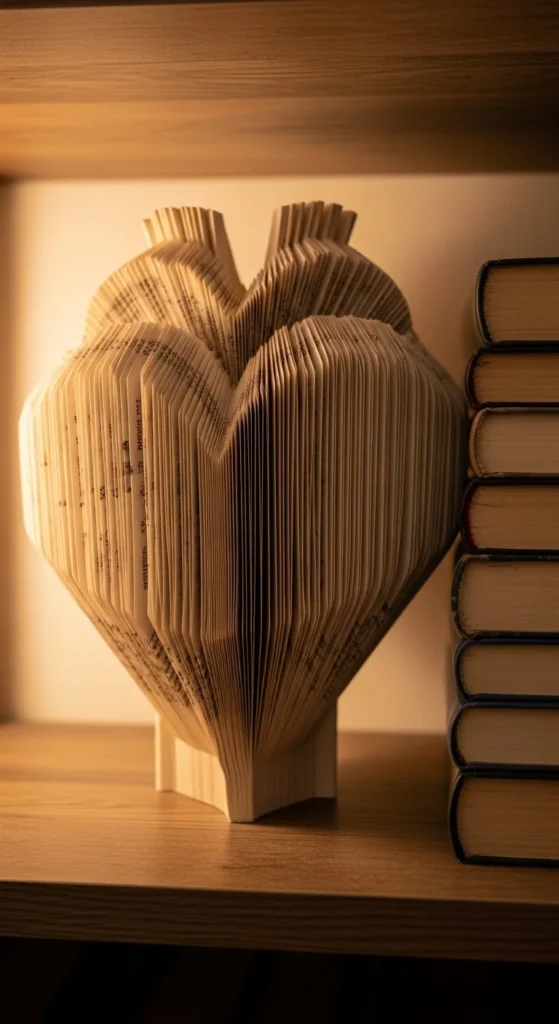
Hearts are beginner-friendly and easy to recognize. Choose a hardcover that stands well. Use a heart pattern that fits your page count and center it so the shape lands in the middle of the book.
Mark each page lightly with a mechanical pencil. Use a ruler for consistent placement. Fold each page to the mark and crease firmly. Work in short sessions so the folds stay clean and even.
Budget tip: Thrift-store hardcovers work great. Pick one with 200–400 pages for a fuller heart.
Display it on a small stand or tray so the heart shape reads clearly from the side.
2. Double Heart Fold

A double heart feels extra special and looks balanced on a shelf. Use a template with two hearts or repeat a simple heart outline twice with a gap between them.
The main challenge is spacing. Leave enough pages for each heart to look full. If your book is thin, shrink the hearts instead of squeezing them.
Fold slowly. Keep the crease angles consistent so both hearts match in height and depth.
Budget tip: Use one book for practice, then redo it with a prettier hardcover.
This design works well as a gift and looks great paired with a candle or small vase.
3. “LOVE” Word Fold
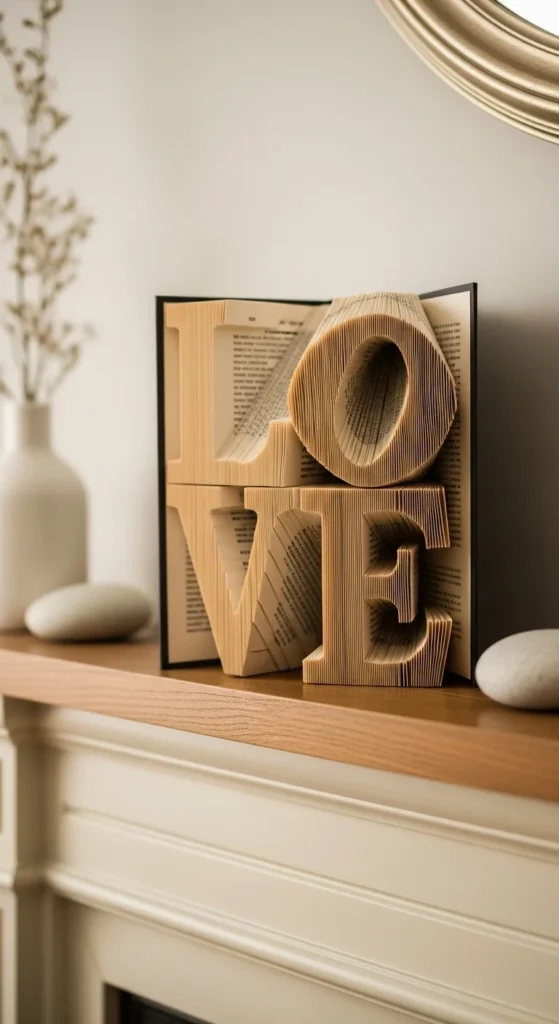
Short words are a solid starting point because they fit many books. Choose a bold letter pattern so each letter reads clearly.
Center the design by splitting extra pages at the front and back. Mark lightly. Fold to the marks and keep the creases sharp.
Press the book closed under a heavy stack after every 30–40 folds. This helps the pages settle and keeps the word crisp.
Budget tip: Print the pattern in draft mode. You only need clear lines.
This looks great in living rooms, reading corners, and gift tables.
4. Custom Name Fold (4–6 Letters)
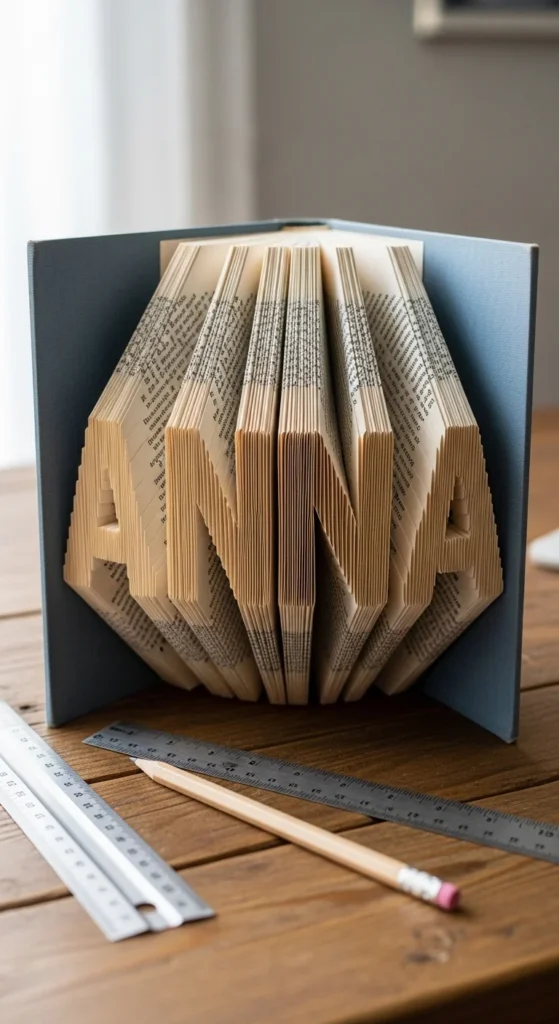
Names feel personal and make great gifts. Start with 4–6 letters so the spacing stays clean.
Use a simple block font. Thin fonts can disappear in the page texture. Center the name across the book. Mark and fold steadily.
Keep an elastic band around finished pages so they don’t spring back while you work.
Budget tip: Test your name pattern on a cheap book first.
A short name fold looks great on desks and shelves, especially with side lighting that shows the shadows.
5. Short Quote Fold (Two Words)
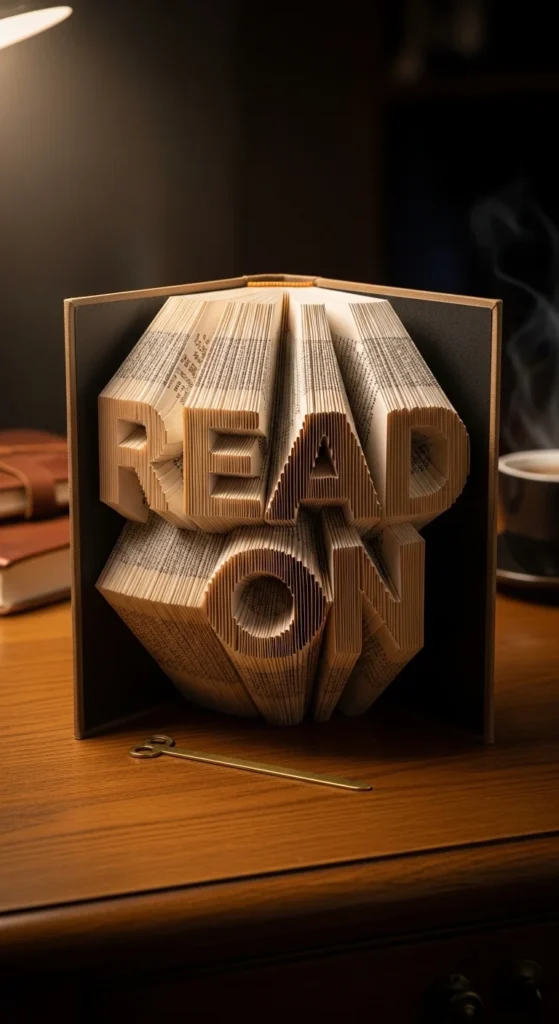
Quotes work best when they’re short and bold. Choose two words so letters don’t get cramped.
Tape your pattern to a clipboard or firm surface so it doesn’t shift. Mark lightly and double-check alignment every 10 pages.
Fold in batches. If one fold looks off, fix it right away before the drift spreads.
Budget tip: Stick to uppercase block letters for cleaner results.
This makes a thoughtful gift and also looks good as decor in offices or craft rooms.
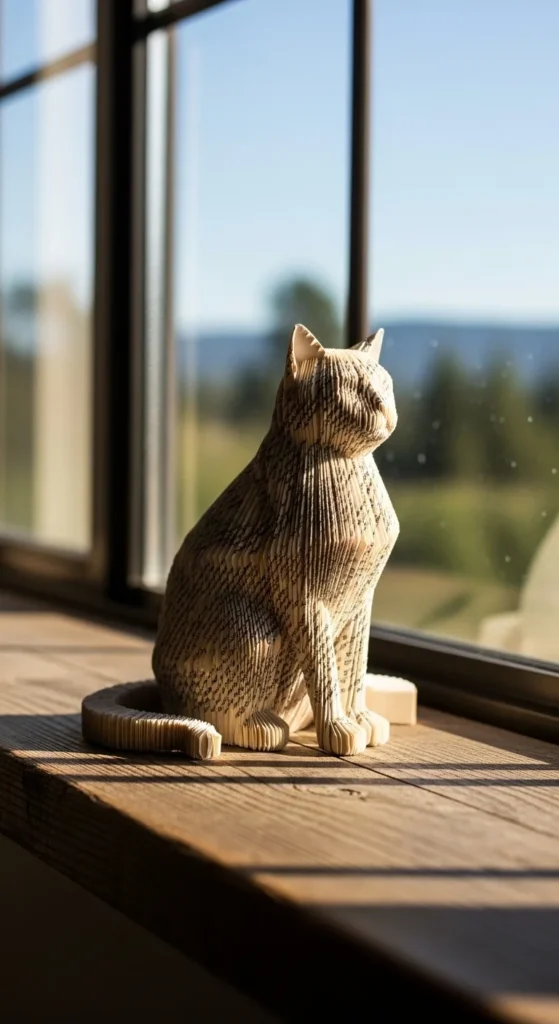
6. Paw Print Fold
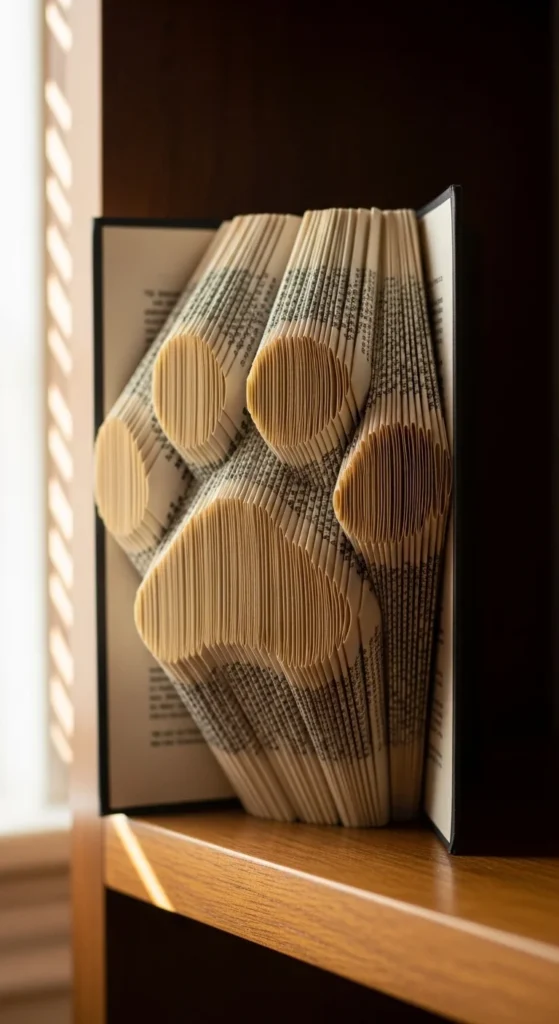
A paw print is cute and reads clearly, even from far away. Choose a bold paw template with simple pads.
Mark carefully, especially around curves. Fold and crease firmly so the edges stay sharp.
Use an elastic band to keep folded pages from loosening.
Budget tip: Pick a pattern with fewer tiny details for your first animal fold.
This works well for pet lovers and makes a sweet keepsake.
7. Butterfly Silhouette Fold

Butterflies look light and decorative. Choose a silhouette with simple wings so the outline stays clean.
Mark wing curves slowly. Keep your ruler aligned to the top edge so fold depth stays consistent.
Press the book closed halfway through to set earlier folds.
Budget tip: Use a mid-thickness hardcover so the wings look full.
This is a pretty piece for spring decor and reading corners.
8. Rabbit Silhouette Fold
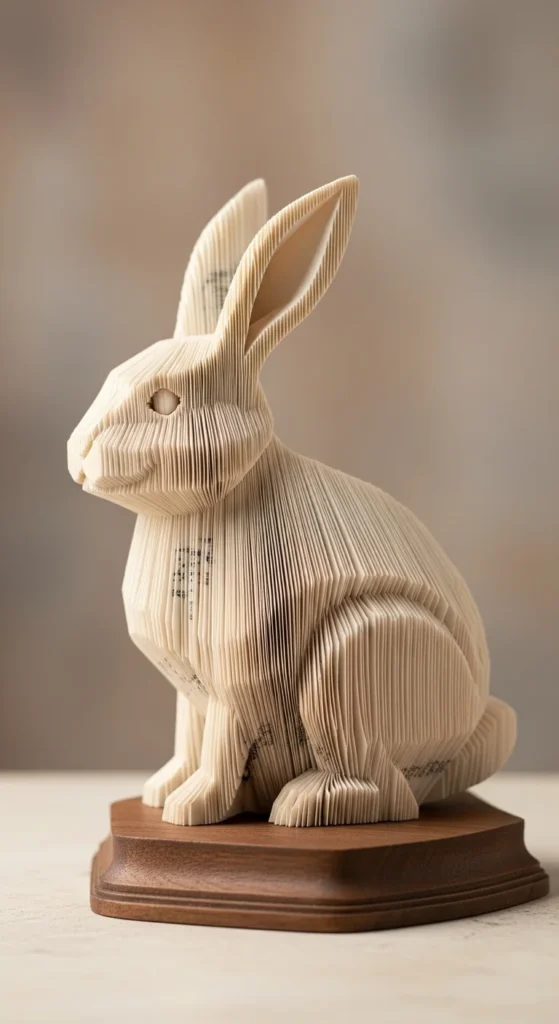
Rabbits are a fun starter silhouette. Pick a chunky outline without tiny interior lines.
Fold slowly around ear points. Make creases firm, but don’t crush fragile pages.
Budget tip: Older hardcovers often have sturdier paper blocks.
This one looks cute for seasonal decor and handmade gifts.
9. Holiday Tree Fold
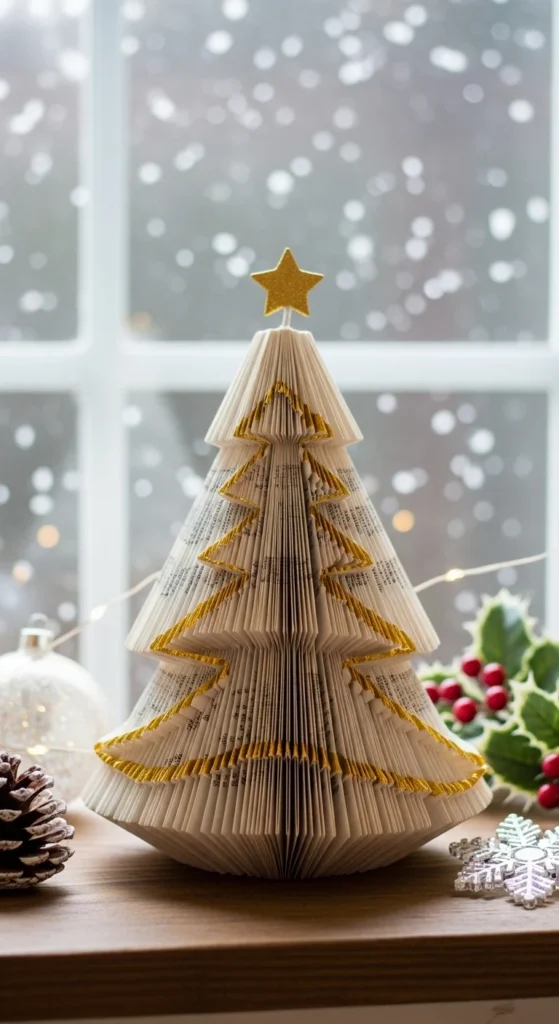
Tree folds are classic and simple. Choose a tall triangle outline with a visible trunk.
Center the pattern. Fold to the marks and crease extra at the top point so the tree looks sharp.
Budget tip: Make three trees in different sizes using different books.
Grouped trees look great on a mantel or entry table.
10. Snowflake Fold
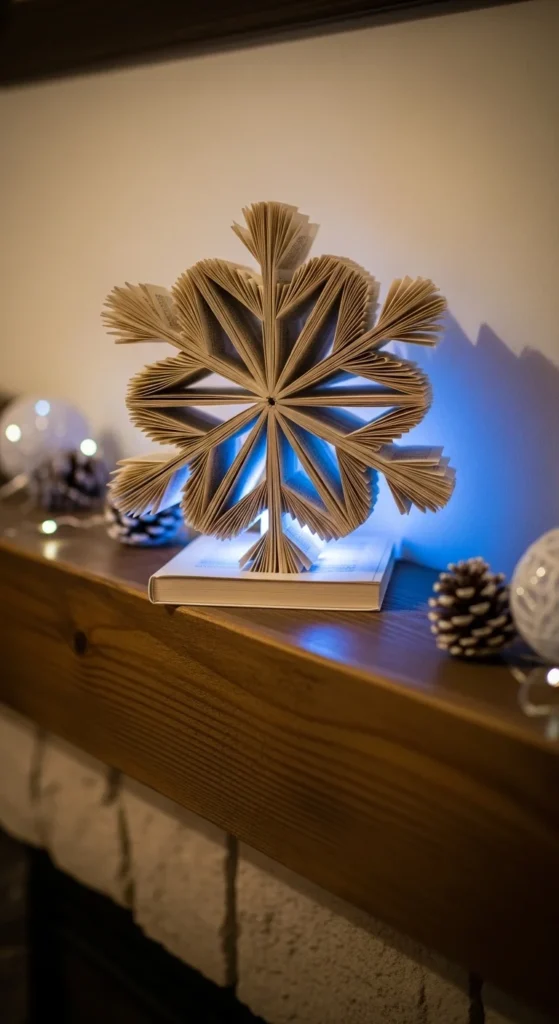
Snowflakes can look detailed, so pick a simple silhouette for your first try. Mark carefully and fold clean right angles.
Press the book closed often so folds don’t loosen.
Budget tip: Choose a thick book so the snowflake has depth.
This works well for seasonal decor and winter displays.
11. Ice Skate Fold
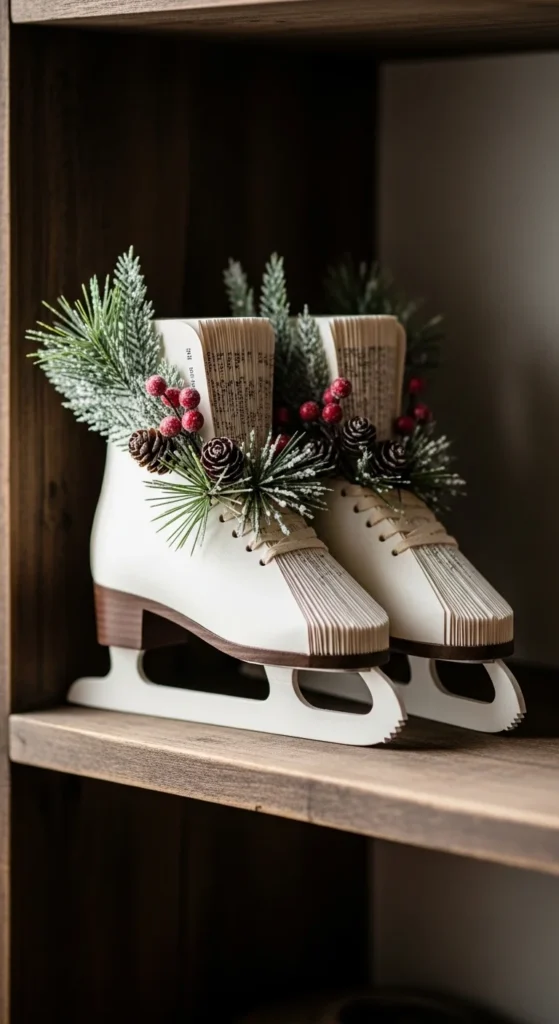
Ice skates feel playful. Use a pattern with a clean outline and skip lace details at first.
Center the design so the blade sits neatly across the page block. Fold slowly through curve areas.
Budget tip: Use a worn hardcover for practice.
This makes a cute winter accent for shelves.
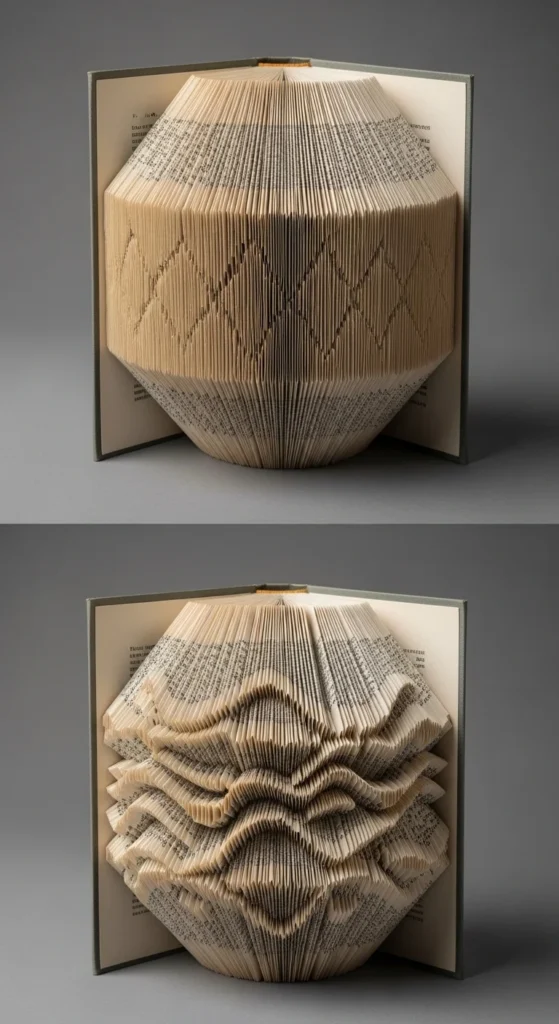
12. Geometric Wave Fold
Waves look modern and create motion. Choose a repeating wave pattern so marking stays easy.
Mark a batch, fold a batch. Keep your rhythm steady so the wave stays smooth.
Budget tip: Use wide waves instead of tight waves for cleaner results.
Side lighting makes the shadows pop.
13. Chevron Pattern Fold
Chevron is graphic and bold. Use a repeating template and focus on consistent angles.
Fold in small batches. Re-crease with a bone folder if edges look soft.
Budget tip: Start with wide chevrons for easier folding.
This fits modern shelf styling.
14. Beginner Stripe Fold

Stripes teach the basics. Use a simple pattern with repeating fold depths.
Mark evenly. Fold consistently. Press the book closed when halfway done.
Budget tip: Use this as a practice book before text or silhouettes.
The texture looks nice even without a “picture” shape.
15. Center Diamond Fold
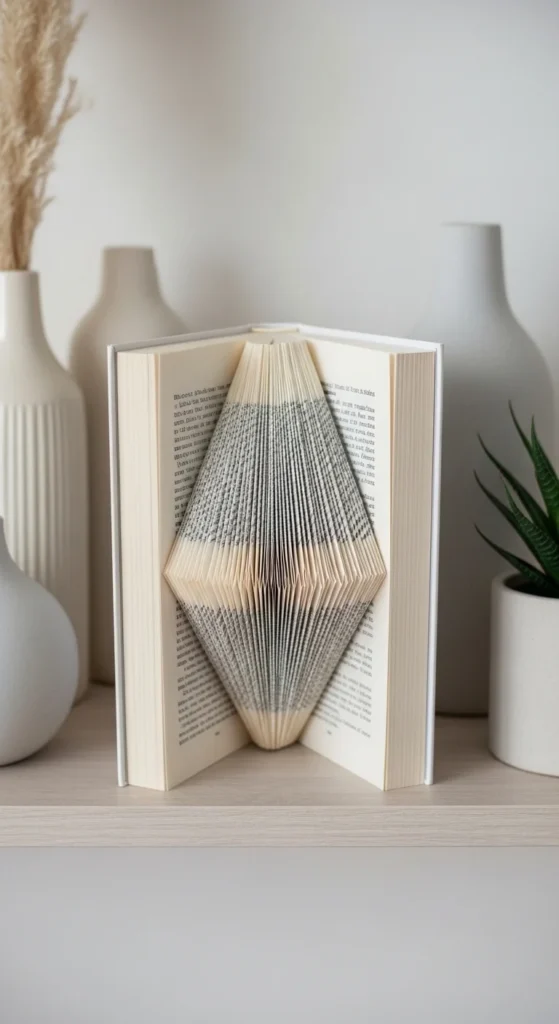
Diamonds look crisp because they rely on straight lines. Use a ruler for every mark.
Crease firmly on the diamond points. Keep folds uniform so the diamond looks symmetrical.
Budget tip: Choose thicker paper so creases hold better.
This is clean decor for offices and modern shelves.
16. Star Silhouette Fold

Stars are great for gifts. Choose a five-point outline for clarity.
Center the pattern so points don’t drift toward edges. Crease sharply at point corners.
Budget tip: Avoid skinny star patterns on your first try.
Stars look good in kids’ rooms and seasonal decor.
17. Cat Silhouette Fold
Pick a simple sitting cat outline with a clear tail curve. Mark carefully around curves.
Fold slowly. Press the book closed after finishing to set creases.
Budget tip: Choose a silhouette without tiny whisker details.
This makes a sweet decor piece for book lovers and cat owners.
18. Dog Silhouette Fold

Dog profiles are popular but can get detailed fast. Choose a bold outline with simple ears and nose.
Mark lightly. Fold consistently. Keep folded pages secured with an elastic band while working.
Budget tip: Start with a basic silhouette before trying breed-specific shapes.
This works well as a handmade pet-themed gift.
19. Farmhouse House Outline Fold
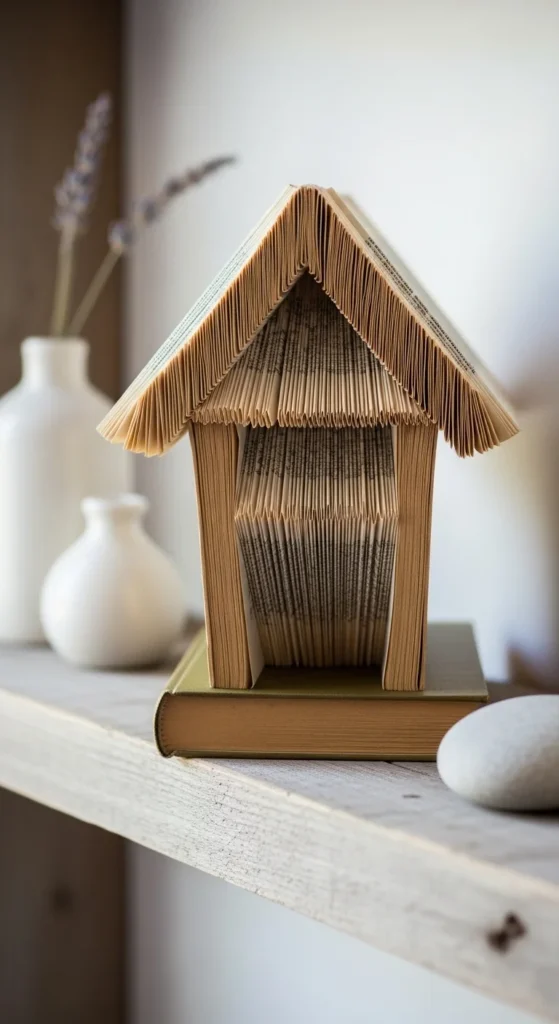
House outlines fit farmhouse decor. Use straight lines for roof and walls, plus a simple door cutout.
Center the pattern so the roof peak sits in the middle of the page block. Fold and crease neatly.
Budget tip: Choose a neutral-colored hardcover for a rustic look.
Pair with small greenery or a candle nearby.
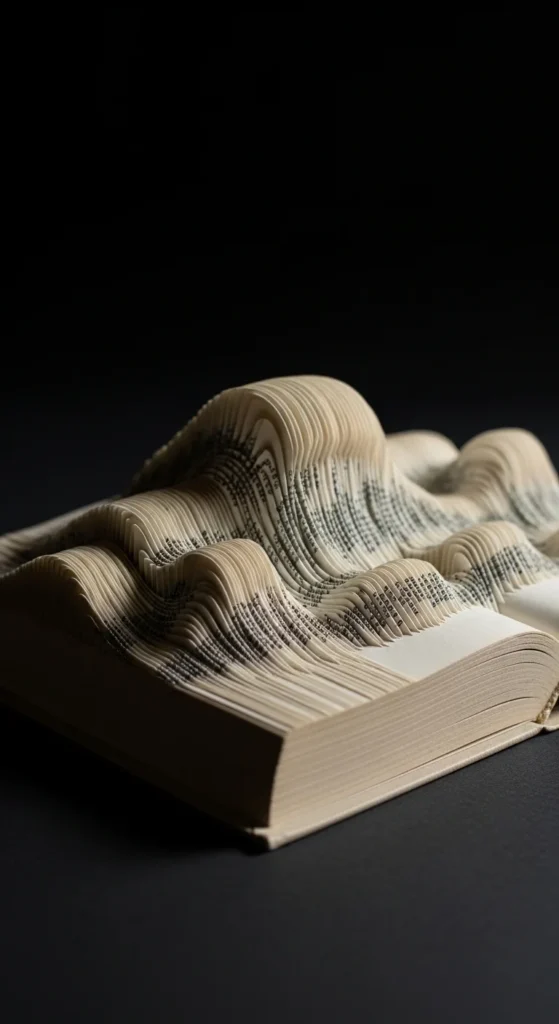
20. Mountain Range Fold
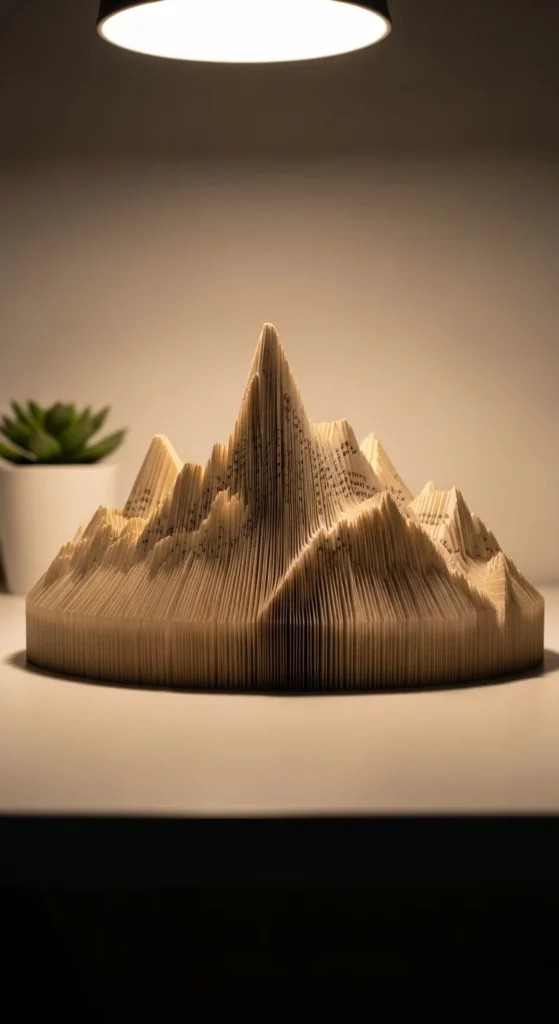
Mountains are easy to read and modern. Use a simple peak outline with clean angles.
Mark straight lines and fold to create peaks and valleys. Press the book closed partway through to keep folds tight.
Budget tip: Start with three peaks only.
This looks great in offices and travel-themed rooms.
21. Spiral Swirl Fold

Swirls look complex but rely on small repeat changes. Mark several pages at once, then fold them in a batch.
Keep crease angles sharp. Press the book closed often so the shape holds.
Budget tip: Choose a swirl with fewer lines to reduce marking time.
Side lighting makes the swirl look dramatic.
22. “HOME” Word Fold
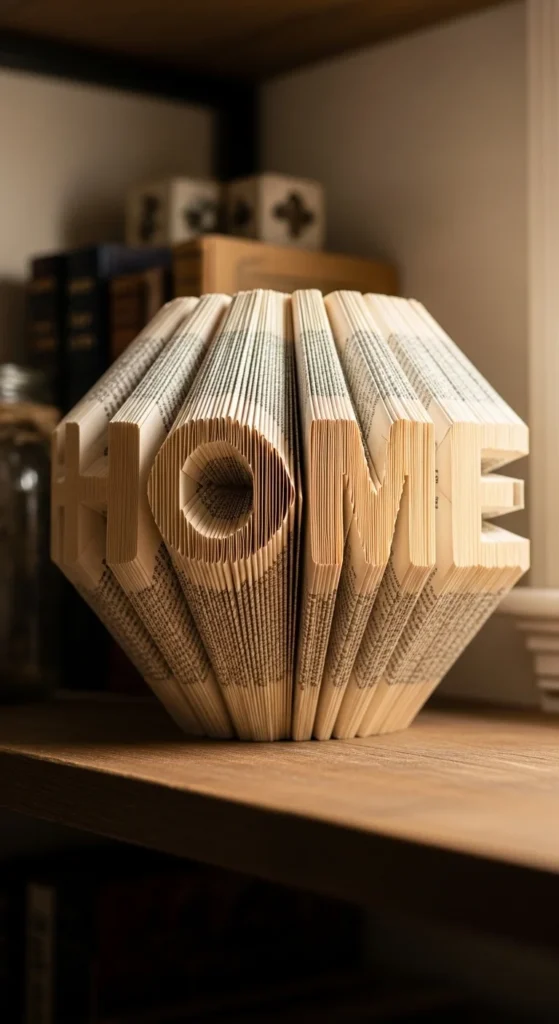
“HOME” is great for decor and gifts. Choose a bold font so letters read clearly.
Center the word by splitting extra pages evenly. Mark lightly. Fold and crease steadily.
Budget tip: Use uppercase block letters for clean edges.
This looks great in entryways and living rooms.
23. Year Numbers Fold

Numbers are perfect for milestones. Pick a bold number template and keep spacing even.
Mark with a ruler. Fold carefully around curves in the digits. Check alignment every few pages.
Budget tip: Start with a two-digit number first if you want quicker results.
This works well for graduations and celebrations.
24. Two-Book Split Word Display

If one book can’t fit your word, split it across two. Use books that match in height and thickness for a clean look.
Fold each book separately and display them together with a small gap.
Budget tip: Thrift matching books from the same series.
This looks strong on mantels and long shelves.
25. Backlit Fold Display
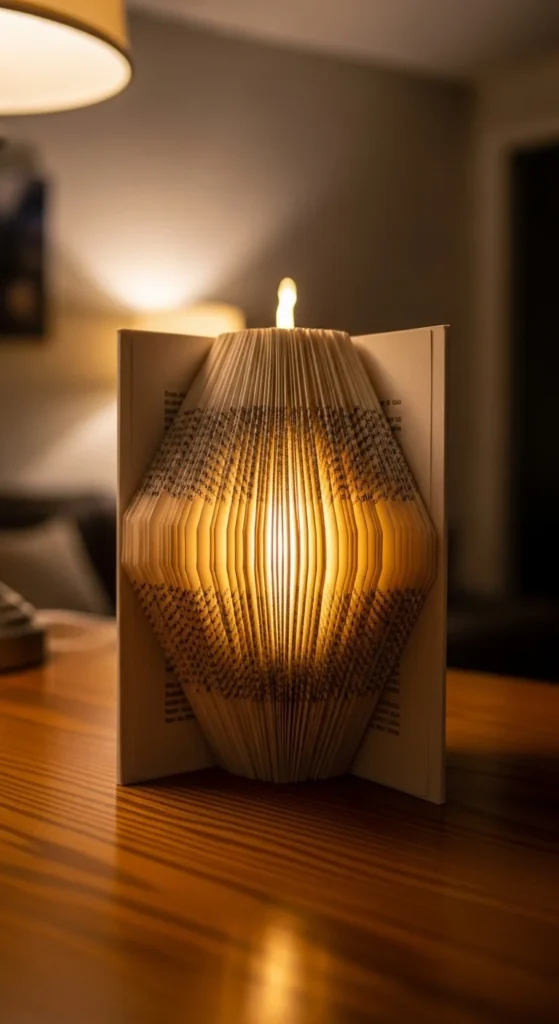
Lighting makes folded designs stand out. Choose patterns with open spaces like hearts or words.
Fold as usual, then place a small LED puck light behind the book. Aim the light upward slightly so shadows show.
Budget tip: Battery LED lights are inexpensive and easy to hide.
This is great for evening decor.
26. Reversible Two-Sided Pattern Book
A two-sided fold is a fun challenge. Choose two simple patterns that don’t demand extreme fold depths.
Plan start pages carefully so both designs sit centered. Mark lightly and check your alignment often.
Fold in short sessions and press the book closed between sessions.
Budget tip: Practice with a cheap hardcover before using a nicer book.
This makes a fun gift because it has a surprise when flipped.
Conclusion
Folded book art rewards steady work and consistent folds. Start with a heart or a short word, then try silhouettes and geometric patterns once your hands get used to the rhythm. Pick a sturdy hardcover, match your template to your page count, and crease cleanly. With basic tools and patience, you can create shelf decor that looks impressive and personal.

DiyVisual is a DIY ideas resource for makers of every level. Our small editorial team researches and curates easy, budget-friendly craft, home decor, and handmade gift projects — explained step by step so anyone can recreate them at home with simple materials.


